Printable Version of Topic
Click here to view this topic in its original format
GMC Forum _ GEAR & PRODUCTION _ The (hopefully Not To Embarrassing) Refurbish Thread
Posted by: Spock Apr 9 2014, 01:52 AM
Win, Lose or go down in utter humiliation, I'm going to diary the progress of this $200 1996 or 1997 Jackson Dinky transformation.
I found out today the wood is Indian Mahogany. (Or that was the guys best guess).
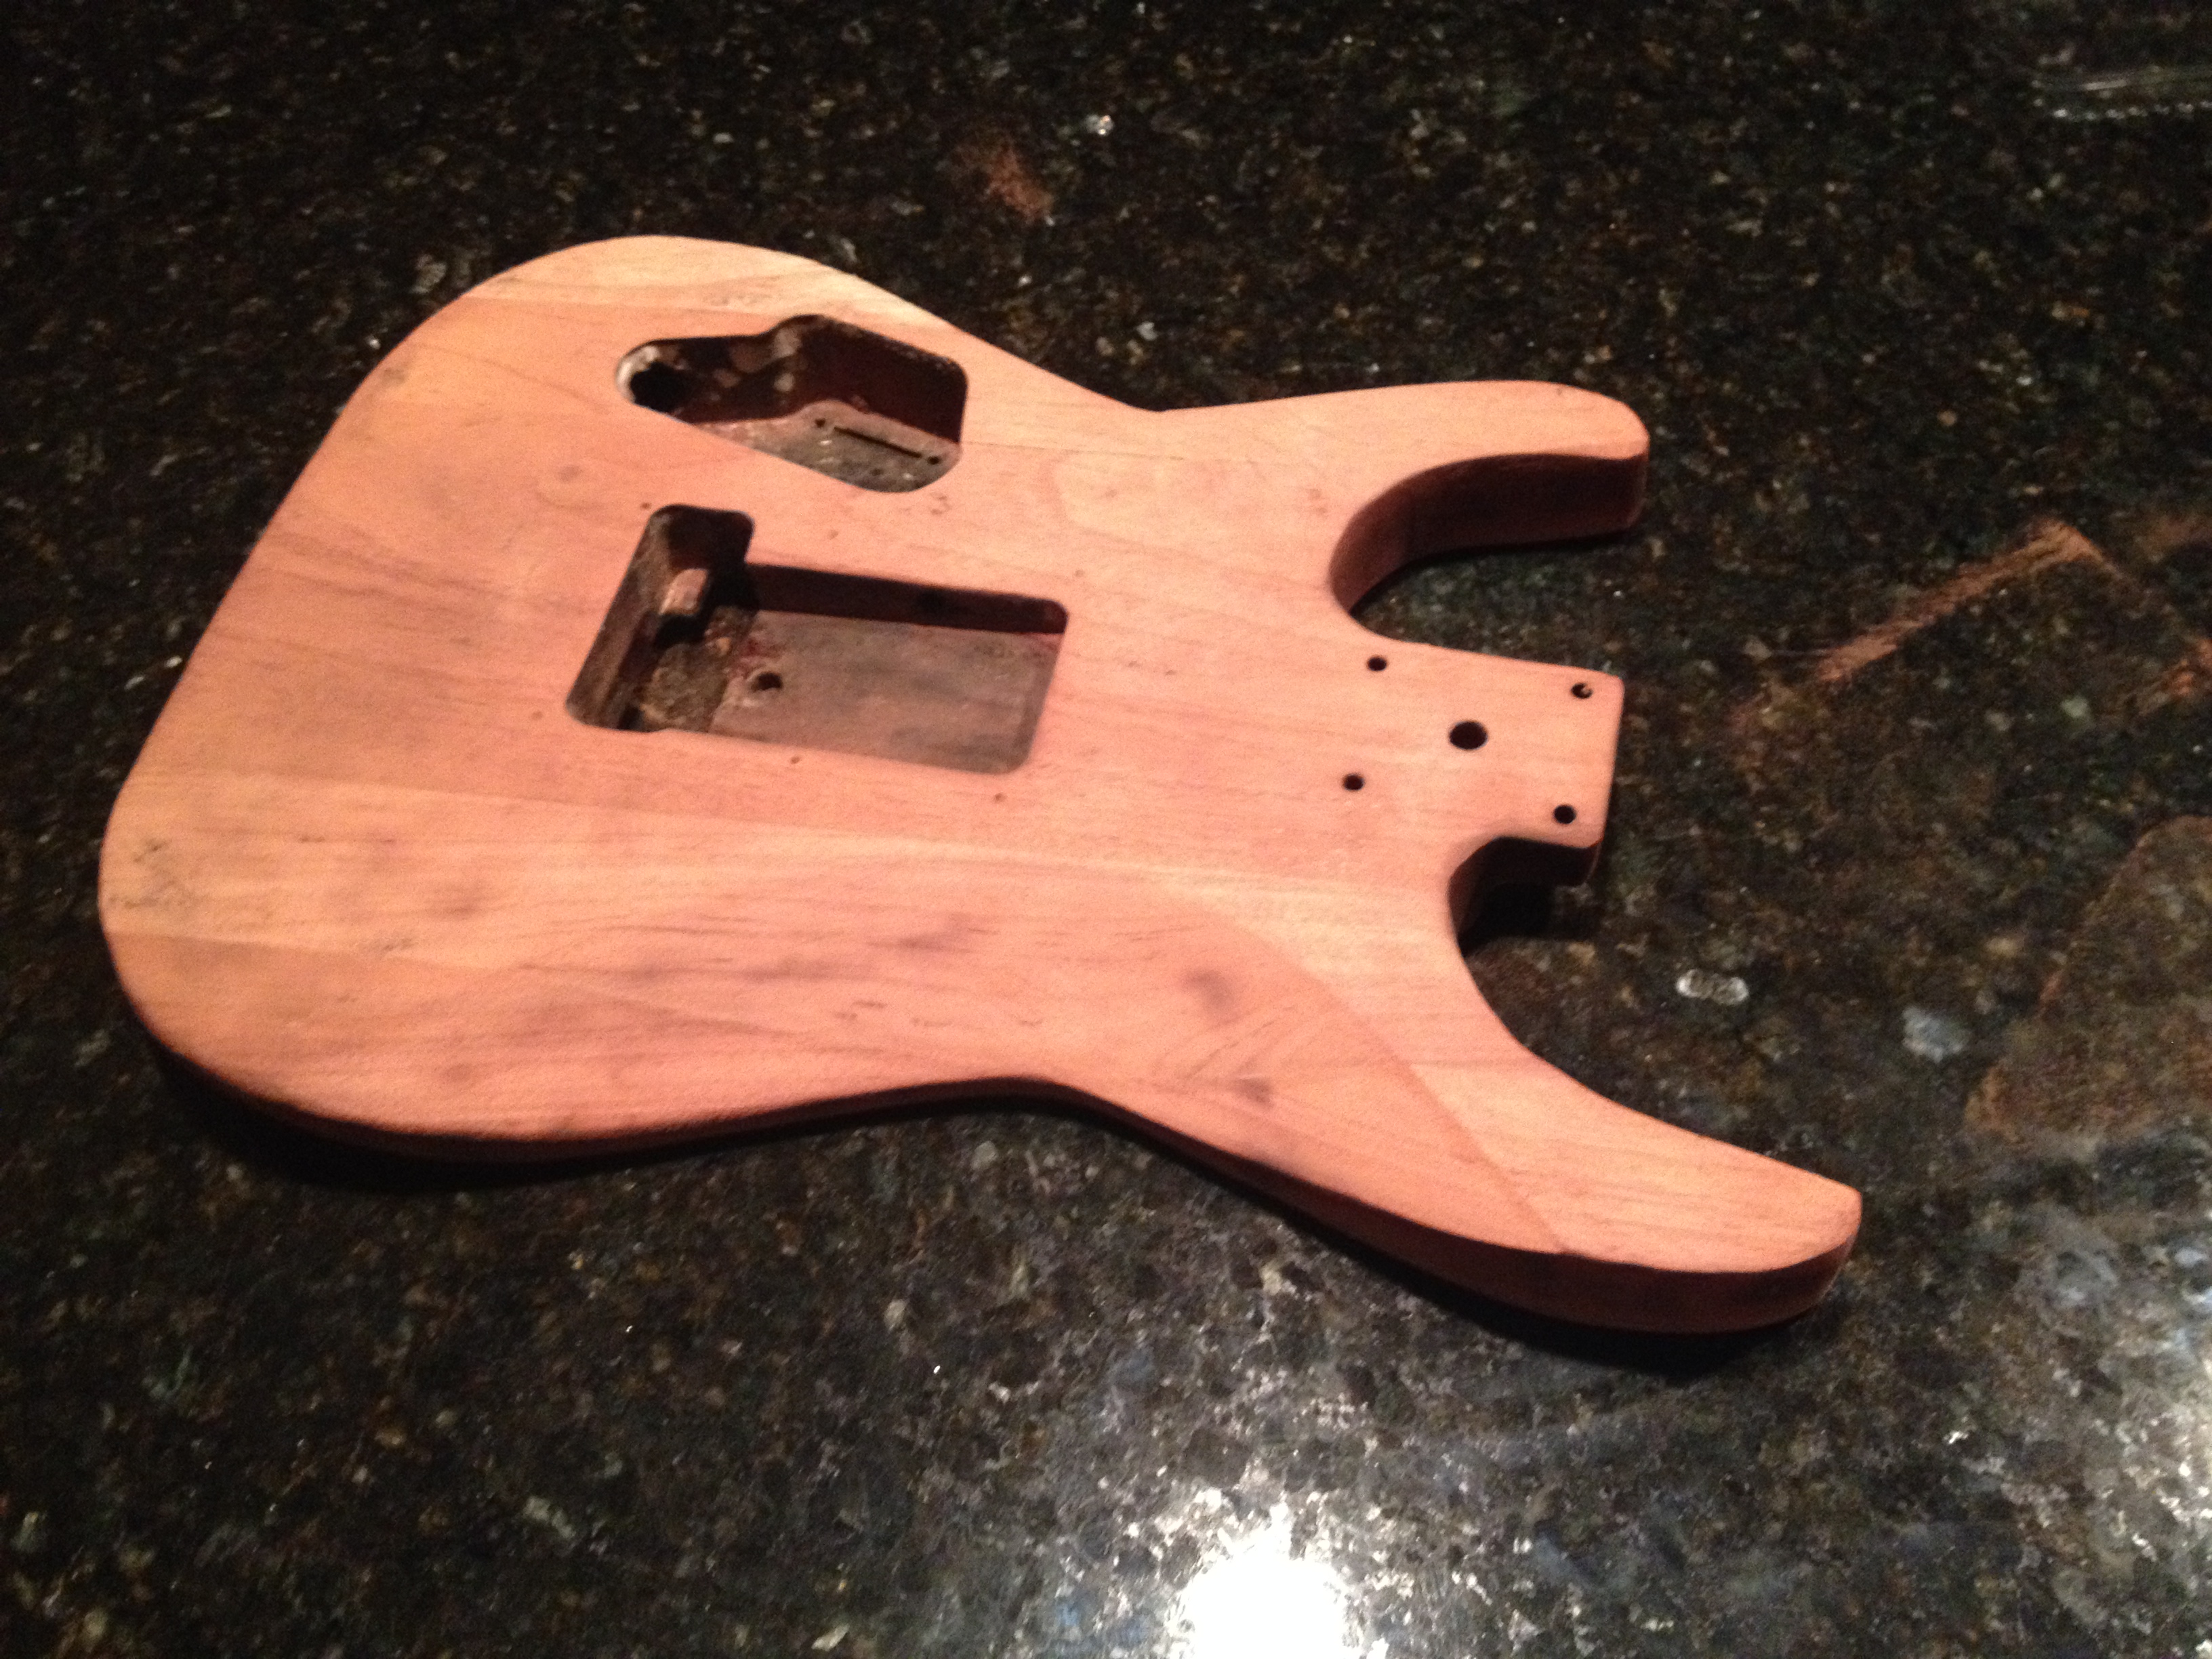
1) So, this is what came out of the box: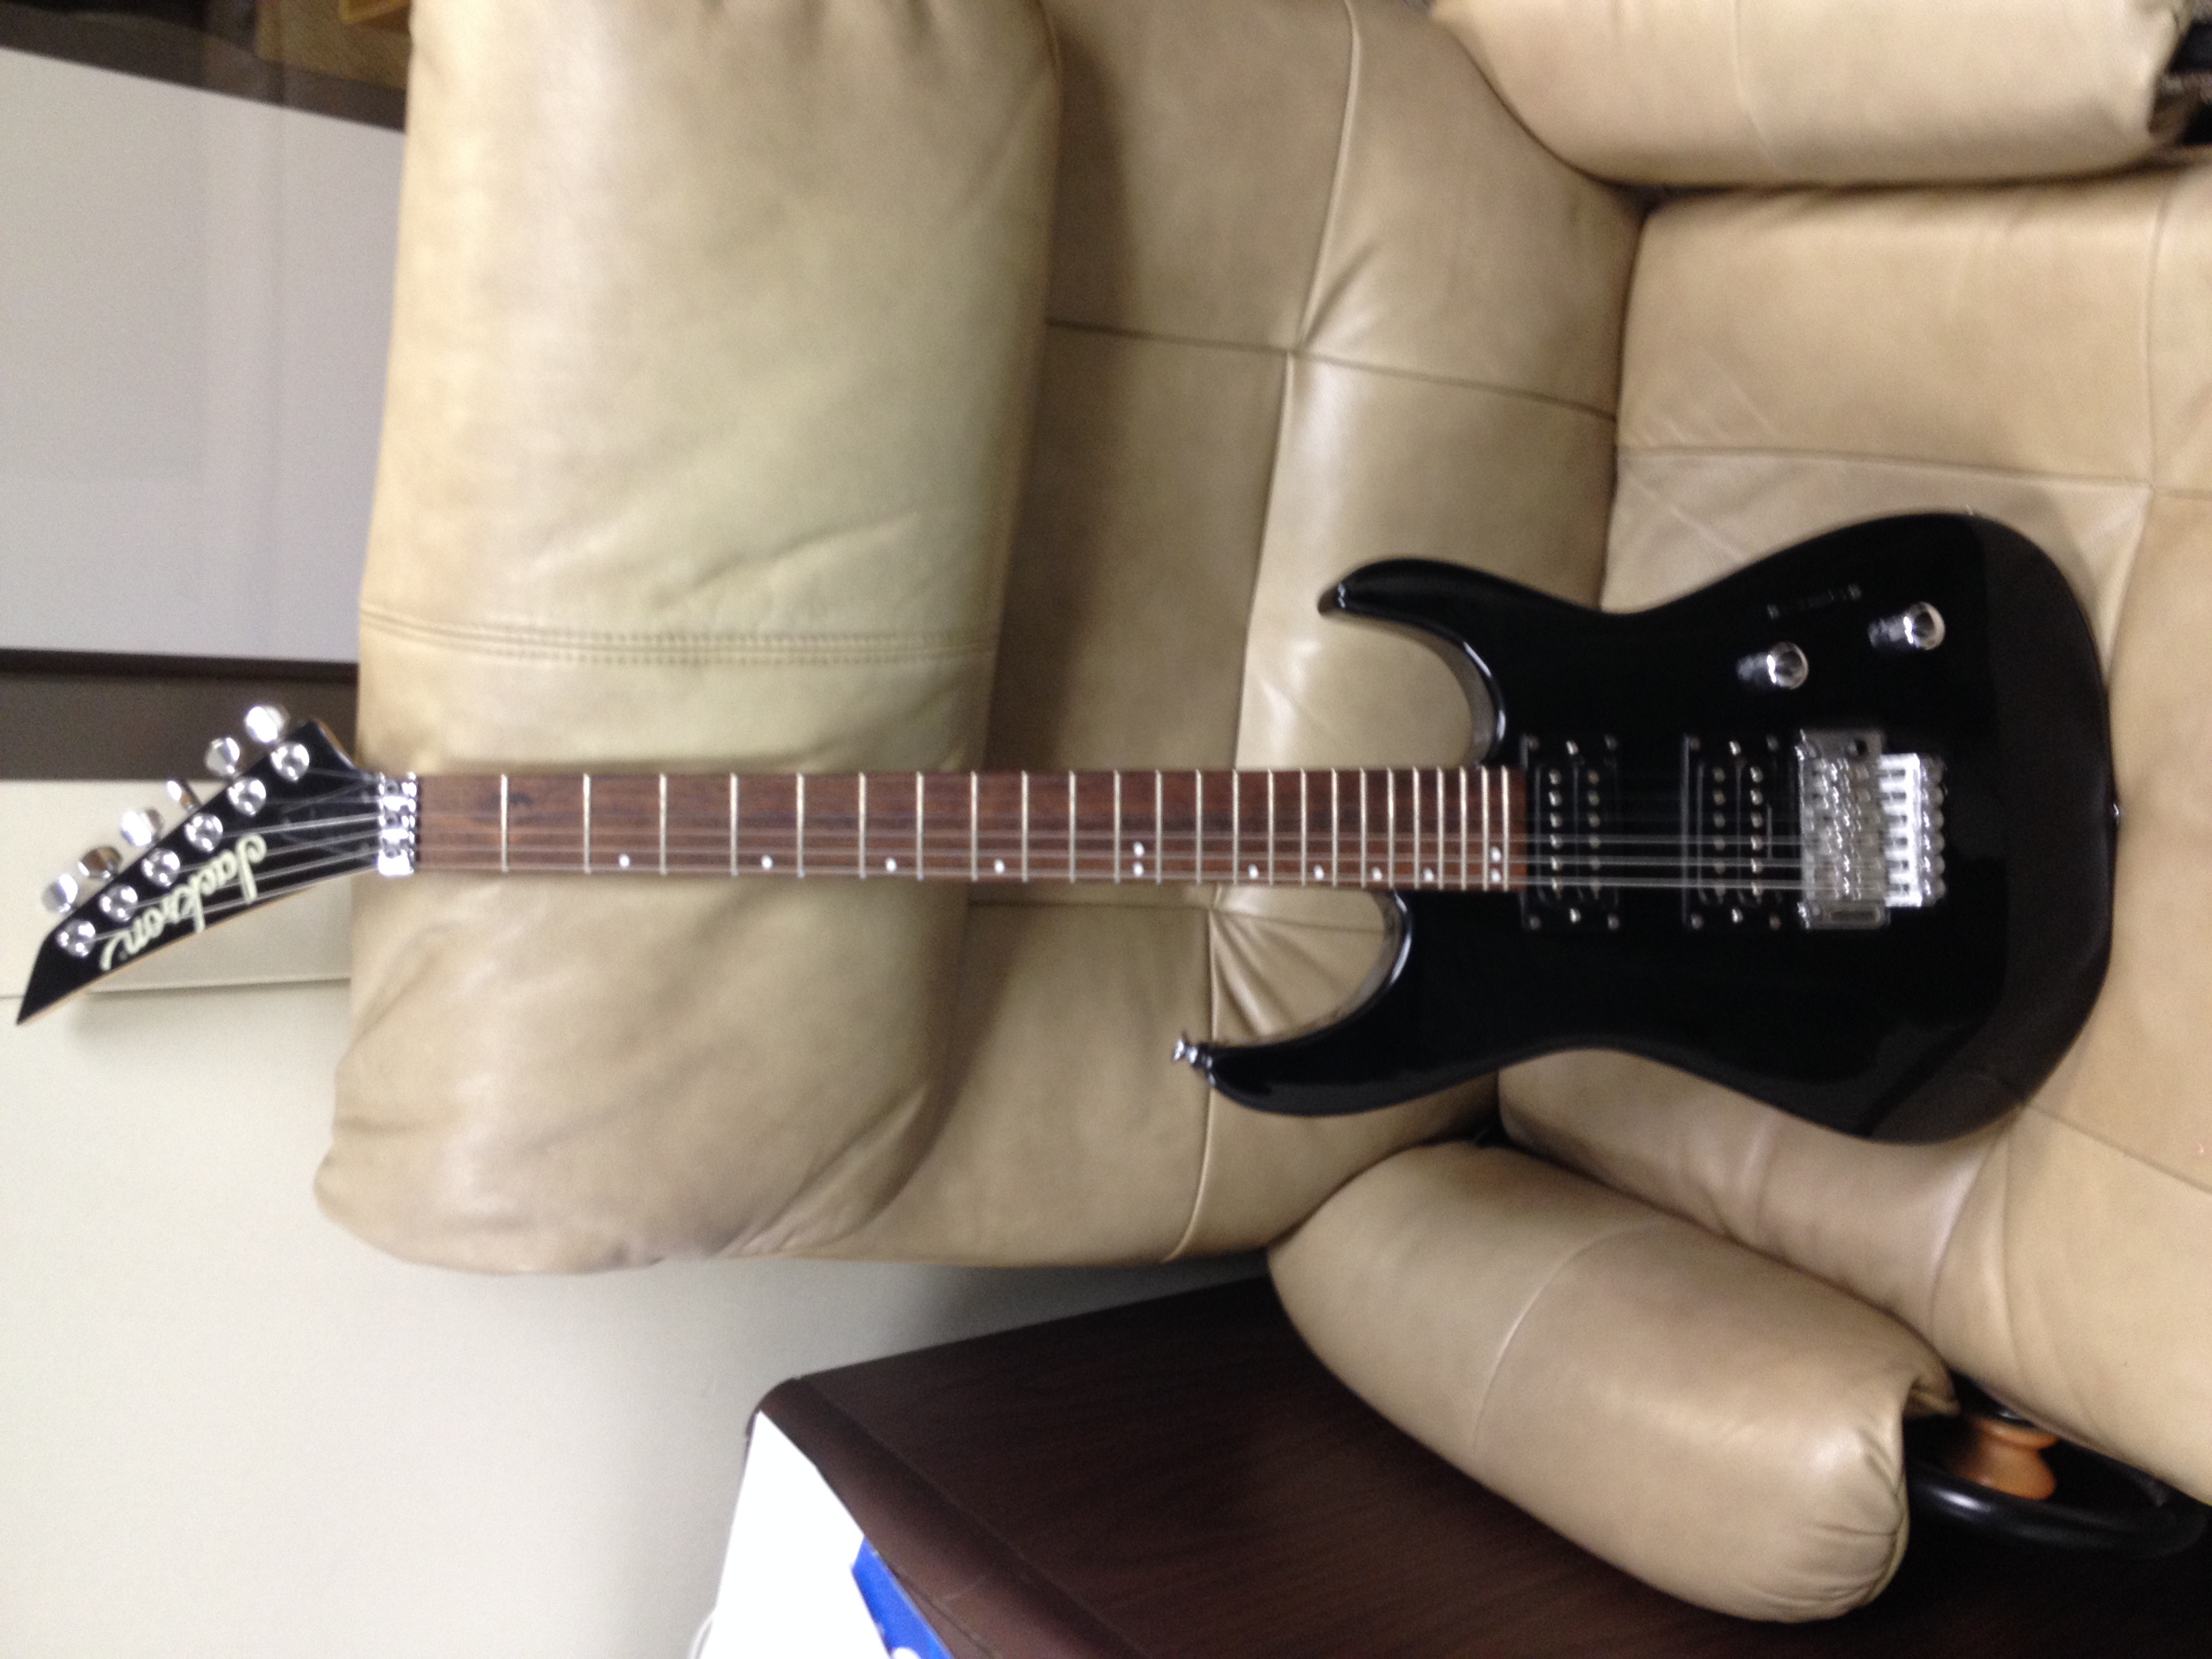
2) Had to use a heat gun to loosen and chip up the thick poly finish and paint. Came to find out there was a very thin veneer covering the top of the body, I singed the veneer off with the heat gun and scraped it - at this point I thought all was lost: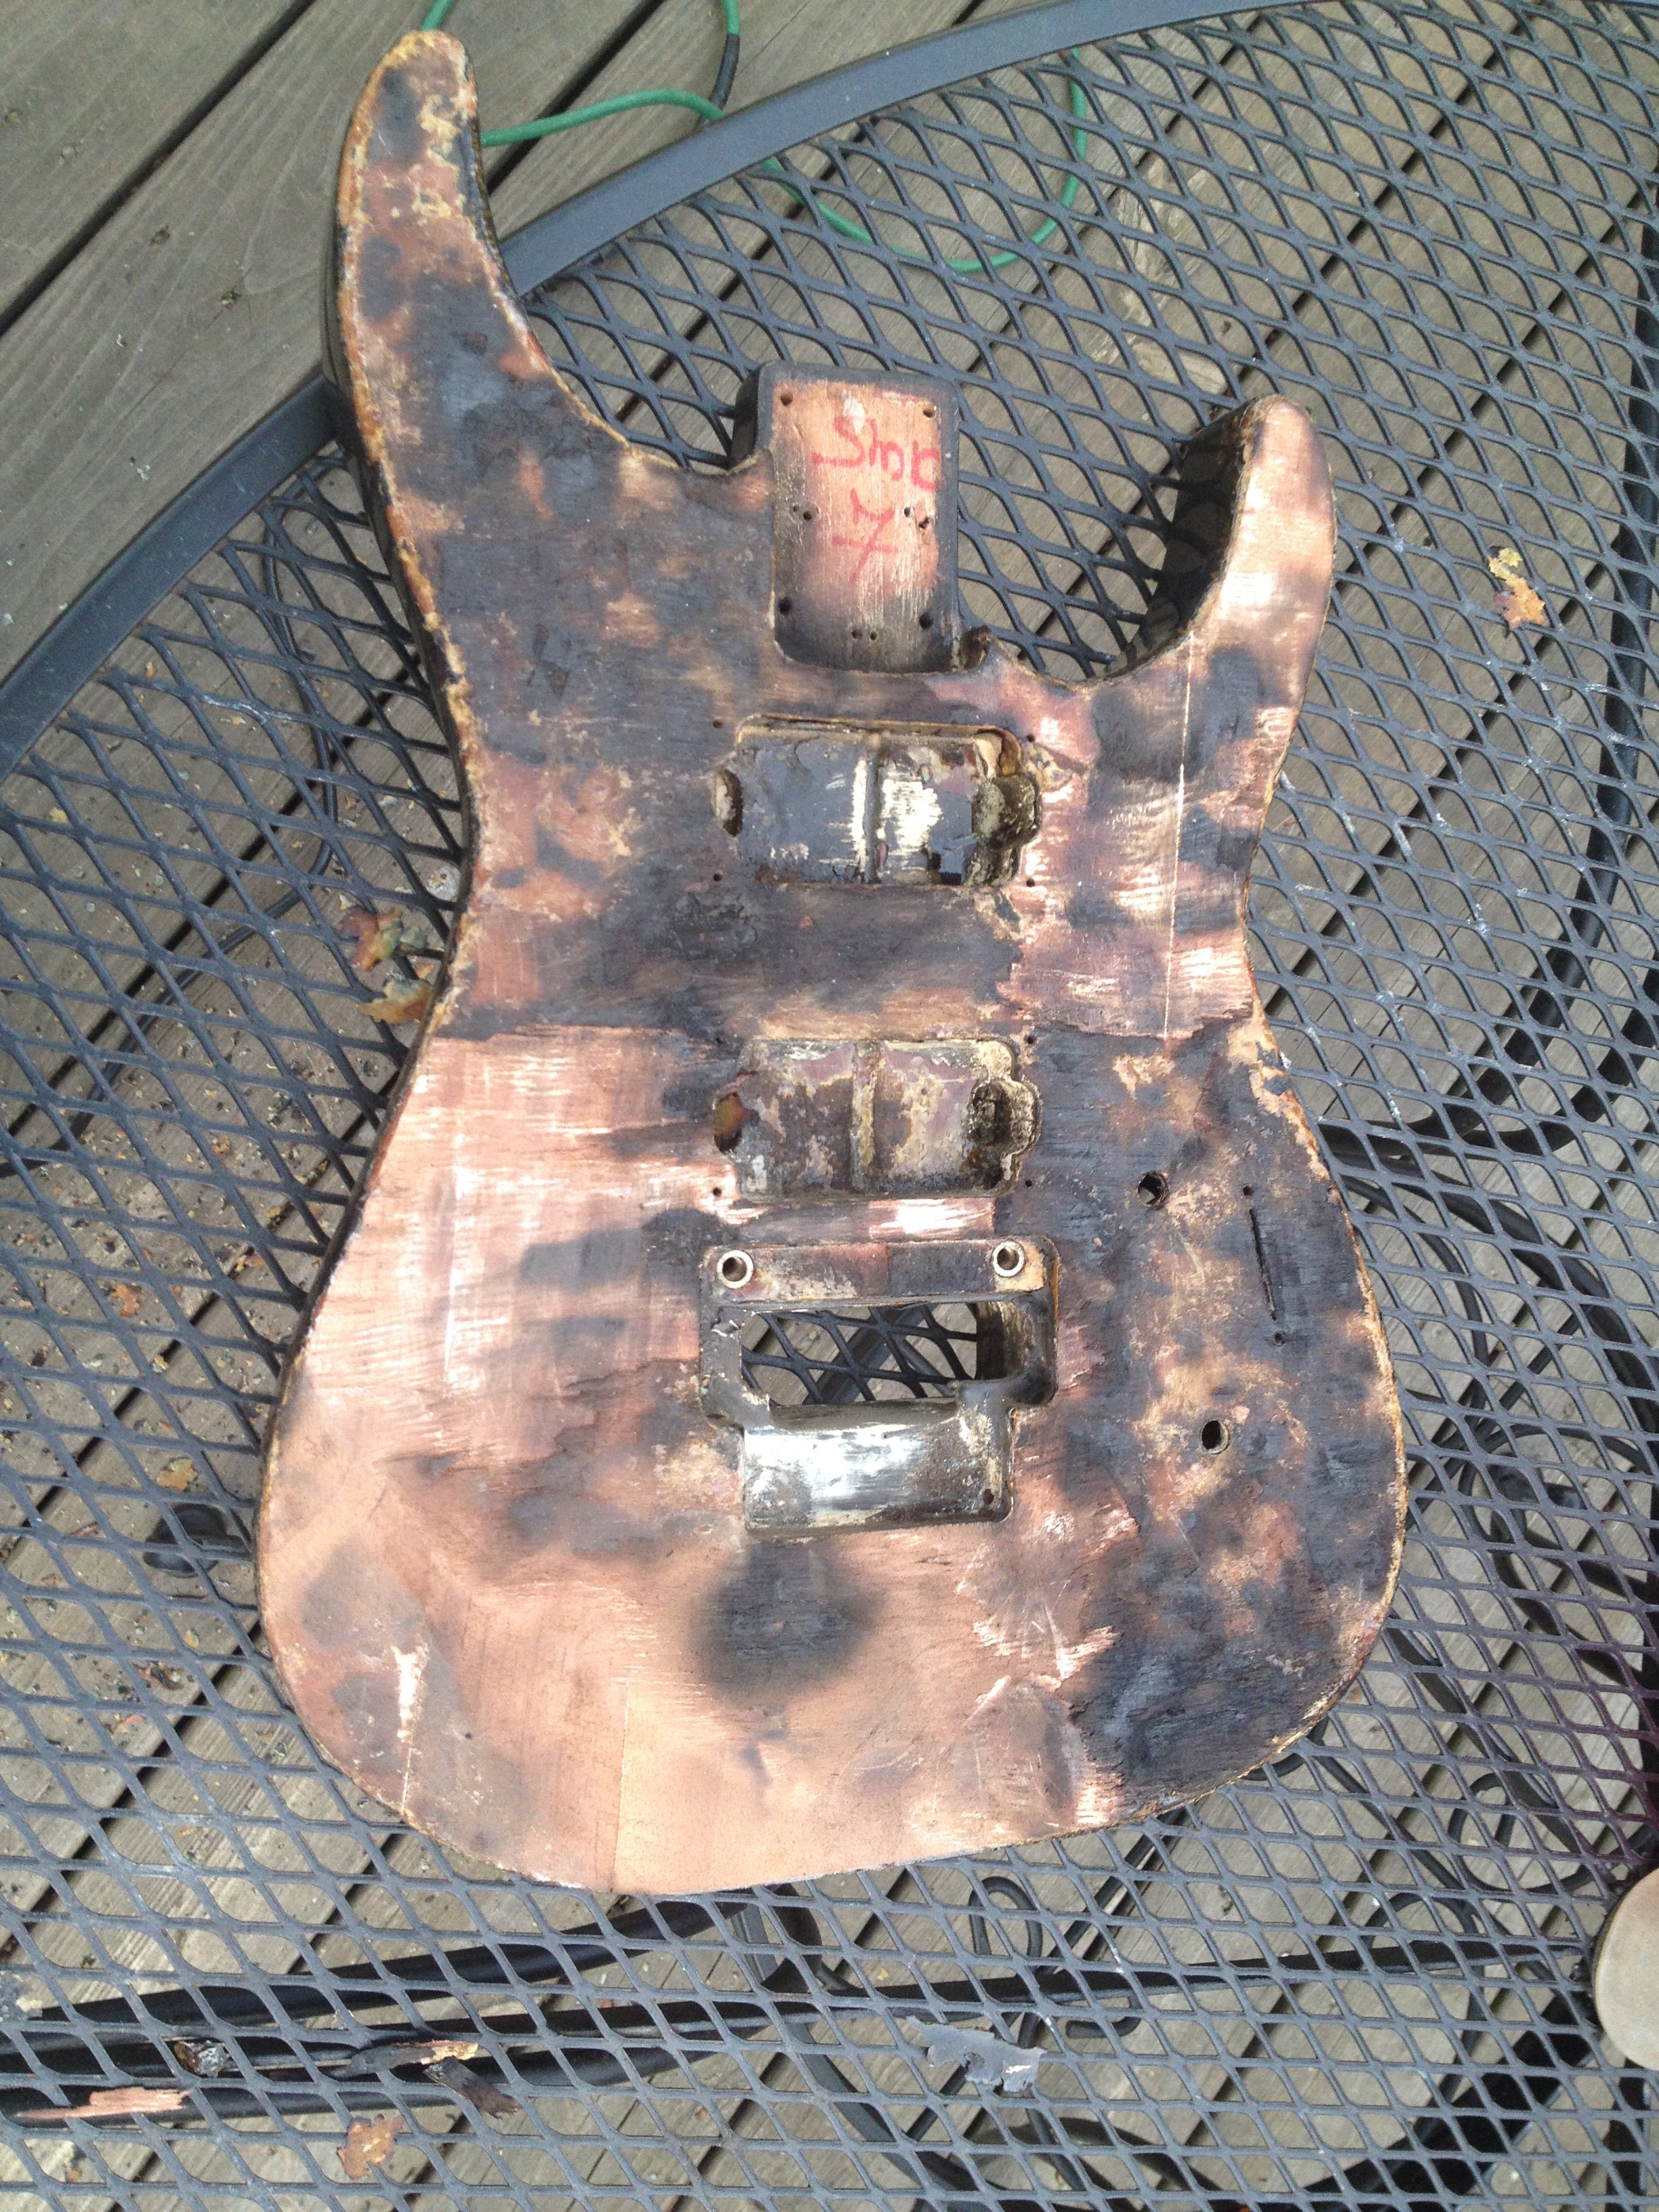
3) I took a damp rag and wiped the saw dust off from a quick sanding. The scorch marks had me thinking of going in a relic direction.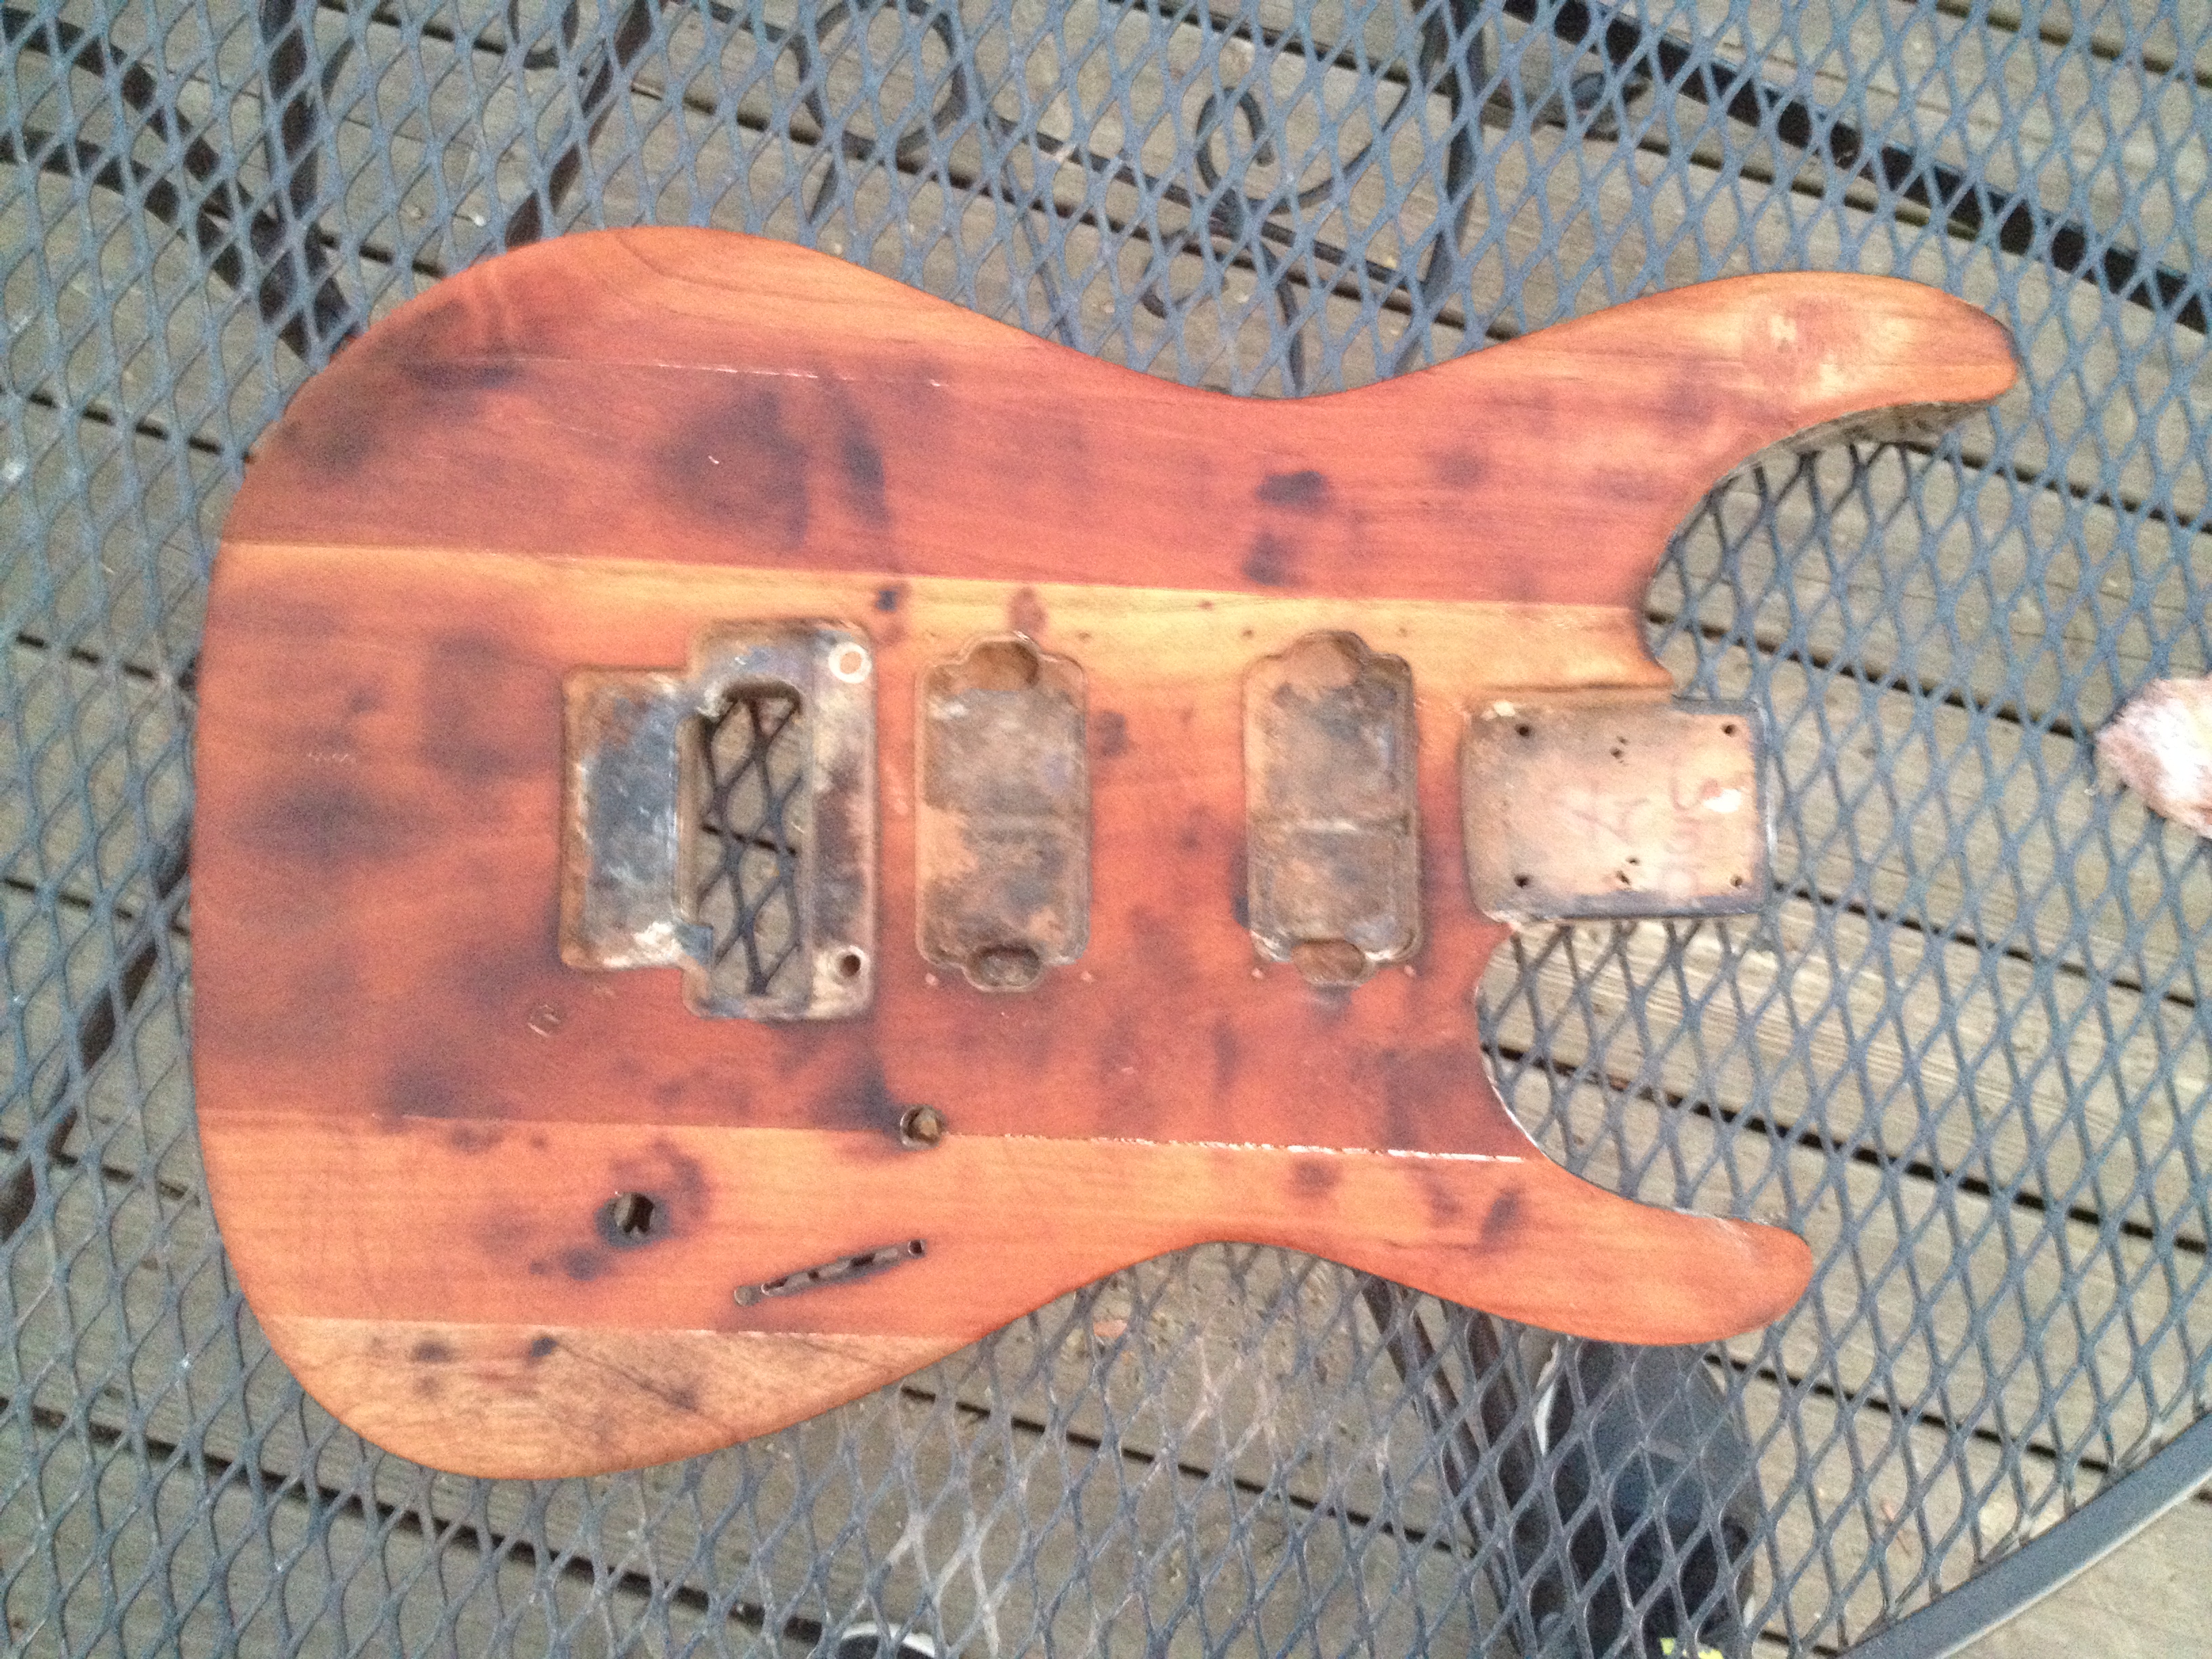
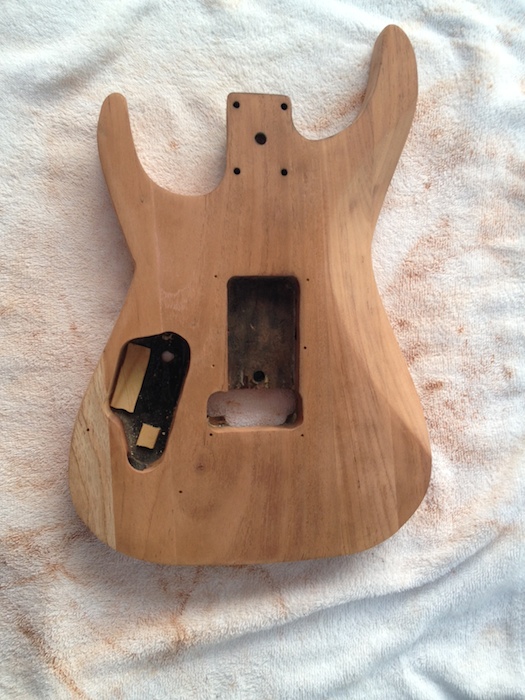
4 & 5)The sides were not that difficult, except for the curves of the horns. The veneer was on the back too, but I realized I could use the heat gun for the finish, and sand the veneer off. It took some elbow grease, and the process to this point took about 6-8 hours. These next two pics are after the first round of sanding with a 50 grit sandpaper.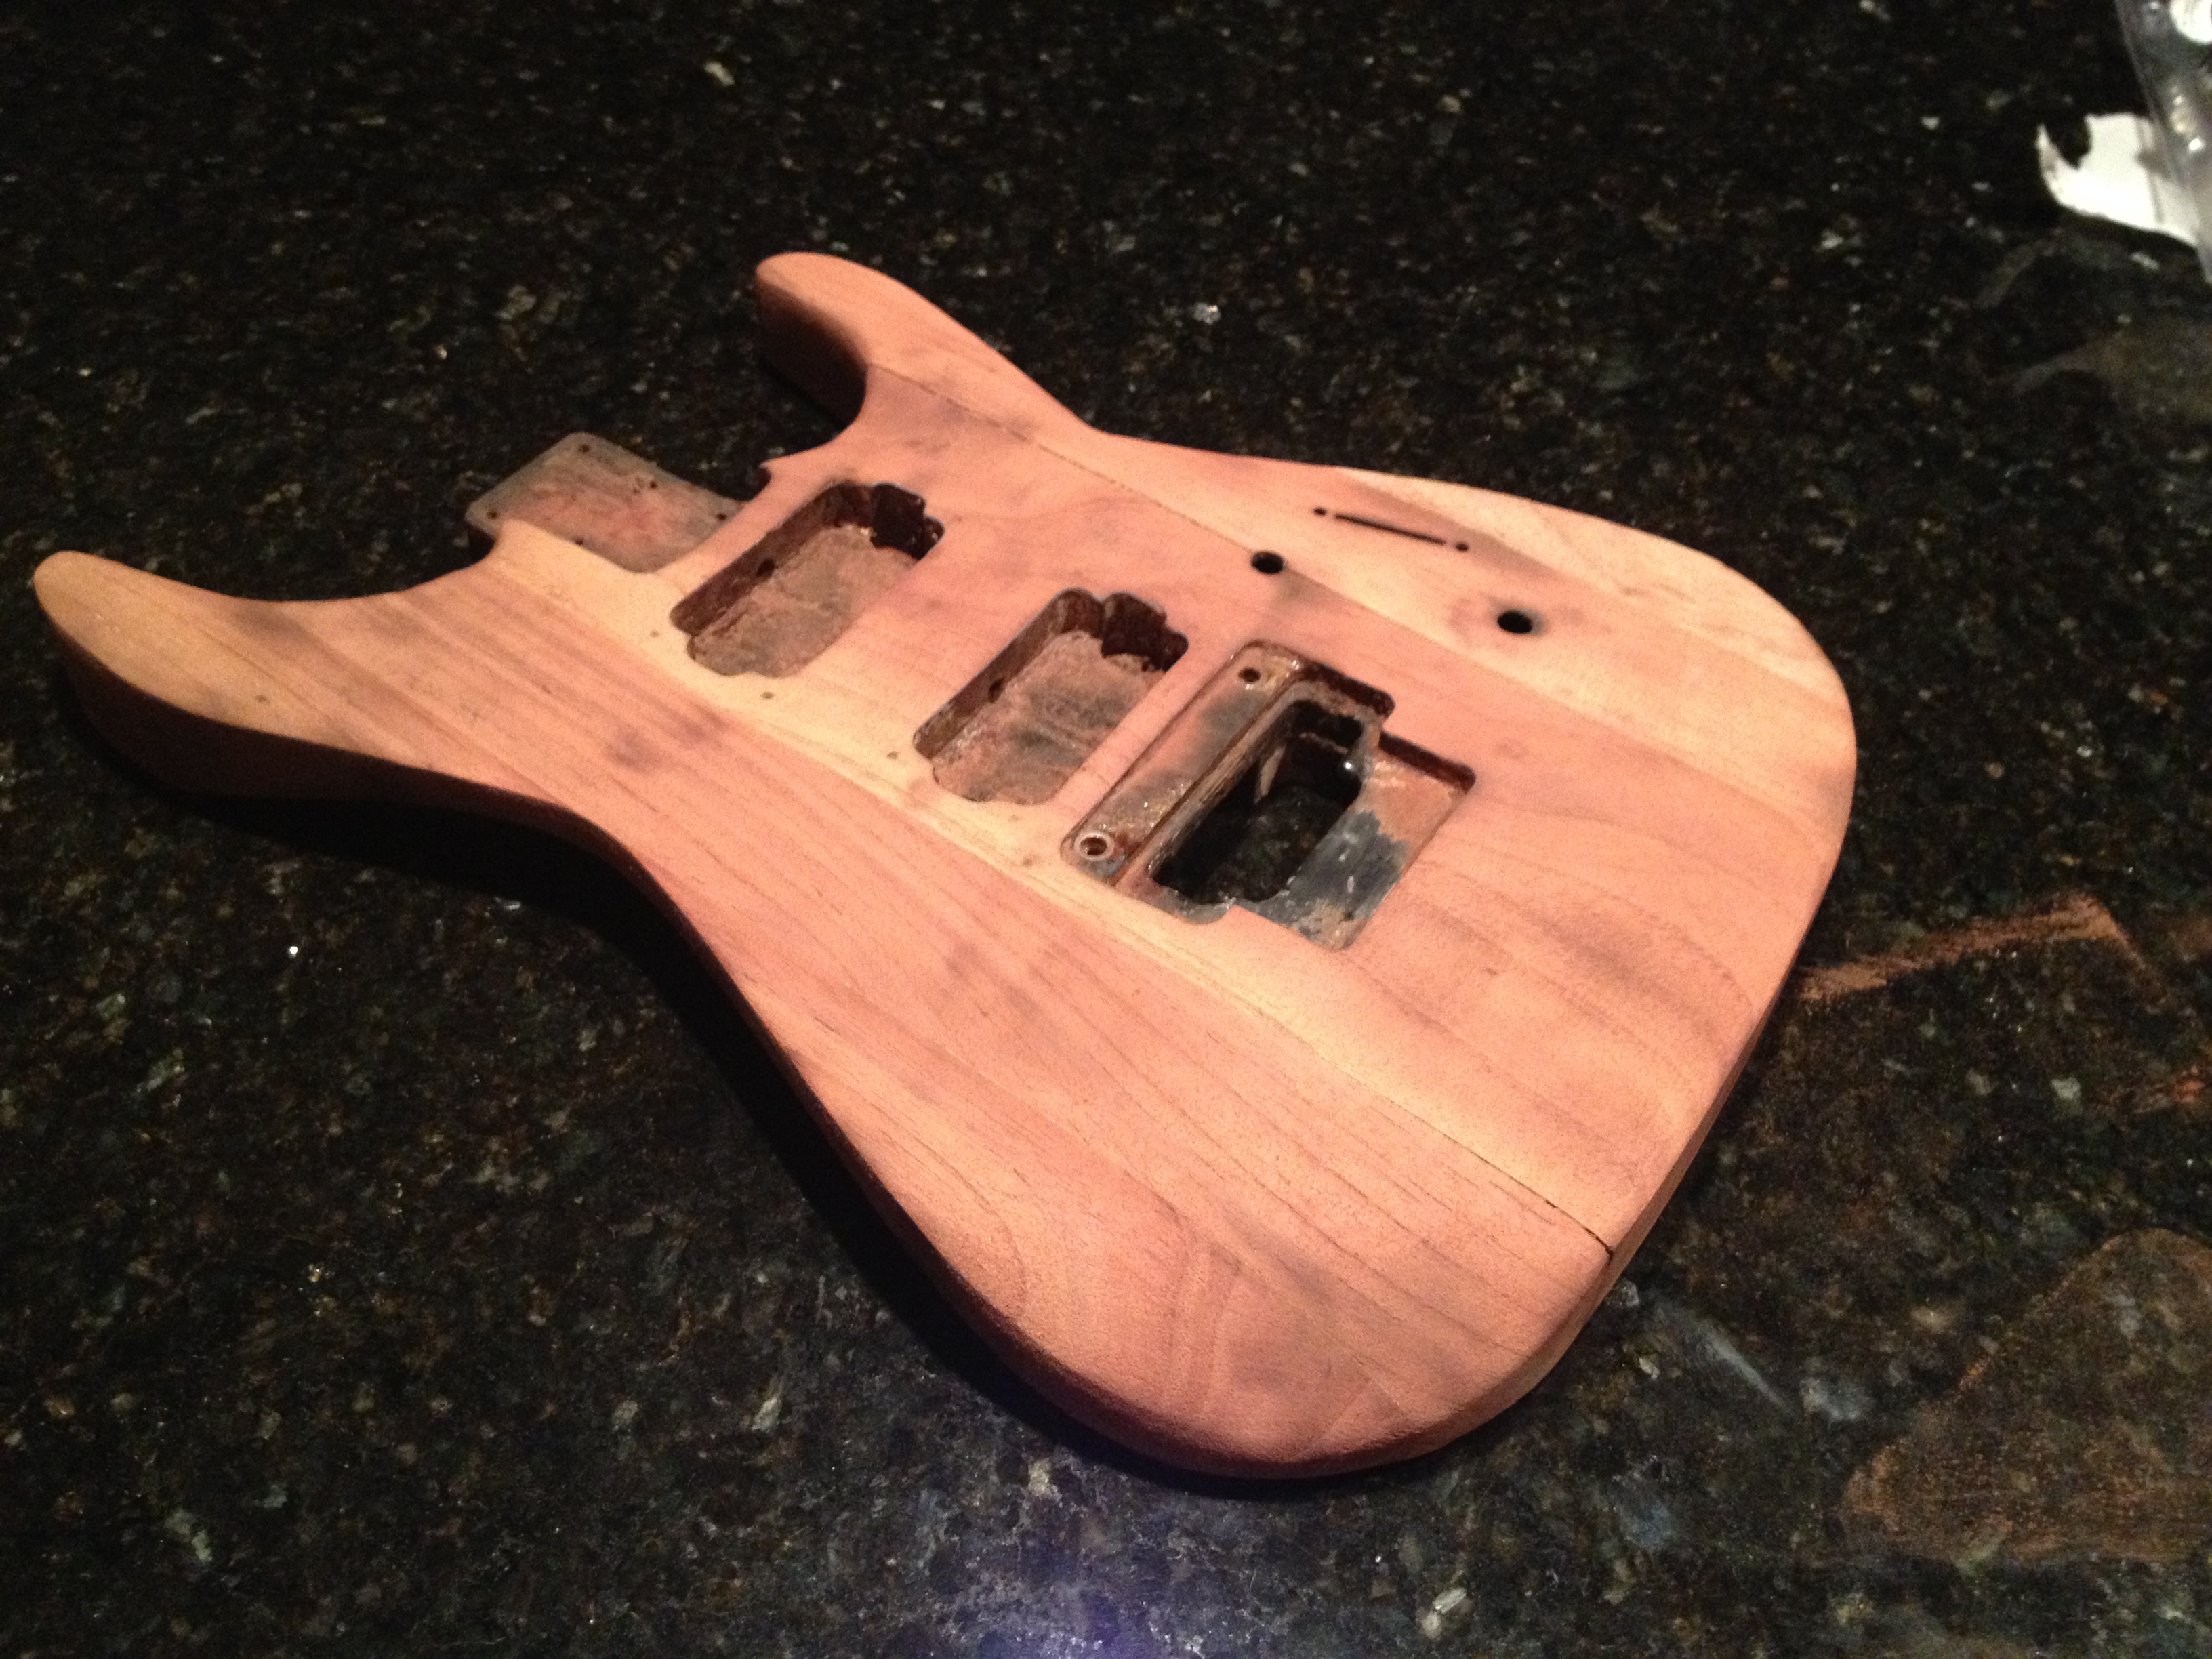
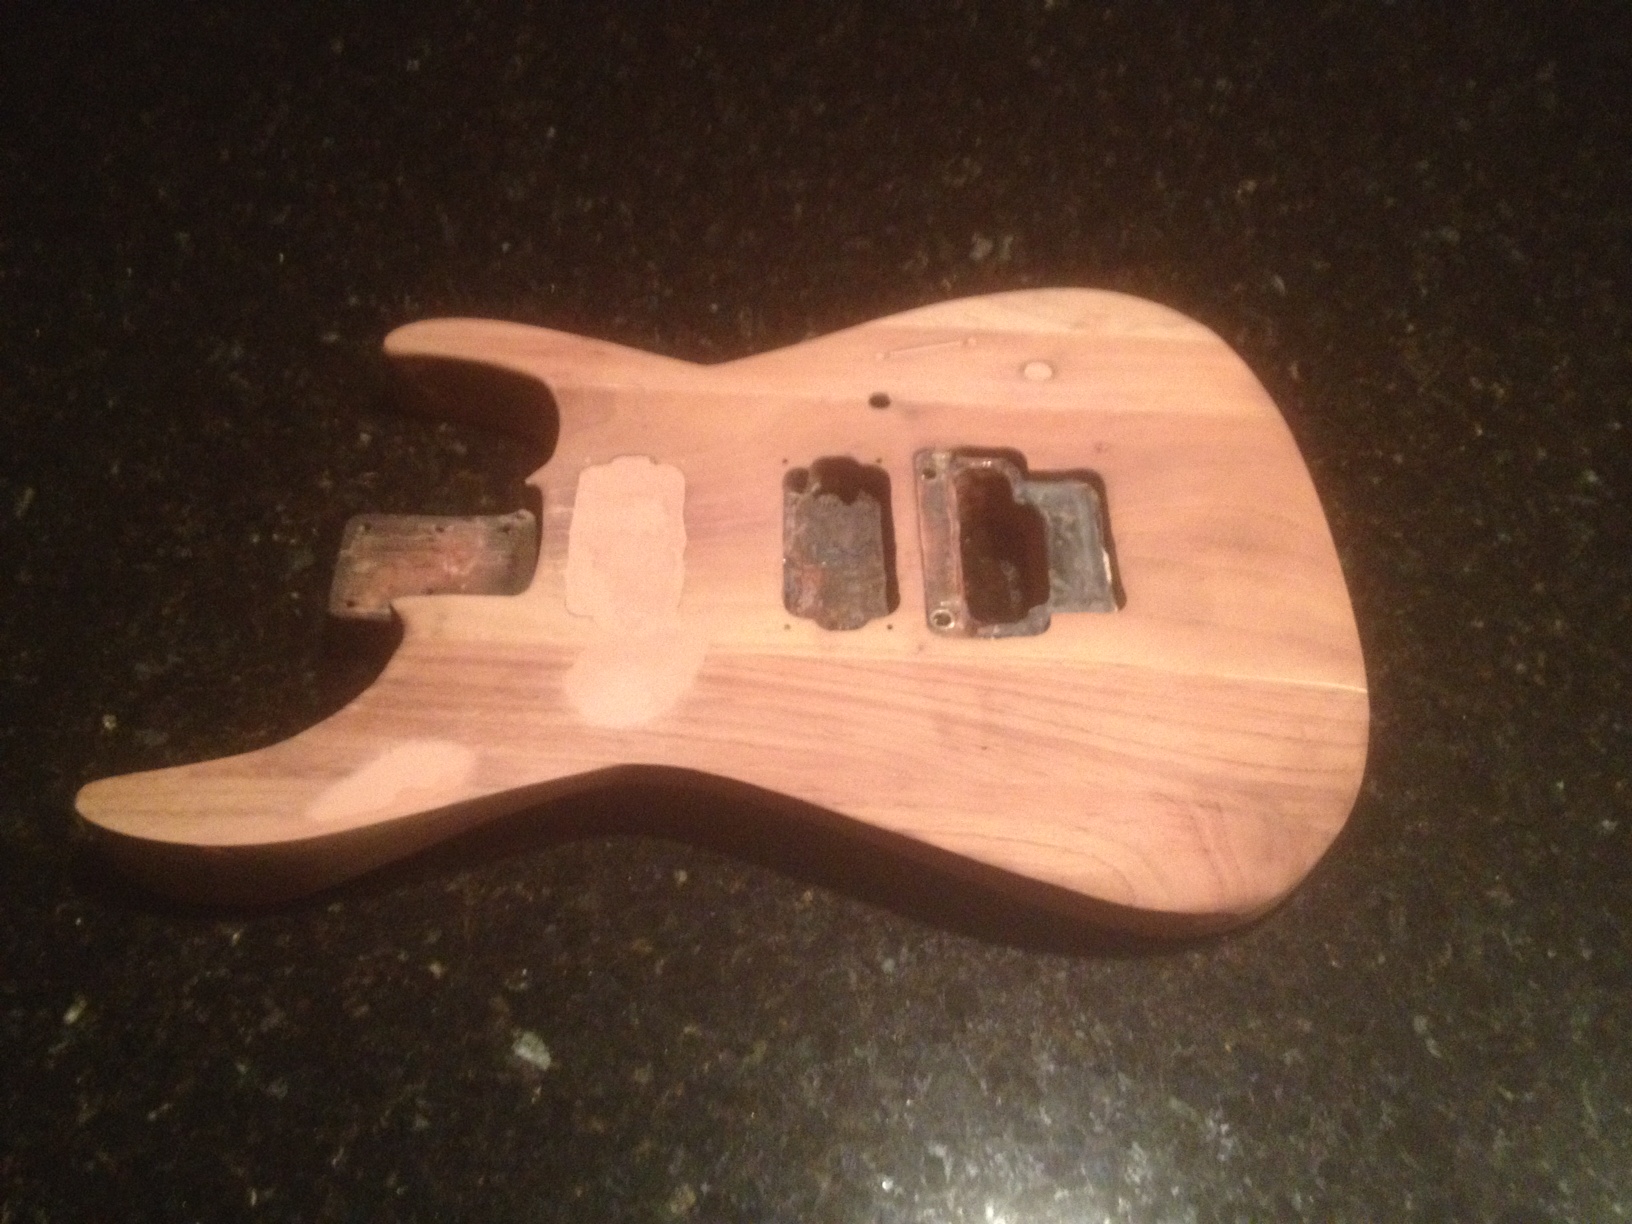
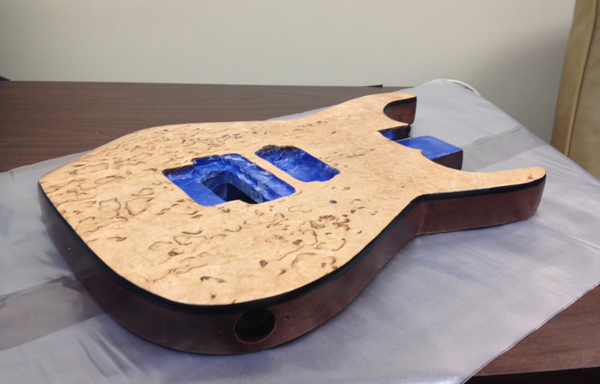
6 & 7) I worked on it for about 2 hours tonight. I used a Dremel Tool to sand inside the crevices, the horn arcs, as well I had to sharpen the body top edge angle to the sides and started round the edge angle to the back of the body. I went over the entire guitar again with a sander and was able to get most all of the scorch marks out. Also, on the front and a couple of places on the side, there was a gap where some of the wood came together. I filled those in with a wood putty and will let it cure for 24 hours then sand off the excess. I am also going to close up the neck pickup cavity - so I wood-glued a piece of wood in the hole. Once it is dried, I will build up the wood putty around the crevices and up over the top of the body, then sand off the excess to make it smooth. This has to be done in layers as it take a a while for wood putty to harden, and it tends to shrink when drying, so this process may take a few days. I am also going to cover the hole for the tone knob and the pick-up selector slit.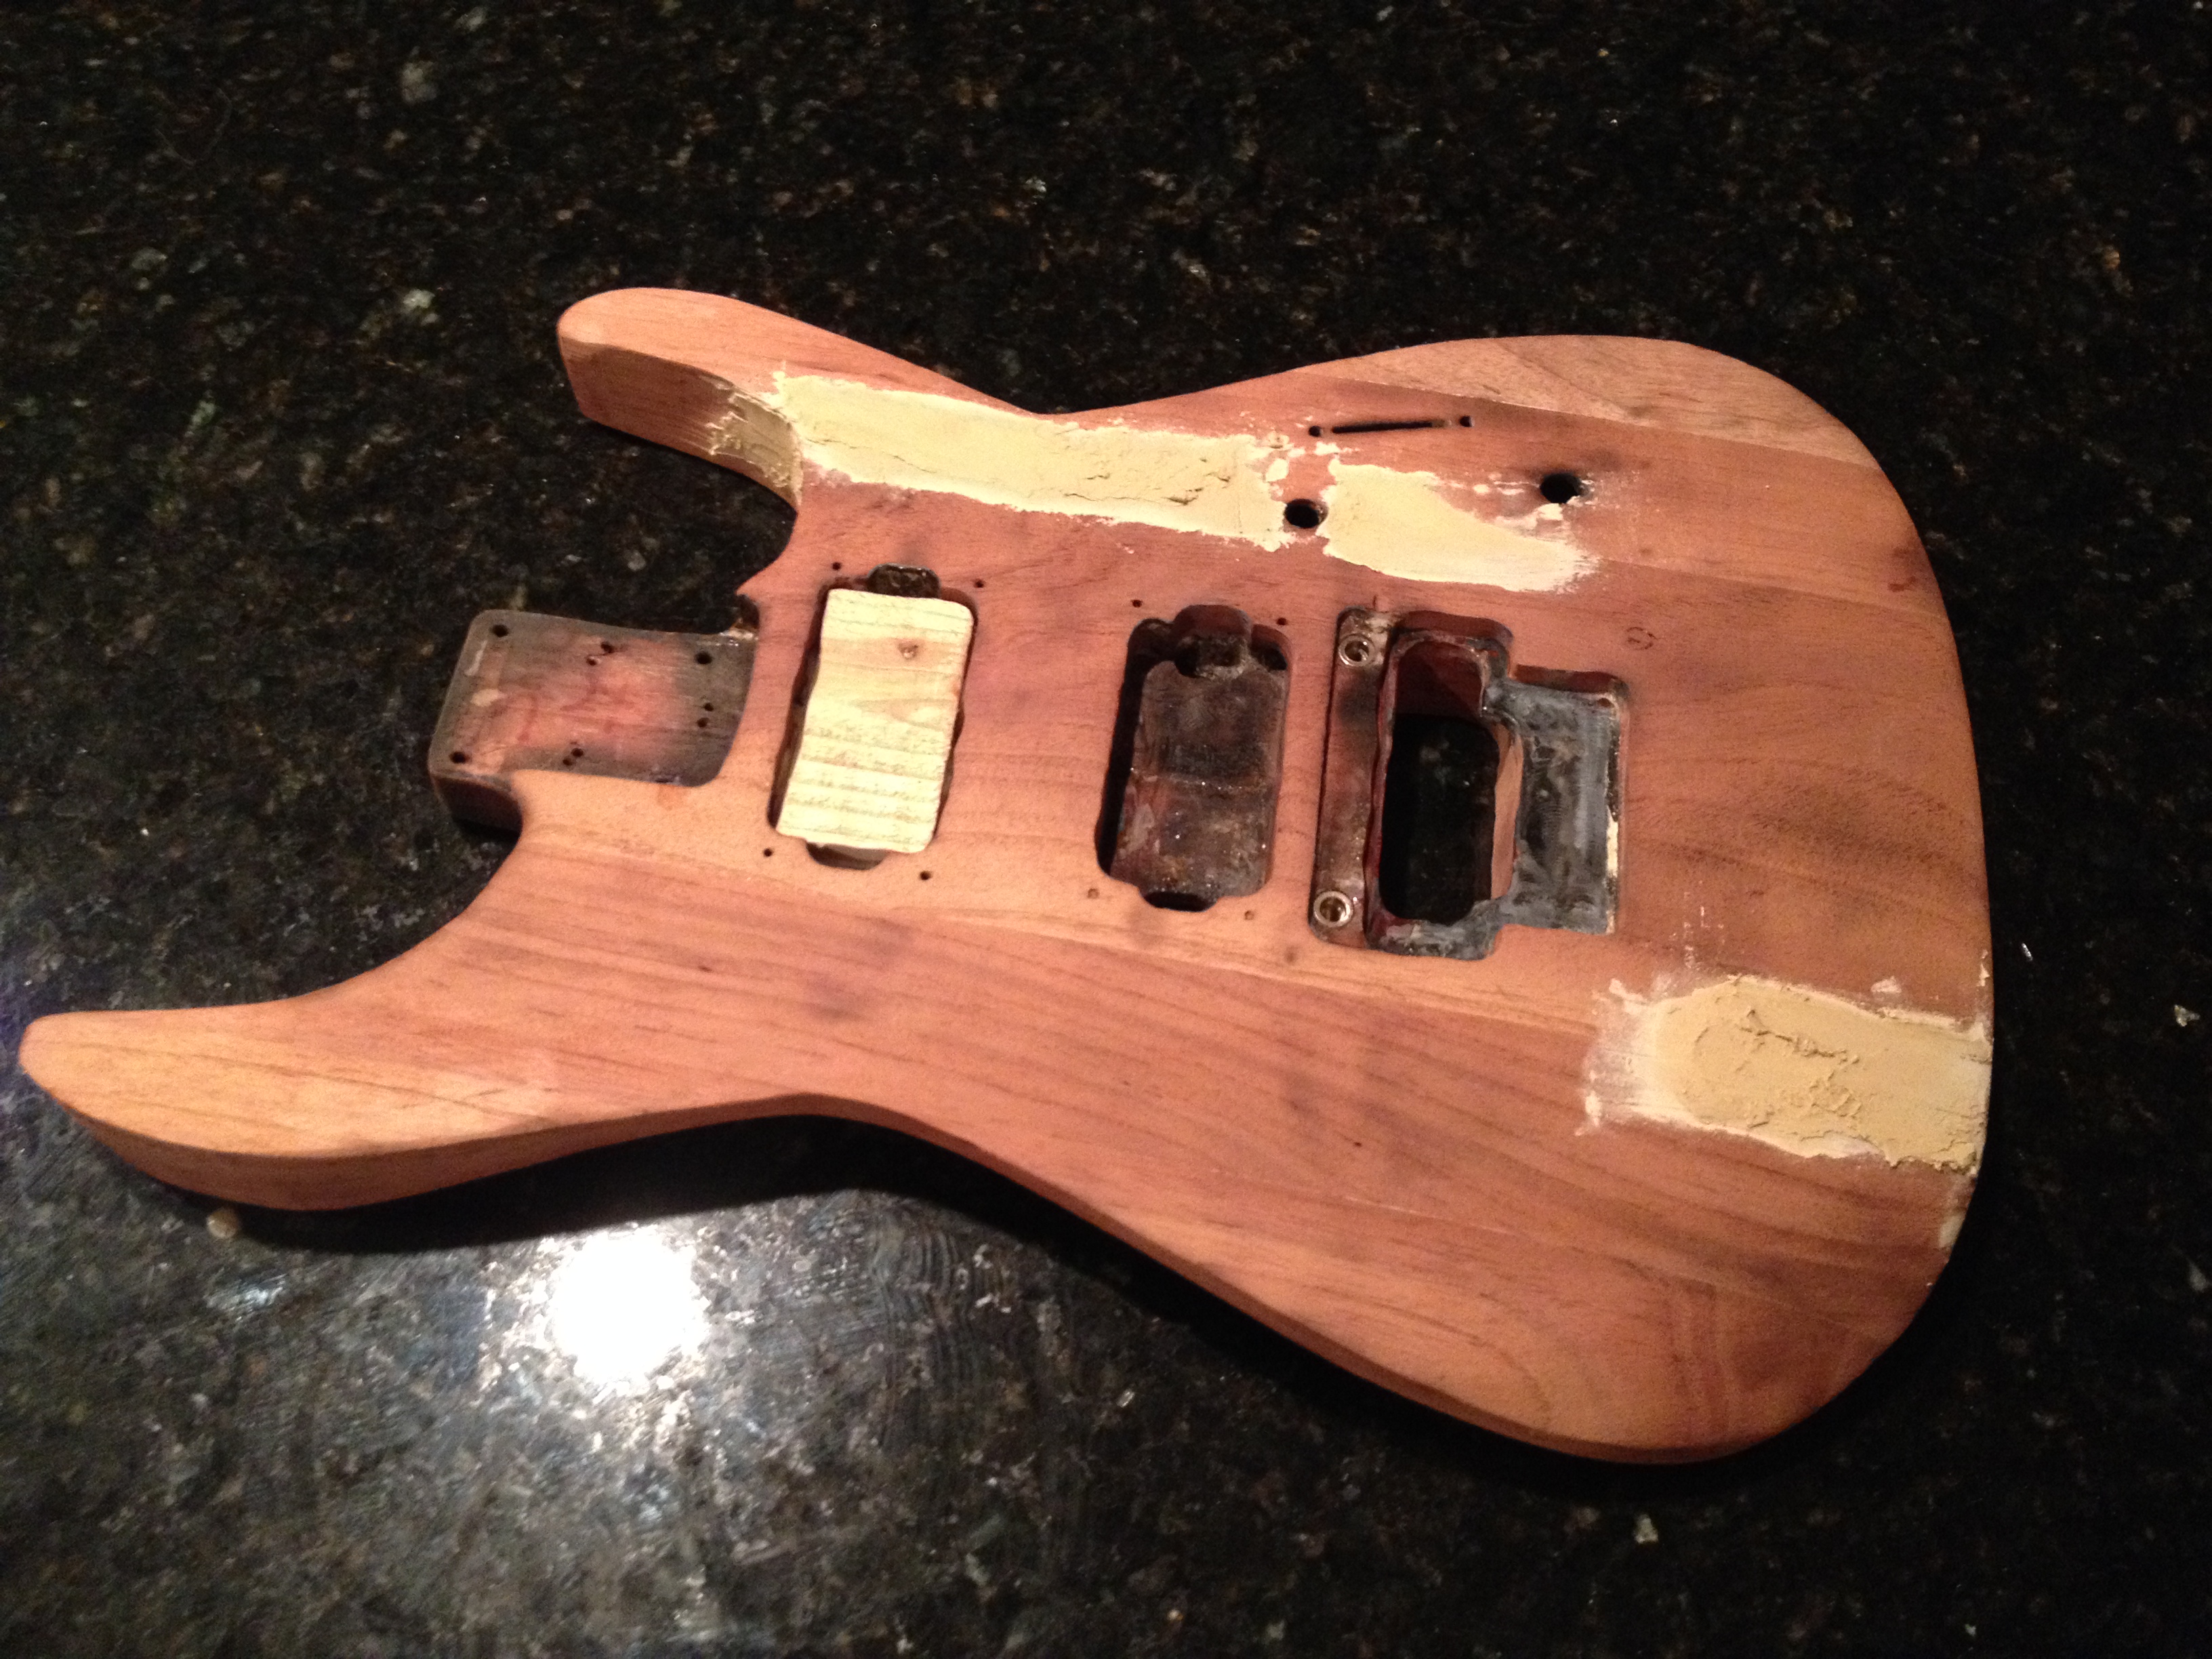
[attachment=36631:7.jpeg]
8) I have purchased the wood sealer, stain and a satin clear coat. Once the front of the guitar has been filled and sanded smooth, I am going to stain the sides and back of the mahogany and to the front of the body add a light colored birch burl veneer. This will get a natural sealer/finish; sand the edges down smooth to the body and start apply the first coating of satin lacquer. When the first coat dries, I plan on putting a 1/4" accent line in between the 2 woods with vinyl tape, then start coating the lacquer up over that until I get a thick shell. The tape will give a nice accent in between the woods, since it's not possible to put a binding on the guitar and best of all IT'S CHEAP!!!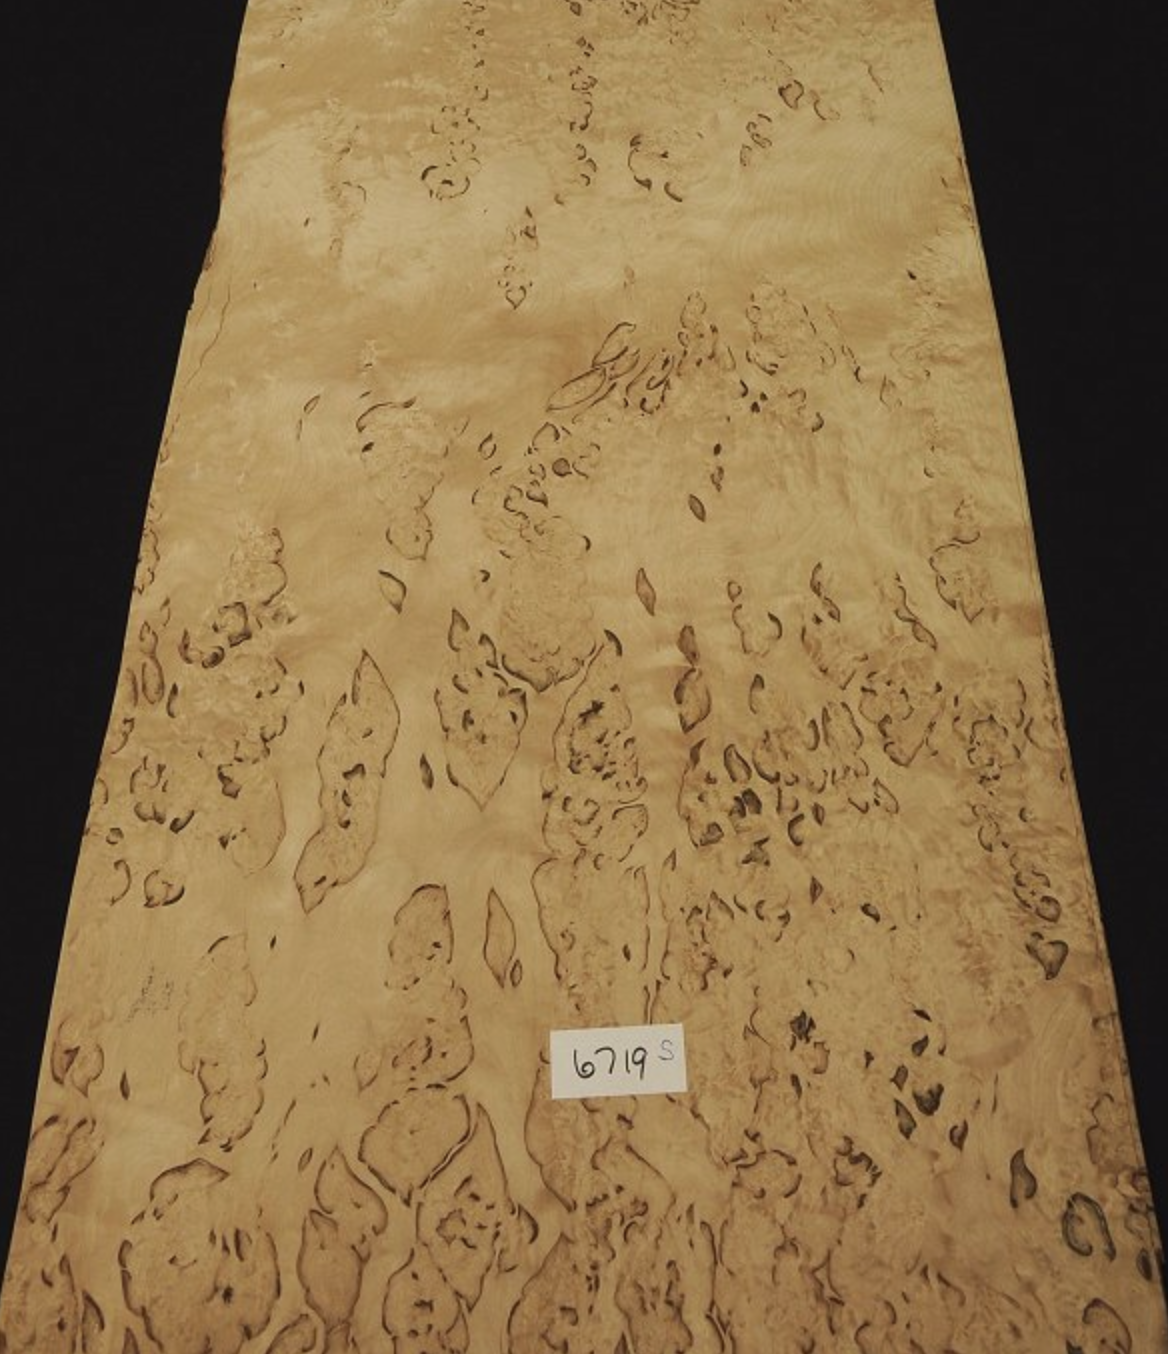
The birch veneer measures 16" x 60" so there will be plenty left over and I won't need to bookend two pieces down the middle.
So, at this point, that is the plan and the progress. I'm really just doing this, just to see if I can.
Posted by: Todd Simpson Apr 9 2014, 03:32 AM
Best of luck with all this. Thanks for sharing as you go!!! Are you just going to glue a pre cut chunk of the veneer to the top of the guitar and sorta bind it all together with clear coat?

I found out today the wood is Indian Mahogany. (Or that was the guys best guess).
1) So, this is what came out of the box:
2) Had to use a heat gun to loosen and chip up the thick poly finish and paint. Came to find out there was a very thin veneer covering the top of the body, I singed the veneer off with the heat gun and scraped it - at this point I thought all was lost:
3) I took a damp rag and wiped the saw dust off from a quick sanding. The scorch marks had me thinking of going in a relic direction.
4 & 5)The sides were not that difficult, except for the curves of the horns. The veneer was on the back too, but I realized I could use the heat gun for the finish, and sand the veneer off. It took some elbow grease, and the process to this point took about 6-8 hours. These next two pics are after the first round of sanding with a 50 grit sandpaper.
6 & 7) I worked on it for about 2 hours tonight. I used a Dremel Tool to sand inside the crevices, the horn arcs, as well I had to sharpen the body top edge angle to the sides and started round the edge angle to the back of the body. I went over the entire guitar again with a sander and was able to get most all of the scorch marks out. Also, on the front and a couple of places on the side, there was a gap where some of the wood came together. I filled those in with a wood putty and will let it cure for 24 hours then sand off the excess. I am also going to close up the neck pickup cavity - so I wood-glued a piece of wood in the hole. Once it is dried, I will build up the wood putty around the crevices and up over the top of the body, then sand off the excess to make it smooth. This has to be done in layers as it take a a while for wood putty to harden, and it tends to shrink when drying, so this process may take a few days. I am also going to cover the hole for the tone knob and the pick-up selector slit.
[attachment=36631:7.jpeg]
8) I have purchased the wood sealer, stain and a satin clear coat. Once the front of the guitar has been filled and sanded smooth, I am going to stain the sides and back of the mahogany and to the front of the body add a light colored birch burl veneer. This will get a natural sealer/finish; sand the edges down smooth to the body and start apply the first coating of satin lacquer. When the first coat dries, I plan on putting a 1/4" accent line in between the 2 woods with vinyl tape, then start coating the lacquer up over that until I get a thick shell. The tape will give a nice accent in between the woods, since it's not possible to put a binding on the guitar and best of all IT'S CHEAP!!!
The birch veneer measures 16" x 60" so there will be plenty left over and I won't need to bookend two pieces down the middle.
So, at this point, that is the plan and the progress. I'm really just doing this, just to see if I can.
Posted by: Spock Apr 9 2014, 10:26 AM
Essentially yes. You have to put a thick coating of veneer glue on the body and on the back of the veneer with a glue roller. You trace an outline of the guitar on the veneer and leave an overhang of 3/4" to 1".
I local luthier said he would apply the veneer for me, he's just a kid in college but he has built some beautiful guitars from scratch. So I'm hoping he has some better tools to form fit it to the top contour. If it's too expensive (I don't want to put much more money into this guitar), then I will use bags of sand to weight down the veneer onto the guitar front contour - let dry for 24 hours.
Then you flip the guitar over, use a sharp blade to cut just up to the edge of the guitar, leaving a tiny overhang, then sand that down with a very fine wet sandpaper - I got a 600 grit for that. You use an exact knife to cut through the pickup, tremolo cavity and slowly carve to the edge, where you sand it down. The volume knob hole you just put a tiny hole with the exacto knife - then use a round metal file to GENTLY open it up.
The kid that is going to help me with this, is not a fan of doing things this way, as he builds exceptional instruments, but we have talked a few times and he understands it's a project, and I think he is interested in how it can turn out too - understanding it is not ideal. He's been very helpful to me.
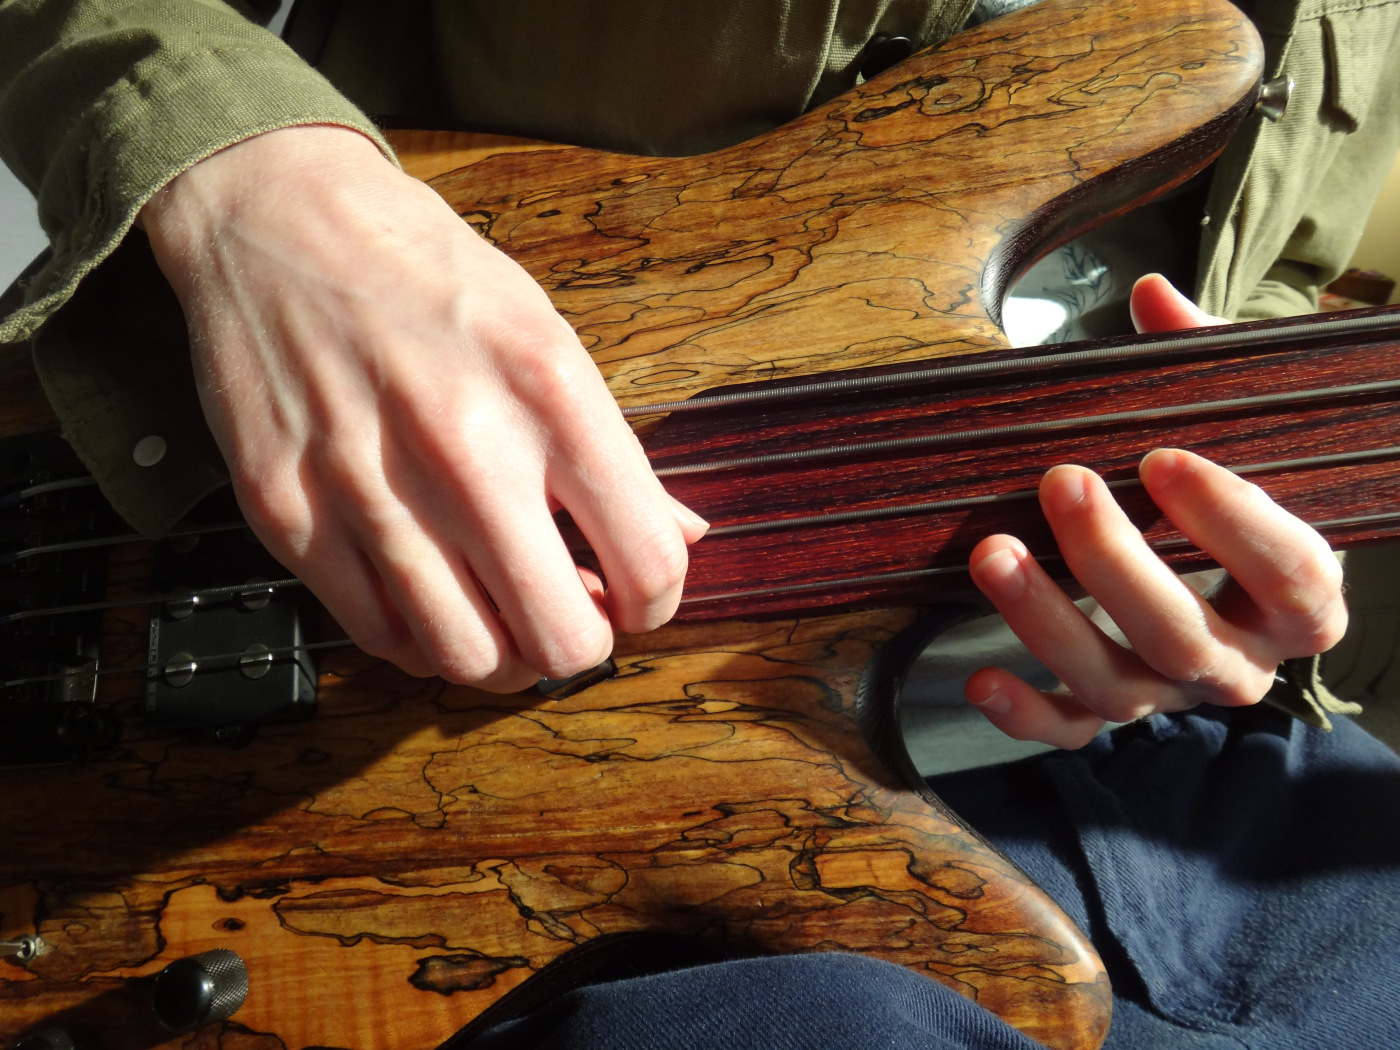
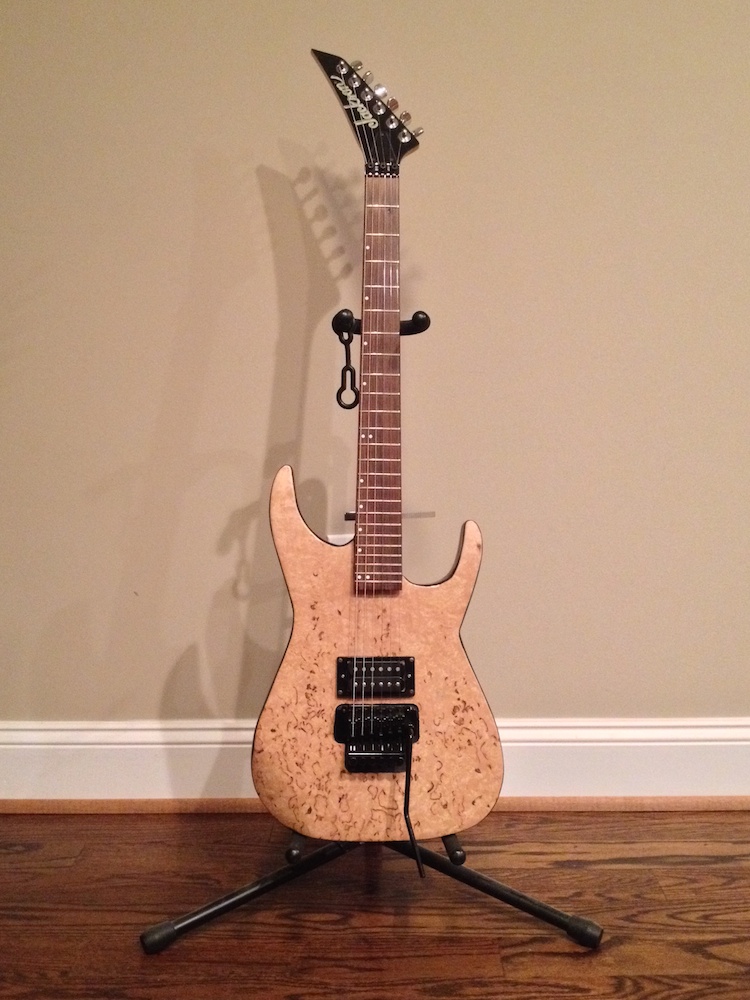
Check out this fretless bass he built...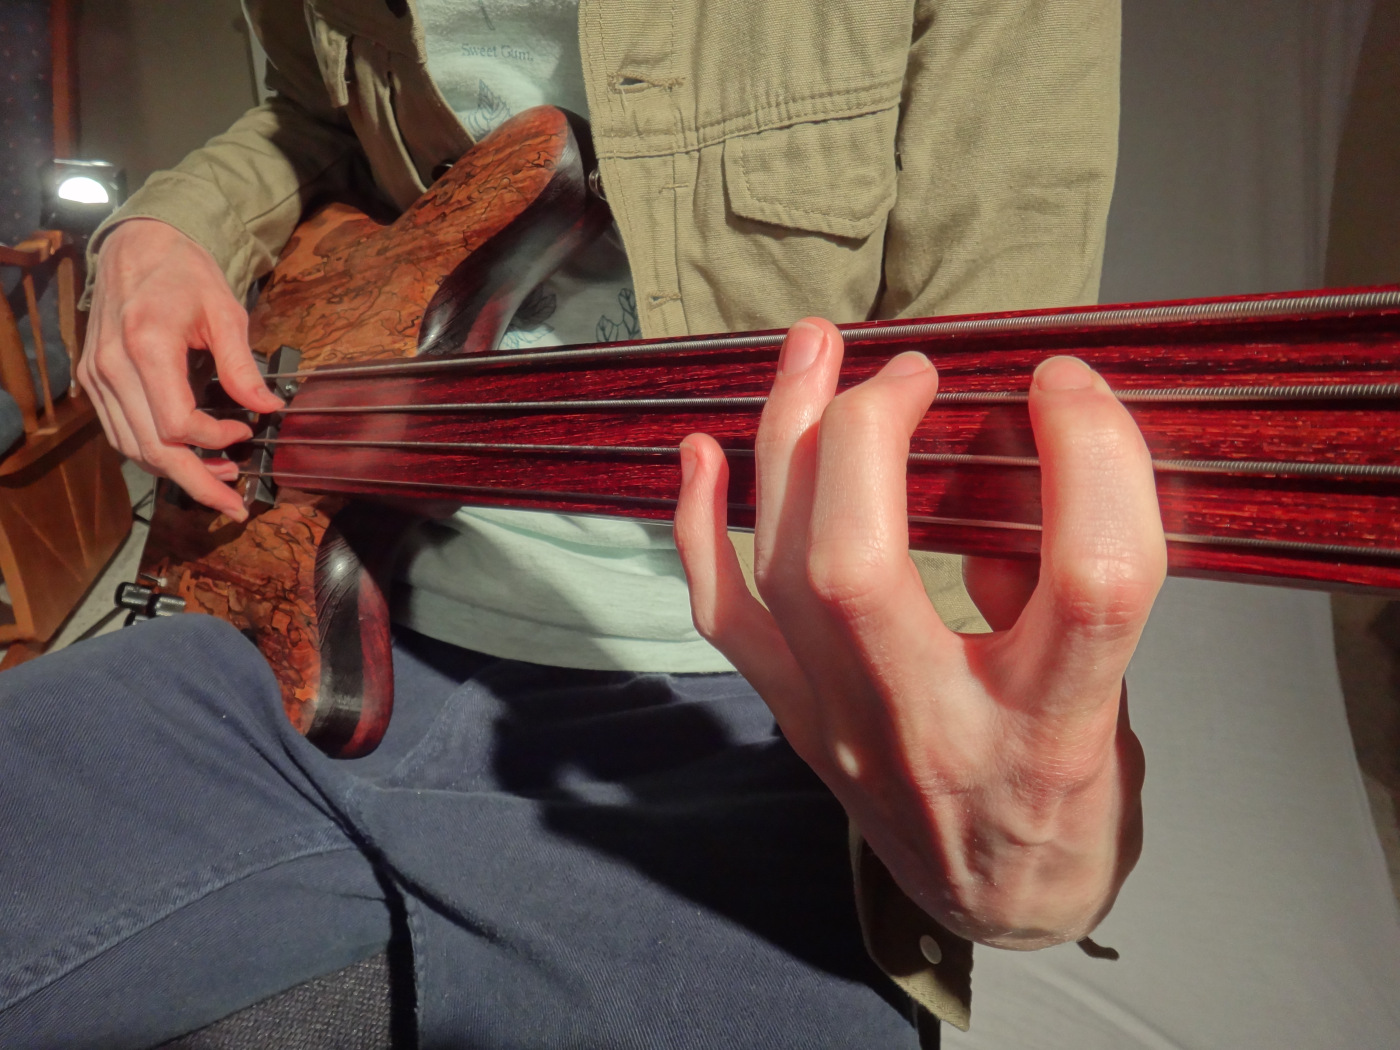
And here's a guitar he built...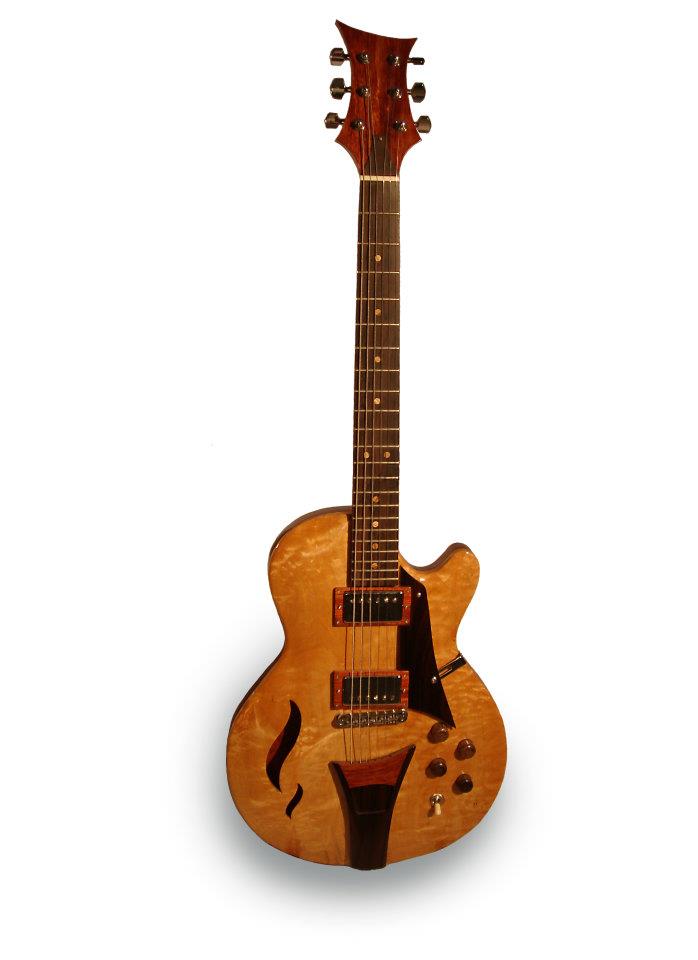
Granted - my project will turn out nothing compared to those, but he's good inspiration. The kid is still in college, and he is awesome to be so young - but he did go to some luthier school in Atlanta - I'm sure you may be familiar with that place? I would love to do that, I think working alone on building guitars and basses would be a dream job. I have thoroughly enjoyed this project so far - even though I have no idea what I am doing other than asking people tons of questions, reading lots of threads and watching lots of videos. I've never been a wood worker - but "spiritually" it feels just like working on art - which is what I do for a living.
Posted by: bleez Apr 9 2014, 12:44 PM
man, that bass looks great. Love the wood he's used for the neck.
Looking forward to seeing how your refurb goes. really interesting 
Posted by: Spock Apr 9 2014, 05:25 PM
Looks like there is a problem. Not sure if it can be overcome. The thin veneer that was under the paint which I stripped off, looks like I lost about 1/8", which means that will somehow need to be built back up. with another piece of wood. Not sure how to do this - and this could be a deal killer for me. Only other solution would be to build it up with wood putty of bondo, cover it with the veneer and hope for the best.
Posted by: Caelumamittendum Apr 9 2014, 08:58 PM
I'd say don't let it kill it off for you. See where you can go from there and learn from the experience.
Posted by: Spock Apr 10 2014, 12:47 AM
I'm a bit more optimistic now. I purchased a piece of mahogany veneer - 1/16" and found out that is all I lost. I can easily build that back up. All together with the finish, paint, sanding and veneer, I lost about 3/16" of an inch. I can router out the neck joint 1/16" and reset the neck, then build the rest up with lacquer at the veneer.
I read on another forum that Jackson will put a veneer on guitars that are painted and pieced together with multiple pieces of wood. This hides the seams once everything cures and ages.
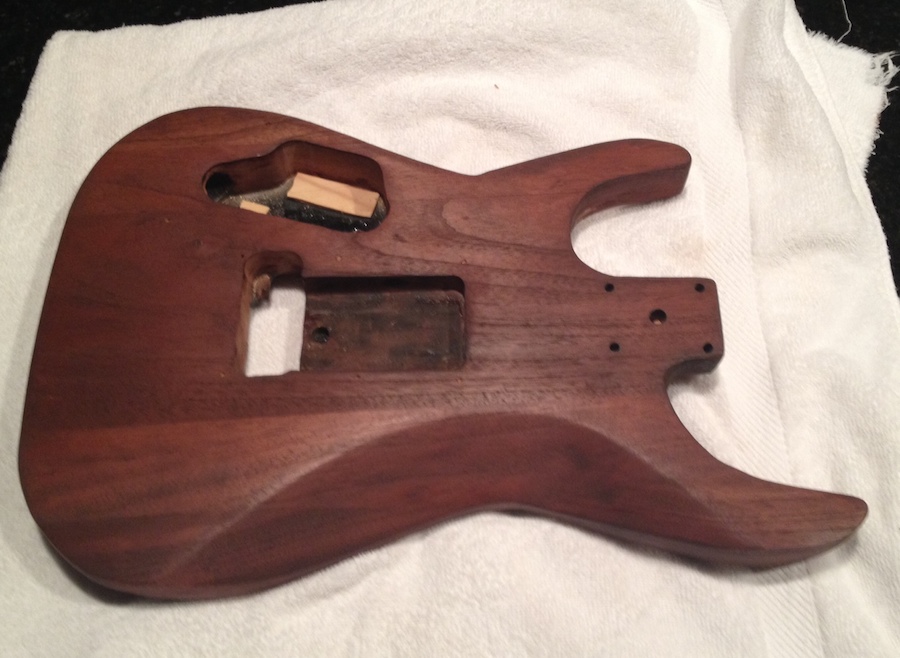
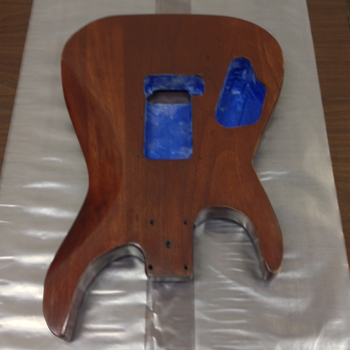
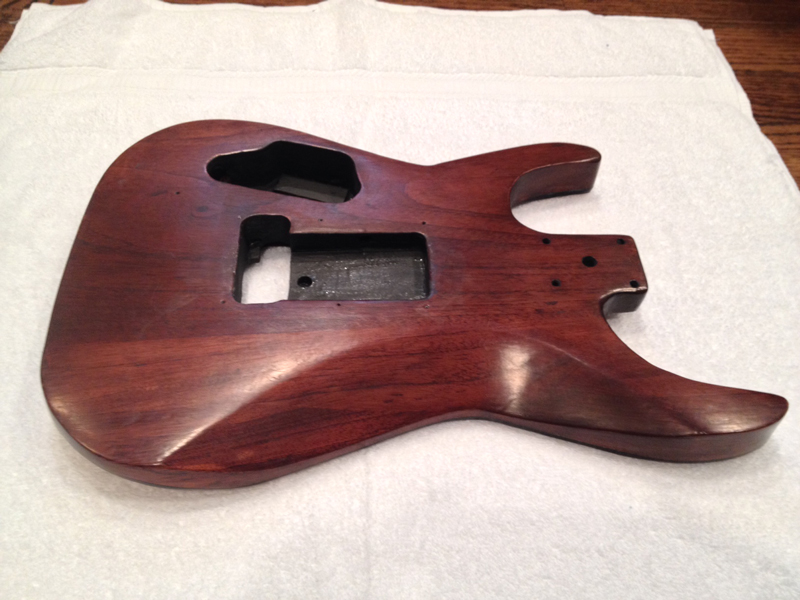
As of right now, it still looks like a dog, but getting soo much smoother. Once I sand this filler off tomorrow, I'll go to a higher grade sand paper and make the entire body as smooth as silk. Then apply the wood sealer on the entire thing. The back is looking really, really great right now.
To be honest, I am SHOCKED this wood turned out to be mahogany.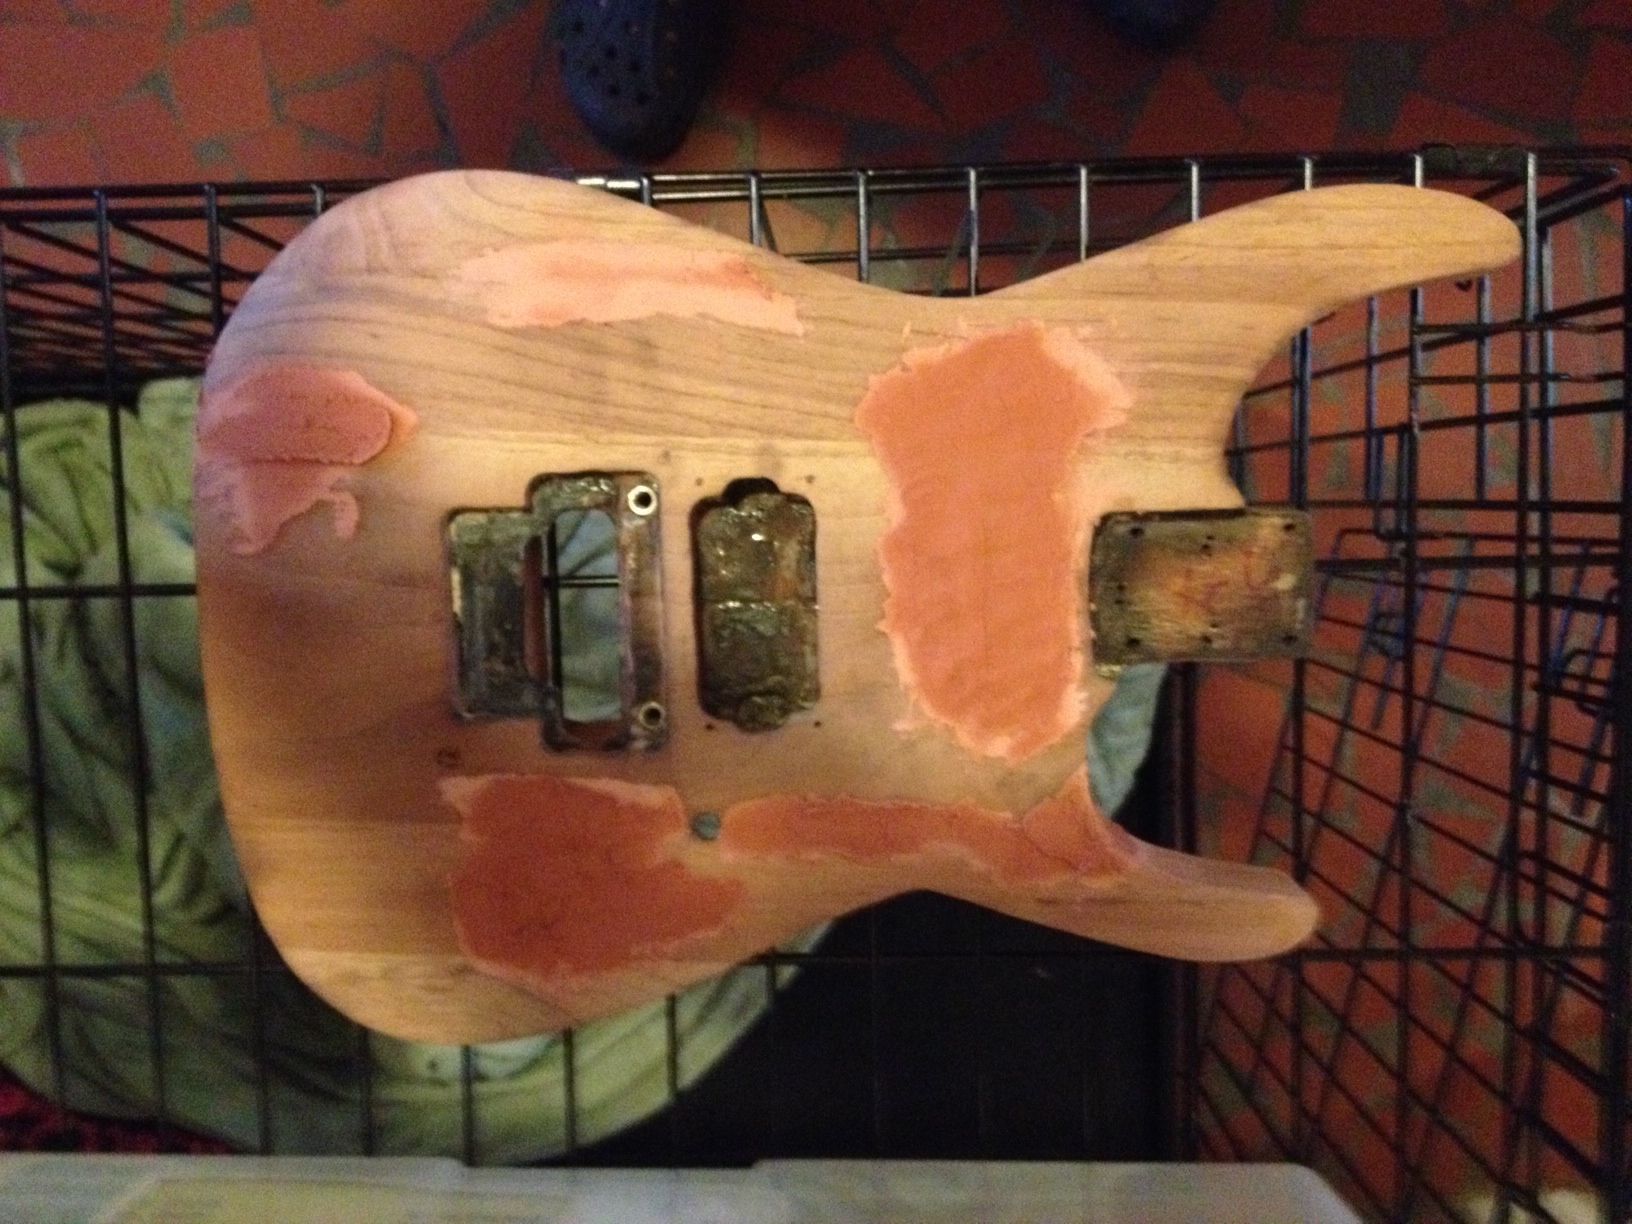
Posted by: Mertay Apr 10 2014, 02:29 AM
I love watching these sort of topics and yeah it seems to be going pretty good 
Posted by: Todd Simpson Apr 10 2014, 02:49 AM
So you work on art for a living? Mind sharing a bit more on that? Are you in art restoration by chance?
Best of luck with the veneer! From what I understand, they typically use a complex system of clamps and heat to set the wood? I've never heard of using sand bags, but hey, every step in this is a learning experience so it's got value by itself!
I local luthier said he would apply the veneer for me, he's just a kid in college but he has built some beautiful guitars from scratch. So I'm hoping he has some better tools to form fit it to the top contour. If it's too expensive (I don't want to put much more money into this guitar), then I will use bags of sand to weight down the veneer onto the guitar front contour - let dry for 24 hours.
Then you flip the guitar over, use a sharp blade to cut just up to the edge of the guitar, leaving a tiny overhang, then sand that down with a very fine wet sandpaper - I got a 600 grit for that. You use an exact knife to cut through the pickup, tremolo cavity and slowly carve to the edge, where you sand it down. The volume knob hole you just put a tiny hole with the exacto knife - then use a round metal file to GENTLY open it up.
The kid that is going to help me with this, is not a fan of doing things this way, as he builds exceptional instruments, but we have talked a few times and he understands it's a project, and I think he is interested in how it can turn out too - understanding it is not ideal. He's been very helpful to me.
Check out this fretless bass he built...
And here's a guitar he built...
Granted - my project will turn out nothing compared to those, but he's good inspiration. The kid is still in college, and he is awesome to be so young - but he did go to some luthier school in Atlanta - I'm sure you may be familiar with that place? I would love to do that, I think working alone on building guitars and basses would be a dream job. I have thoroughly enjoyed this project so far - even though I have no idea what I am doing other than asking people tons of questions, reading lots of threads and watching lots of videos. I've never been a wood worker - but "spiritually" it feels just like working on art - which is what I do for a living.
Posted by: Spock Apr 10 2014, 03:17 AM
I think my Official Title is "Graphics Whore". I "Will Design for Food".
I've been a graphic artist since 1989. After numerous jobs; years of doing automotive dealership ads in the southeast, print shop work and newspaper work,etc. I somehow lucked up and landed a position as a marketing director for a southeast based food service company. I stayed there for 8 years, then left to start my own business with a partner. Our corporate motto was, "All it takes to succeed is 1 half ass designer and a bullshit artist" and for 2 years, that philosophy proved itself. One of my customers stole my partner in order to open an Apple Store (iPlace) - this was before a real Apple Store came to Greenville. I did not have time to go to meetings, do the work and everything involved, so in a panic, I asked my largest customer if he would hire me - that was the best move I ever made, now working for the best company I could have prayed for. I'm the art director there now, and I take care of their website design and marketing materials, displays, etc. All in all its a great job with great people, but after all these years, I think I am just a little burned out on designing. I use to enjoy freelancing for extra cash on nights and weekends - but now days the LAST thing I want to do when I get home is open anything licensed by Adobe.
Posted by: Spock Apr 10 2014, 02:42 PM
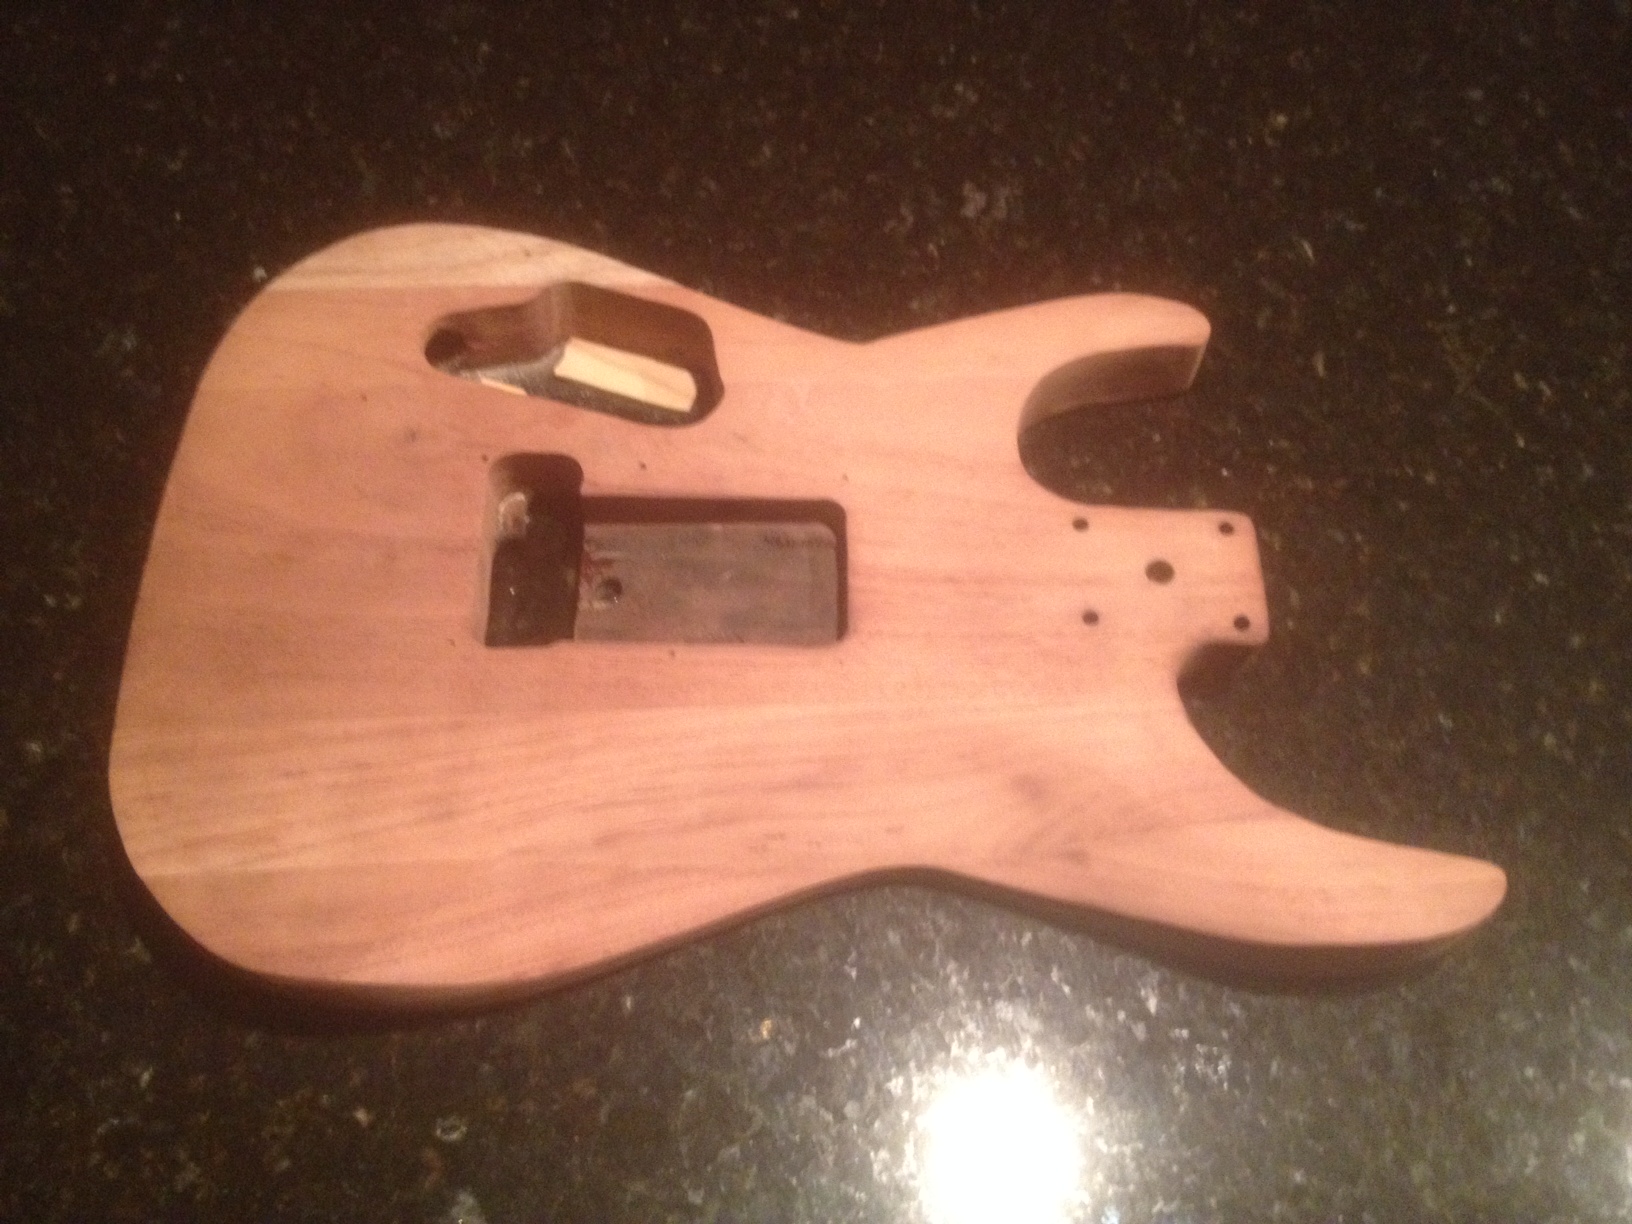
The setback I ran into yesterday I think has been solved. As I said I lost about 1/16" of an inch by taking the veneer cover off the guitar body. So when I placed the neck back into the neck pocket, it seemed way too high off the body.
The solution is to router down the base of the neck pocket by 1/16". Once the new veneer is applied and the lacquer has built back up. That should solve the problem. I'll just have to make sure that when fastening the neck back to the body, that the screws are so long as to come through the fretboard.
FYI - the inside arc looks much cleaner now then when I took that pic yesterday morning.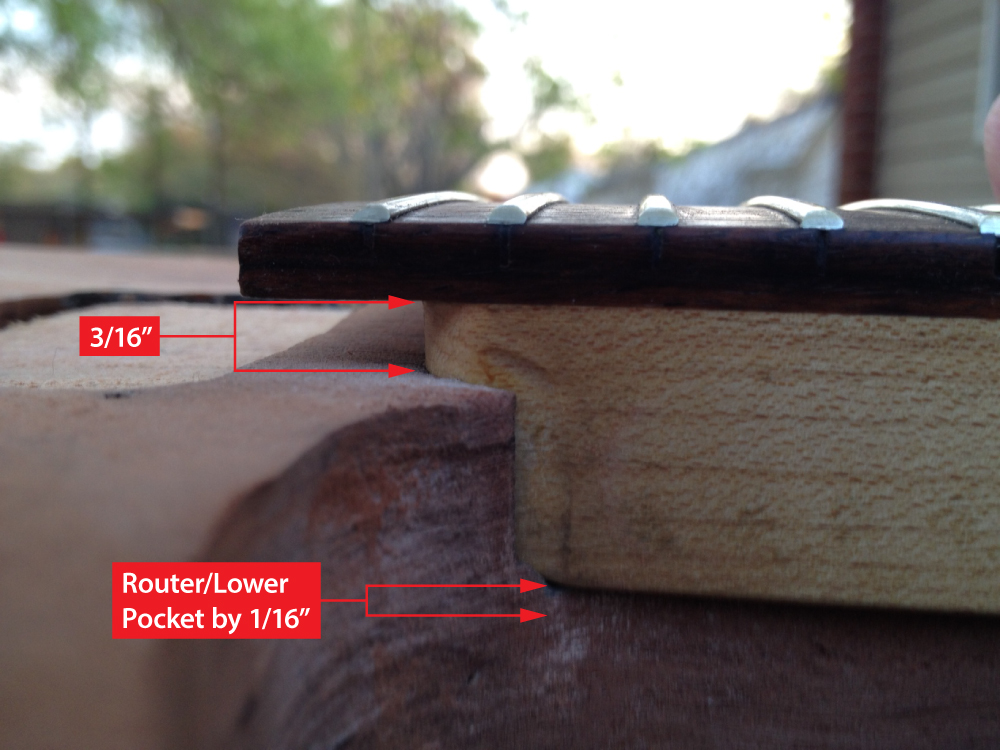
Posted by: Todd Simpson Apr 10 2014, 09:42 PM
hmm. Deepen the pocket? It's looking like you may have to cut your loss on the body and chalk it up as learning experience? The rest of the bits still work so you could buy an unfinished body from warmoth or some chinese body off ebay and move forward that way?
Posted by: Spock Apr 10 2014, 10:20 PM
I've considered that and it's very possible. But I still have hope. I'll post another pic in the morning with some finer sanding completed - it is so close - plus I got my veneer in today.
I've been reading a thread about this sort of neck issue thing ( http://www.tdpri.com/forum/tele-technical/235220-depth-telecaster-neck-pocket.html ), people shimming necks and also lowering pockets. I've learned that you don't want to cut into the neck, and the luthier guy I talked to said I may not need to lower it at all - but I think I will have to.
Anyway I have hope, and this is just a project on a project guitar. I got in my new Jackson about an hour ago and I LOVE IT, everything about it! Sure, it's not a USA custom, it's a Japanese model, but the neck feels great, it looks great and it will be set up great with some hot active EMGs and a D-Tuna on the Floyd Rose. So I'm tickled over that - and this project is relaxing to me and I am enjoying learning (finding my zen) - even if I end up really screwing the pooch and getting a Warmoth body. At this point, I am truly amazed at how far it has come since that first picture where it was burned to a crisp.
Plus I have enough veneer and products to screw up at least 5 more cheap bodies.
Posted by: Todd Simpson Apr 10 2014, 11:18 PM
Great to hear your new jackson is working out You never know when you "buy before you play" so it's great that it's a keeper Before you put the stock emg81/85 in, try to see if you can play an axe with their newer offerings if possible. They have a new set with alnico mags that retains the emg punch but doesn't sound all compressed as emgs are prone to.
The EMG 57/66 combo is one that many players are switching to these days. It's got a great sound to it and is very dynamic. I had a few guitars with 81/85 sets and eventually moved on to passive/alnico pups but I'd have gone for these if they were available at the time
ANDY JAMES uses this set and I can see why. "Better" is a loaded term, but I'd go so far as to say these are just "Better" pups than the standard 81/85, which haven't changed much since the original.
Here is the info.
http://www.emgpickups.com/guitar/humbucking/active-humbucking/57.html

I've been reading a thread about this sort of neck issue thing ( http://www.tdpri.com/forum/tele-technical/235220-depth-telecaster-neck-pocket.html ), people shimming necks and also lowering pockets. I've learned that you don't want to cut into the neck, and the luthier guy I talked to said I may not need to lower it at all - but I think I will have to.
Anyway I have hope, and this is just a project on a project guitar. I got in my new Jackson about an hour ago and I LOVE IT, everything about it! Sure, it's not a USA custom, it's a Japanese model, but the neck feels great, it looks great and it will be set up great with some hot active EMGs and a D-Tuna on the Floyd Rose. So I'm tickled over that - and this project is relaxing to me and I am enjoying learning (finding my zen) - even if I end up really screwing the pooch and getting a Warmoth body. At this point, I am truly amazed at how far it has come since that first picture where it was burned to a crisp.
Plus I have enough veneer and products to screw up at least 5 more cheap bodies.
Posted by: Sensible Jones Apr 11 2014, 11:38 AM
You should be OK with the screw length, but check before you screw them in!
Depending how thick the body is at the Heel/Neck Pocket another option is to take a 1/16th off the back of the neck Heel or even to take a 1/32nd off both sides.
Posted by: Spock Apr 11 2014, 01:56 PM
I wish I had heard of those I would have given them a shot. I just listened to them on some You-Tube vids and they would have been great, but I already purchased my Zakk Wylde EMGs and have them in house - the only thing I'm waiting on is the brass block which should be delivered today (I hope).
Depending how thick the body is at the Heel/Neck Pocket another option is to take a 1/16th off the back of the neck Heel or even to take a 1/32nd off both sides.
Good suggestions, my concern was that gap, but I am a little confused this morning. I wish that before I started this project that I had taken pictures of every nook and cranny of the guitar, so I would have known what to expect putting it back together.
It seems that my assumption that the veneer I stripped off as being 1/16" was wrong - it couldn't have been any thicker than the one I am about to put on it.
I have one more sanding to go. Last night I sanded with a 150 grit, tonight after work I'll sand it with a 220, get the edges of the body as uniform as I can, then it will be ready to stain and seal.
So - check this out. This morning I bolted the neck back on just to see. I placed the old pickup and tremolo in their cavities, and the pickup sleeve <---- not sure what it's called where the cavity for the bridge pickup use to be - and there is not much room left.
Everything seems to be fitting perfectly. Now, I can't swear that it will ever get and stay in tune again, but I think the parts will go back together nicely. But I can not understand that little overhang, I don't see them on other guitars just doing Google image searches, even on my new Jackson the bottom of the fretboard touches the body.
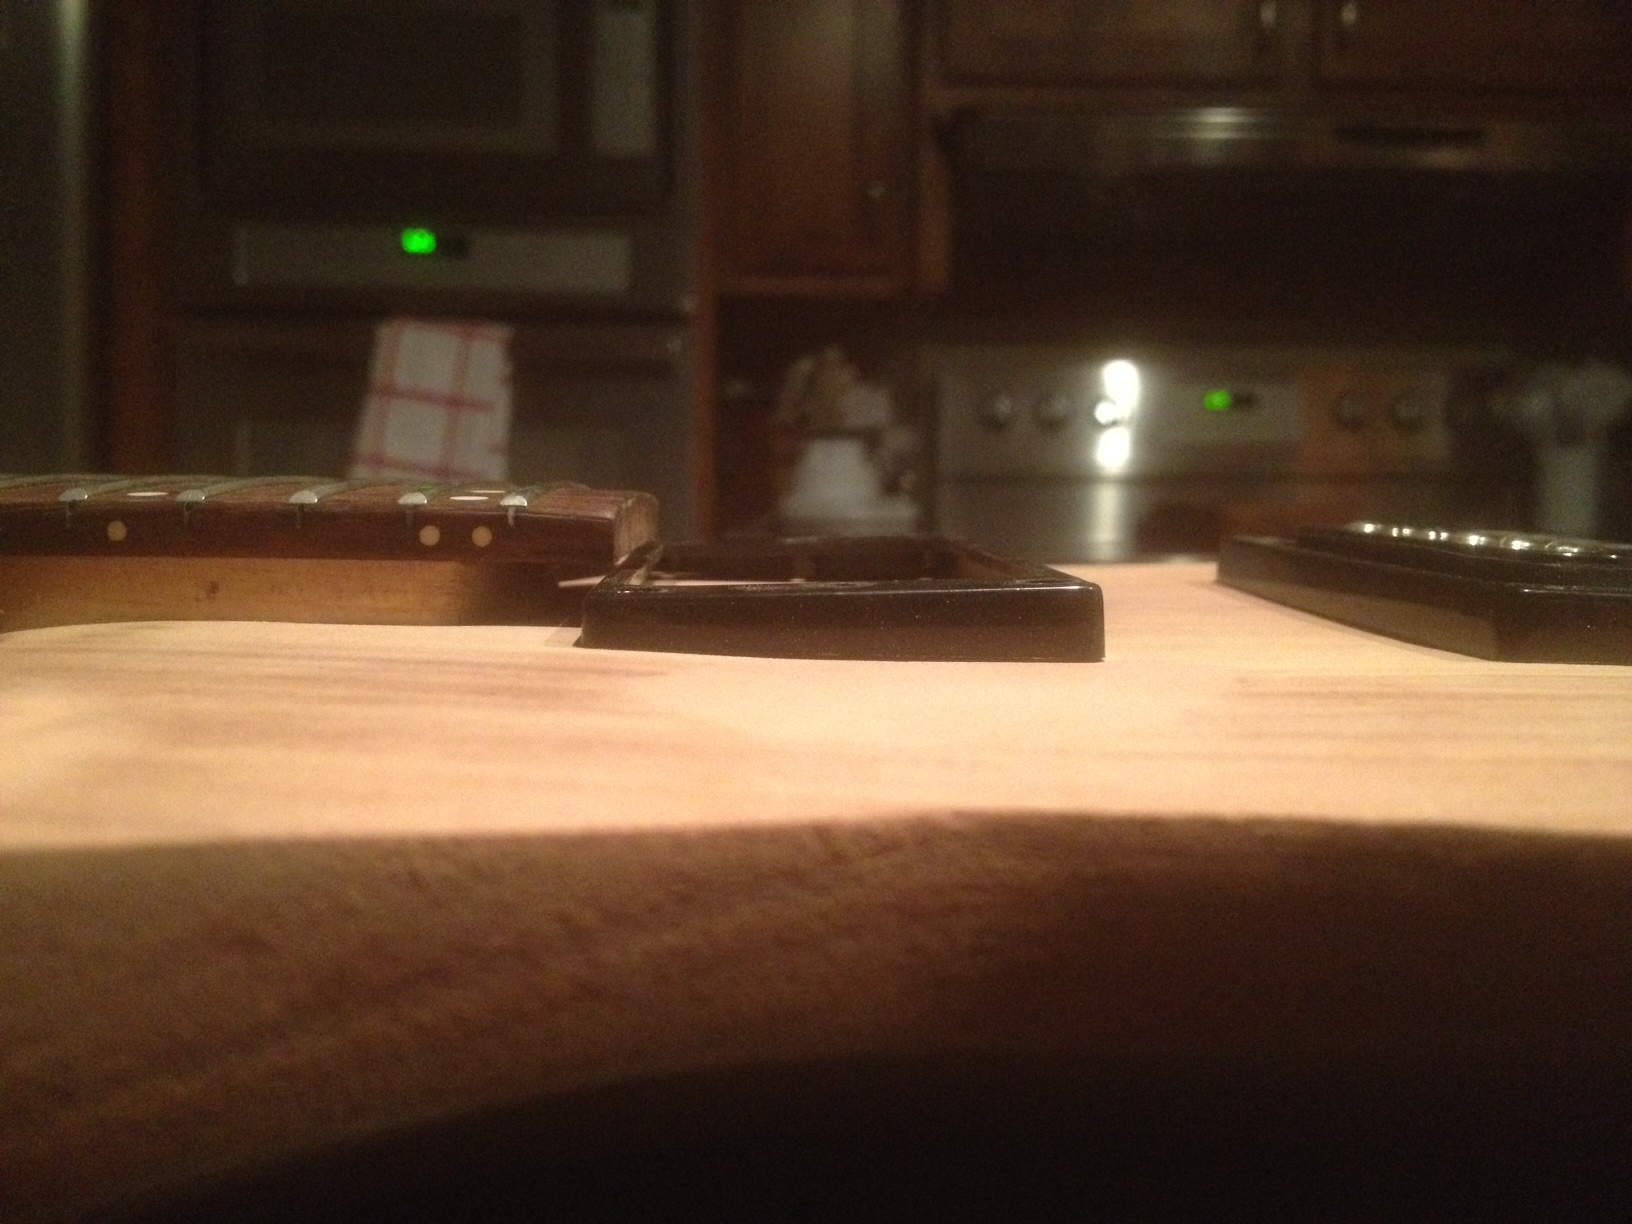
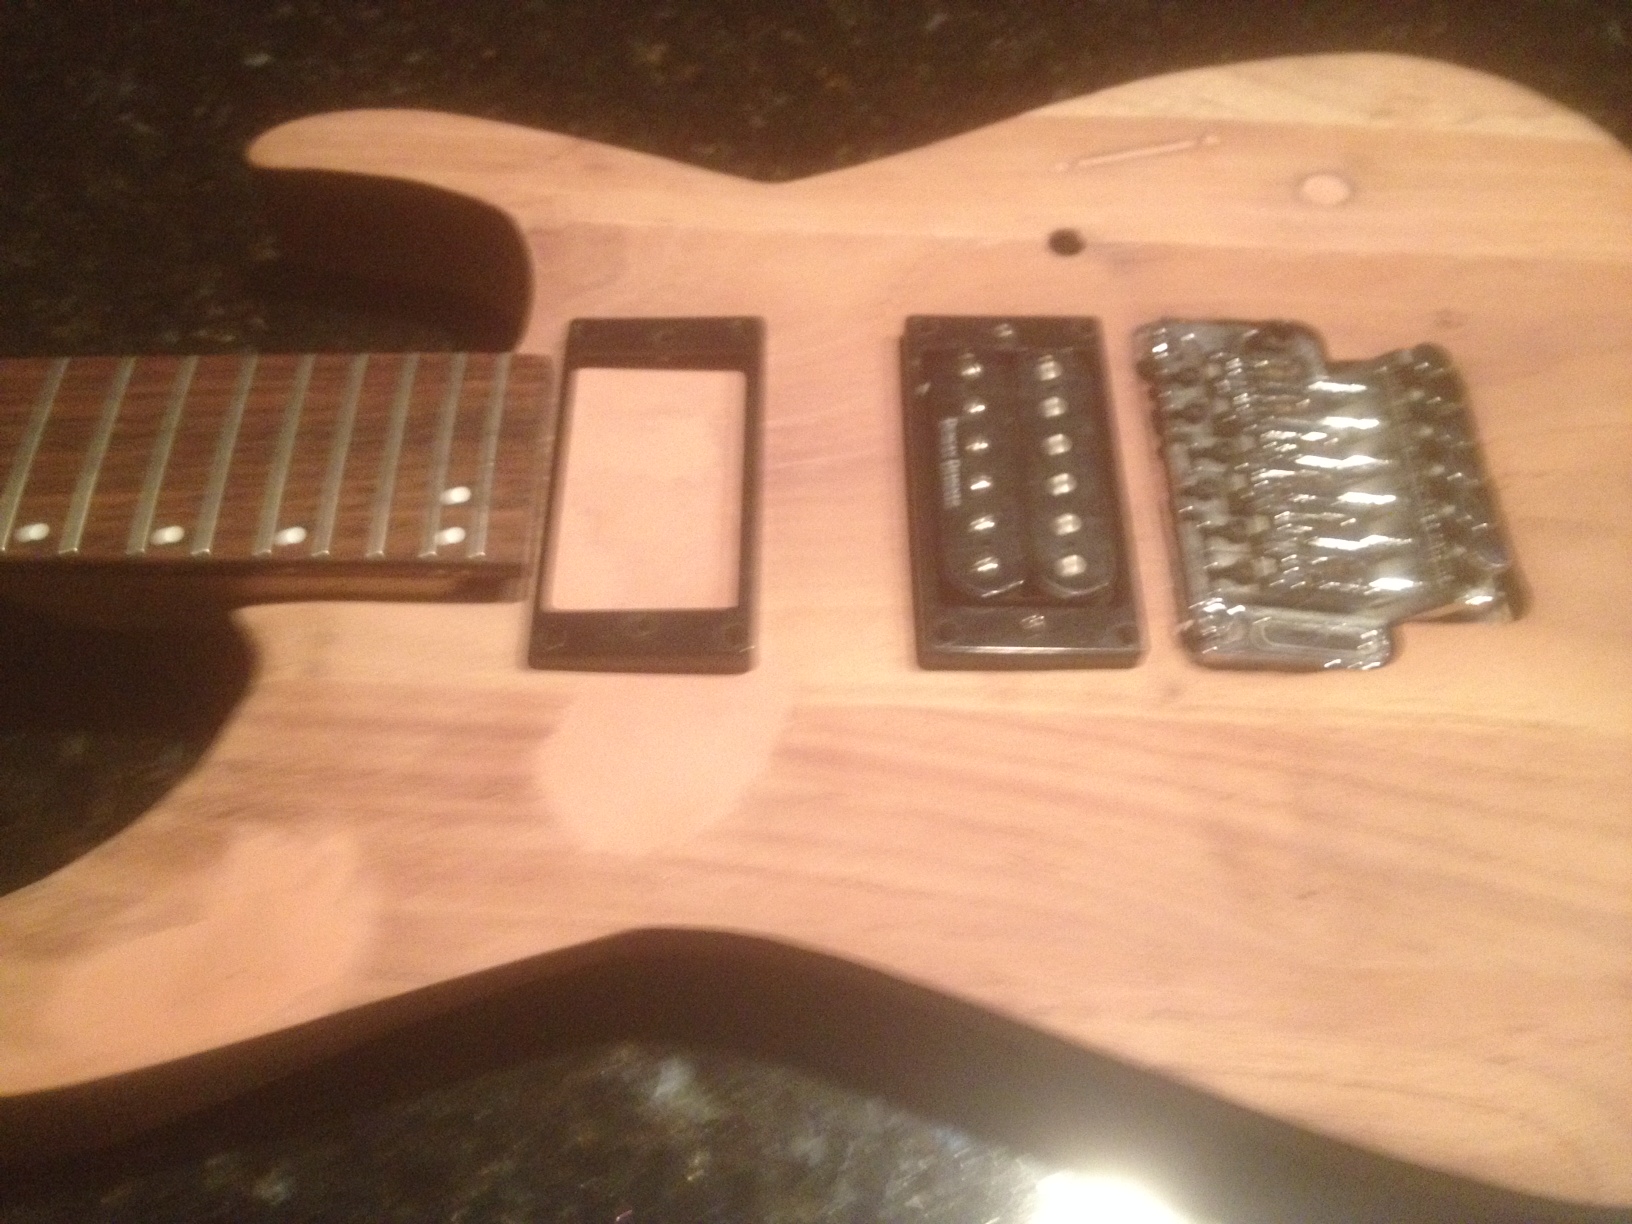
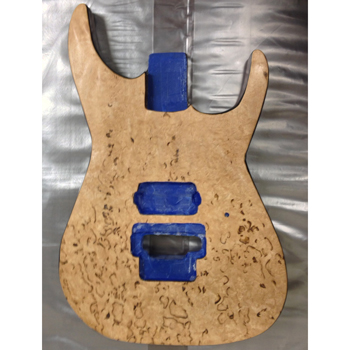
And here's the body as of this morning - with 1 more sanding to go. I also found out I need to get a little bottle of black shielding paint for the cavities (learn something new everyday)
Posted by: Spock Apr 11 2014, 04:34 PM
While researching "staining mahogany" I found this video, and this guys fretboard has a gap to the body as well.
Plus I found this thread too talking about newer Fender Telecasters with the gap overhang - and since Jackson is owned by Fender now, I'm guess this is normal on many guitars.
Small gap between fingerboard and top of body.
http://www.tdpri.com/forum/telecaster-discussion-forum/131899-small-gap-between-fingerboard-top-body.html
Posted by: Spock Apr 12 2014, 01:57 AM
After 3 trips to Lowe's Home Improvement, 1 to Walmart and another to WoodCrafters - all today, I made the last sand when I got off work with 220 grit sandpaper and finally put the first coat of stain on.
I struggled with whether or not to put a coat of wood grain filler on or not, because it smooths out the wood to make it look pristine - like all PRS guitars, but since the front veneer is going to be so natural, lumpy and rustic, I decided to not do the grain filler and just go ahead stain.
After 1 coat, I think that is as dark as I want it, the hint of red is awesome and wood grain looks great. There are some spots I'll need to touch up, especially inside the lower arc, but all and all, I'm very happy with the decision to stay rustic - plus it makes mistakes appear more like character.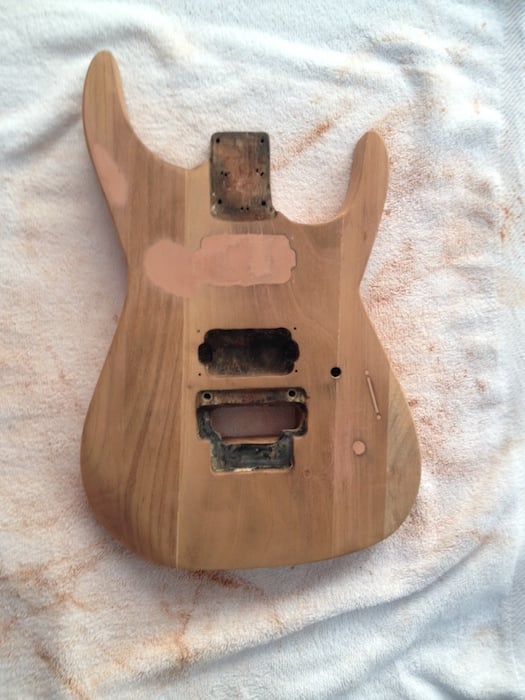
Posted by: Spock Apr 12 2014, 11:26 AM
Veneer
Rolled out the veneer and decided where I wanted to cut a piece from.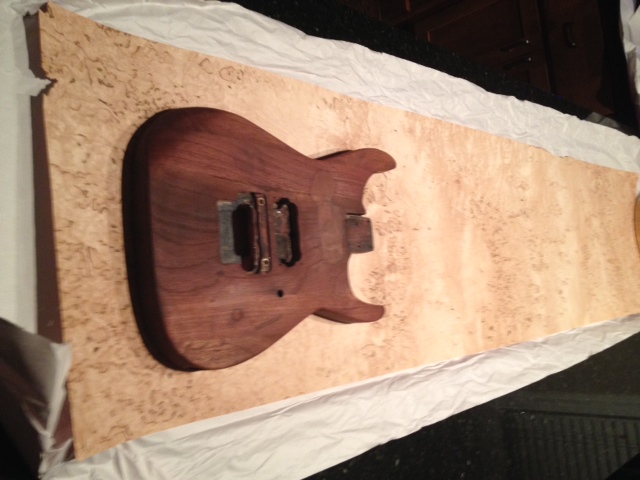
Cut out a piece roughly 2' x 2'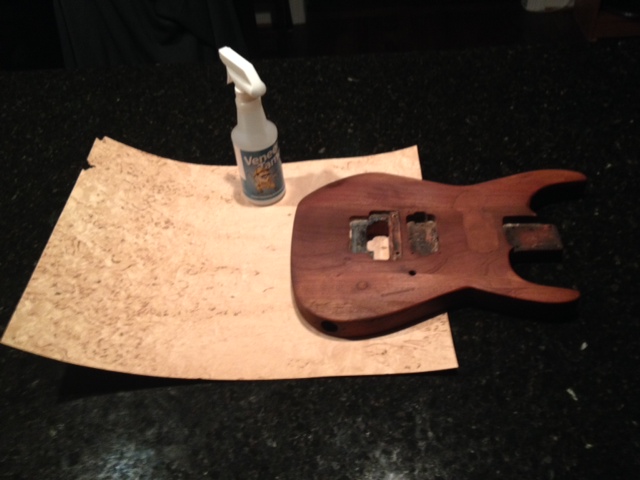
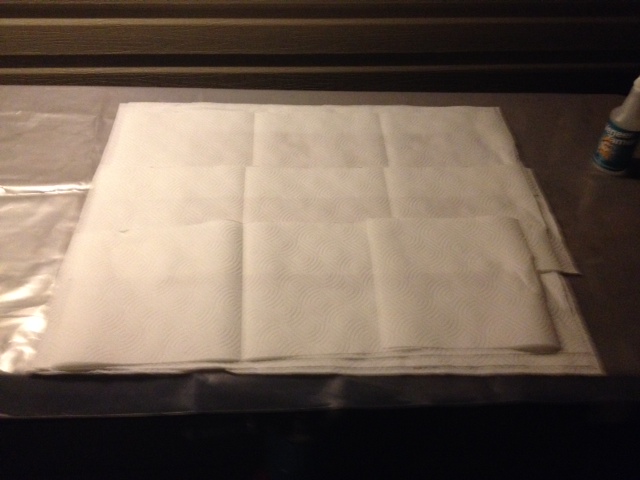
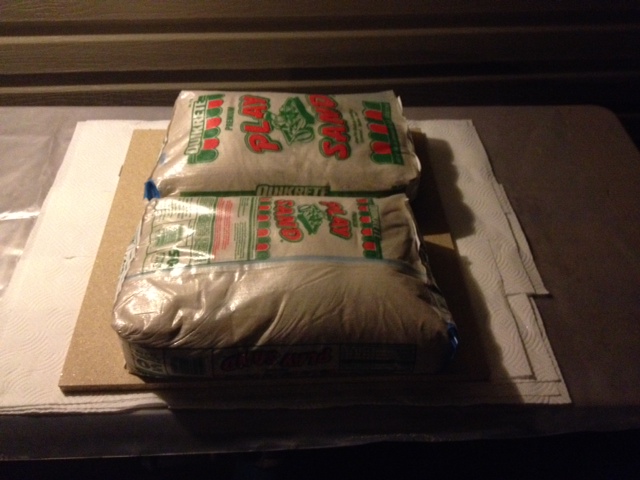
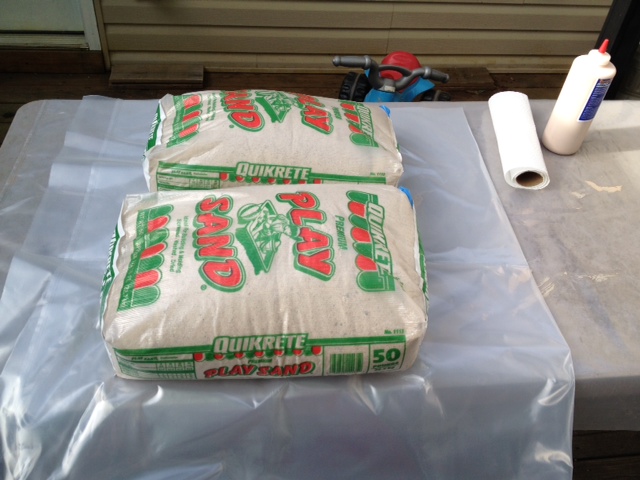
After totally saturating it with "Veneer Tamer", I laid out some plastic on a table, then some paper towels, then sandwiched the veneer between more paper towels, a heavy flat piece of particle board and put (2) 50 pound bags of sand on top of that. This is a poor mans vacuum press but should work fine, and the sand bags are also the way I will shape the veneer to the contour of the guitar. (24" x 24" particle board $4, 50# bag of sand $3.50 each, Paper Towels 88¢, plastic sheet - free scrap - Total: $12)
The Veneer Tamer makes the wood more pliable and less brittle. Supposed to allow the veneer to totally dry out this way, so it's 6 in the morning, I'm hoping by tonight it will be ready so I can apply it tomorrow morning.
Today I will spot stain some areas on the guitar body while this process takes place.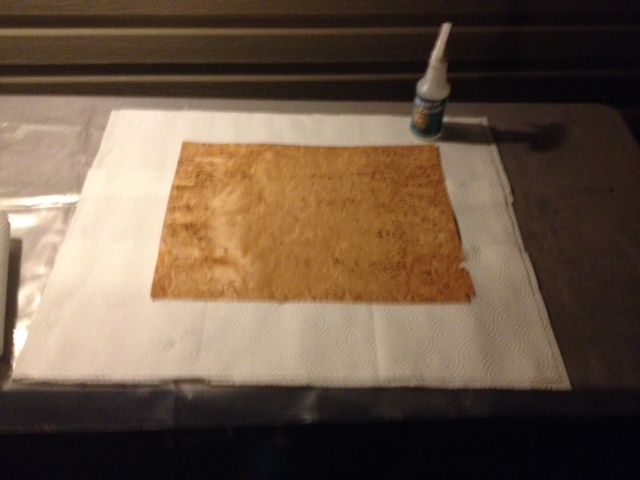
Posted by: bleez Apr 12 2014, 07:39 PM
man, its great how this is turning out Im looking forward to seeing it with this veneer on.
impressive work so far mate.
Posted by: Spock Apr 12 2014, 07:56 PM
Thank you sir. I don't know if it will ever play again, but I'm enjoying the experience and the next time around will know what initial mistakes not to make. I'm just anxious to see how the body turns out too. I plan on doing the headstock as well.
Posted by: Spock Apr 13 2014, 04:29 AM
okay so...
It's 11:22 p.m. and the veneer still is not right - I sprayed it down and put it under the sand bags at 6 a.m. this morning, so it's been 17.5 hours. It is pliable, but it's sort of wavy, even though it's been in the sun under all that weight. I guess I will move it inside to the kitchen counter for the night and see how it is in the morning.
I watched one video where the guy said he was going to leave the saturated veneer in the vacuum bag for 24 hours - so I have to think that the vacuum seal is a better and quicker option than sand on a thick board. Of course, I am impatient, but I will just wait it out and see if it continues to flatten.
Worse case scenarios are: I have to spray it down again and repeat the process, put it on while it's a bit damp maybe, or, put it on with waves and hope the veneer glue secures it tight.
My hope is that waiting it out will eventually bring it to a flat, pliable sheet. And the only way to know is to wait until it is flat again, and see if it's pliable.
Posted by: Spock Apr 13 2014, 07:02 PM
This has been the absolute hardest part so far. There are a few lumps in the veneer in between the pickup and the neck, but nothing major and the quilted grain in the wood hides it well. When you hear people say a quilted look gives a "cool" 3-D effect, well, this one will have more than just the effect - but shouldn't mess with anything too much, and could still dry out more.
I had a lot of trimming to do and also because of the runs from the veneer glue, I had to sand the entire guitar to get it off, so I'll have to stain the back and sides again, after more sanding.
Cutting out the pickup hole and the tremolo area were tedious. But the exacto knife did a great job and I found cutting along the edge of the guitar to be simple - relatively speaking.
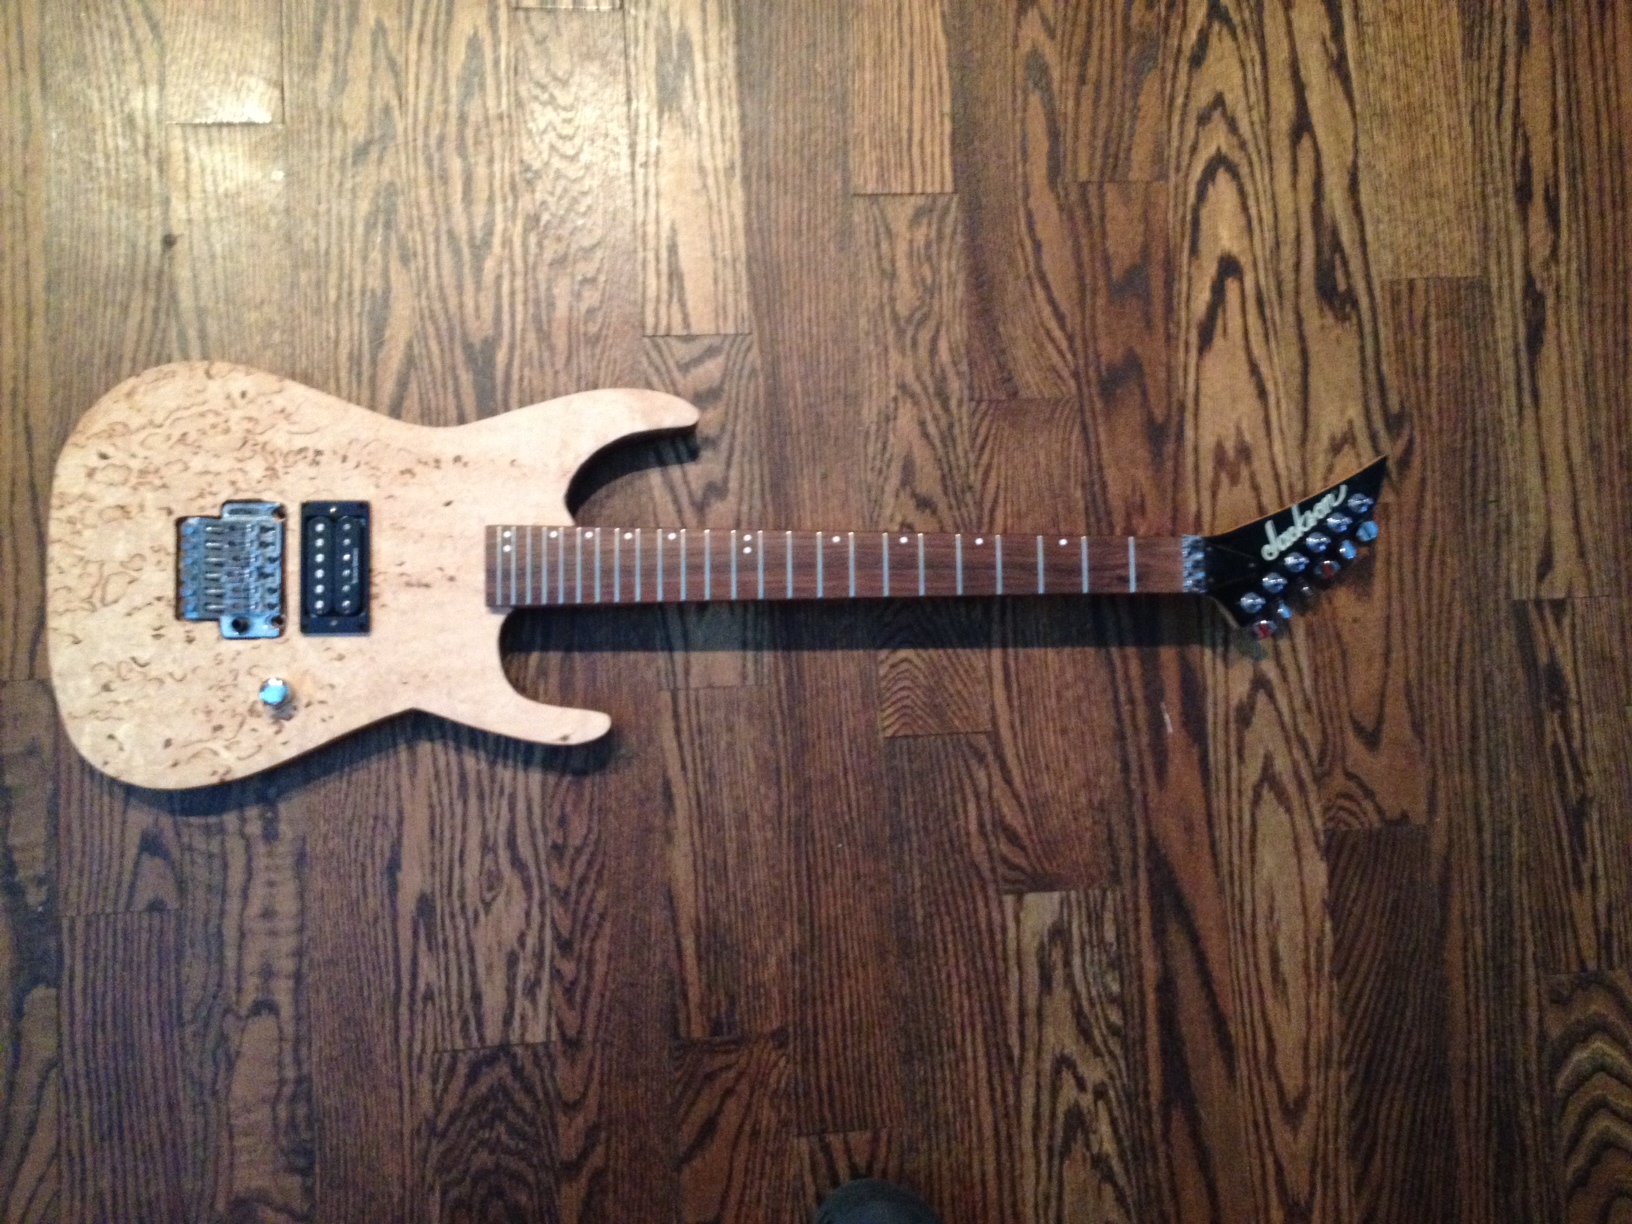
So - I went ahead and put the neck back on and put the pickup and tremolo in the hole just to give a vague idea of the finished product. This has no sealant or lacquer on it yet, and I want a black tremolo, knob and I have another pickup instead of that one seen here. Also, i just placed the volume knob up on the body, it's not over where the hole for it will be, I haven't cut that out yet.
Still got a lot to do - but getting there. Personally, i already like this better than when it was just black.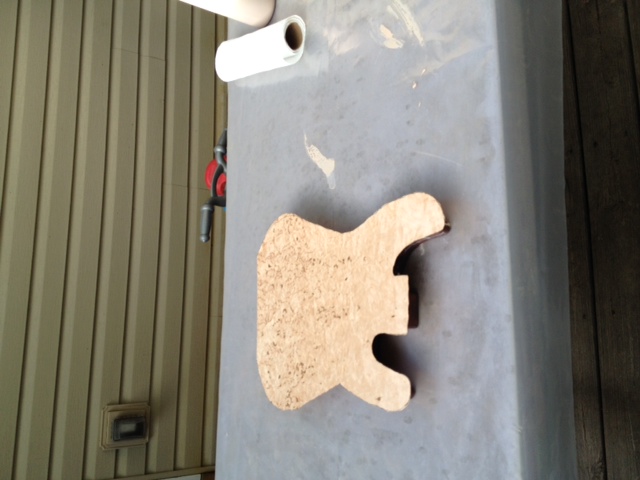

Posted by: Spock Apr 13 2014, 07:43 PM
It's personal preference, but I do love the wild wood look, and to me, I don't care much for solid black - unless it's matte black, love that.
So far...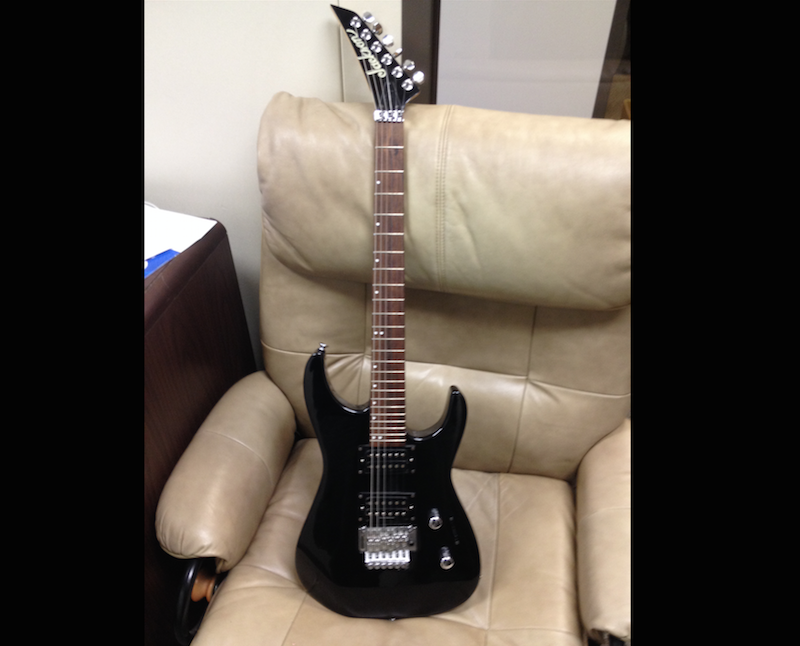
Posted by: Spock Apr 13 2014, 09:08 PM
BREAKING NEWS!!!
The veneer is flattening out! I pushed at the lumps best I could and could still feel the moistness in the wood. But this is the first time I have had the veneer out in the air for any length of time since placing the sandbags on it. And it appears, the dry spring air is working on the wood and flattening that area.
Anyway - I guess I'm cataloguing these events because I'm sure there is someone out there that wants to do this too, and maybe this will help them through the process, because I was not able to find a specific thread or video to do what I am trying to do here, just pieced information together from multiple sources on the net, understanding this could still end in complete catastrophe.
But with each set-back, there has been a way to recover, and I stay wholeheartedly optimistic.
Posted by: Spock Apr 16 2014, 04:57 PM
Because of the runs of veneer glue, I had to sand off much of the stain from the sides and back - not all the way off though, just to make it even. I did not want the stain soaking into the top, so I taped it off just short of the edge of the veneer and stained again. This left an unfinished line between the top and sides...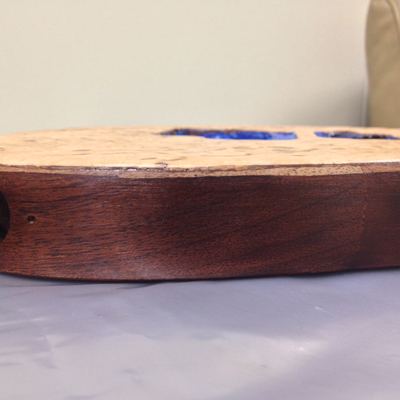
Above was still raw wood.
I've used 2 coats of satin lacquer and then 1 coat of wood sealer. Sanding lightly after each coat of lacquer.
This gave a thin poly type finish - making the base to adhere the fake binding - which is black "3M" 471 conformable vinyl Tape.
Next, I'll put on another coat of the water based satin lacquer.
when that dries I'll do 1 or 2 coats of shellac. This will create more of a shell barrier to insure the tape "binding" stays secure.
After that dries - I'll apply 8 to 12 more coats of the vinyl lacquer.
Here is the key, you can't use water based lacquers on top of shellacs that contain wax. The lacquer will not stick or bond to the shellac. The brand posted above contains no wax in the aerosol can version. But if purchasing, just make sure that it does not. This is not a necessary step to take - but I like the slight amber glow the shellac will give, and under another 12 coats of satin varnish, it should not come across plastic looking at all. I did test this on scrap wood and tape before attempting on this guitar.
Here the guitar body as of right now, a lot more lacquer and sandings to go, but still very pleased with how it's turning out.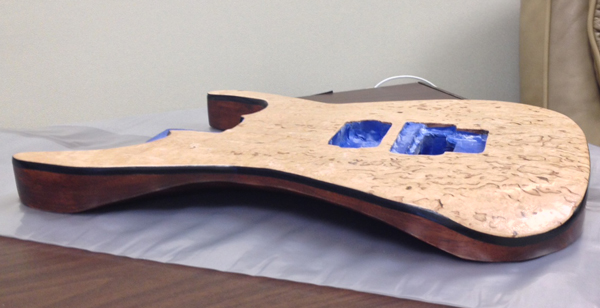
Posted by: Blister Apr 16 2014, 05:59 PM
I just saw this thread today. I love before & after stuff as well as seeing the process. This is a great project & thanks for sharing!
Posted by: Spock Apr 16 2014, 07:43 PM
Thanks Blister. I hope this thread will maybe help someone else out in attempting the same thing. Buying a cheap used guitar and making it better.
I have learned more about the anatomy of a guitar, along with wood working and finishing in the last 2 weeks than I have ever known in my entire life. And - it's tremendously fun, tedious and rewarding.
I can guarantee I will be refinishing another guitar soon, but next time I may do a bass - I would love to get a hold of an old Fender Jazz for about $150 to $200 and give it a wood finish.
Posted by: Spock Apr 17 2014, 10:59 AM
Since that last picture I've added 3 more coats of lacquer - 9 or 6 more to go, depending. I want a barrier of at least 8 coats above the tape. I put today's first coat on at 5 a.m., and I have my stuff to take to work with me. Hoping to put on a new coat every 4 hours.
It is popping right now, and each coat makes the over-all project look more and more professional.
I just hope this thing will, not just play good, but play at all!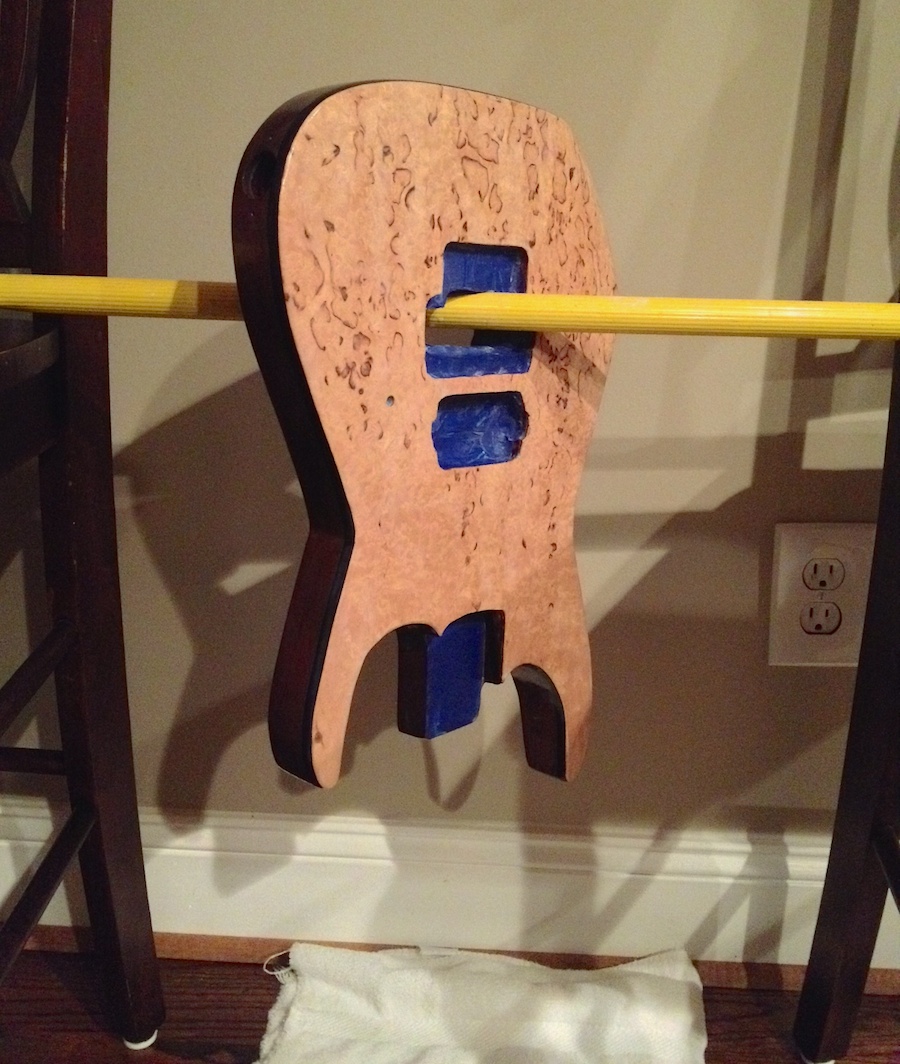
F.Y.I. The wood on top is called "Karelian Birch Burl" - I love this pattern personally and picked it over quilted maple - because each piece seemed so unique to itself. Although, I would like to do something with a thick sheet of quilted maple one day.
Here is a drum done with the same wood - and this color is a better representation of the color of the front of the guitar - the picture I posted is showing more reddish-yellowish hues from the dimmed kitchen light.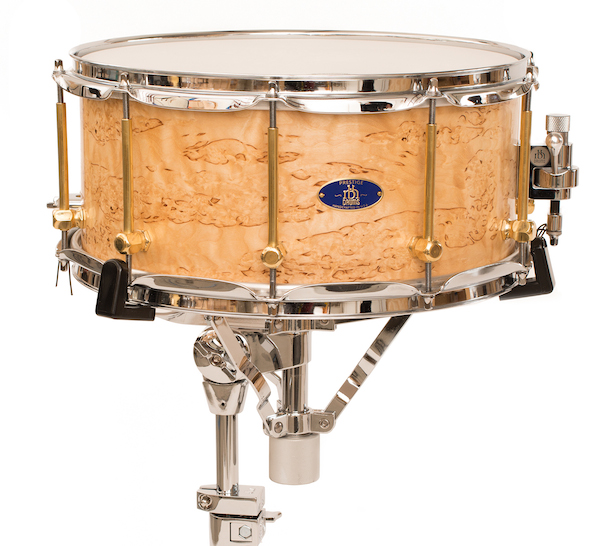
Posted by: Sensible Jones Apr 17 2014, 05:31 PM
It's looking good mate!!!
It will look killer with the Headstock done and all black hardware!!!
Congrats on your first one and may there be many more to come!!!

PS. When doing veneers like this in our W/shop we use Leather Bags filled with sand, exactly like your bags, and then it would be put under a press for added pressure. This may have helped with that moisture lump issue. To do it in your home/garage or wherever, place a piece of MDF/Ply on top of the Sand Bags and then place all manner of heavy objects on to the board to press the bags right into the shape of the body. Leave for a day or so and voila!!!
Posted by: Spock Apr 17 2014, 11:39 PM
That makes perfect sense S.J. Adding the weight on top of the sand bags - and using leather. I considered pouring the sand into a very large bag, bought thought it may run down the sides and not leave enough on top.
I found out a valuable lesson today. I have been sanding between coats with a 320 grit sandpaper, which keeps taking the lacquer down to the wood in spots. Finally realized to use a 600 grit and do it wet - which worked perfectly. So I am hoping this lacquer drying on the back is my last application - except for one spot where I had to actually touch up stain a tiny bit.
I finally realized to raise the body off the surface of what it is sitting on, and tape the bottom edges to keep the lacquer from running down the sides and puddling under. I wish I had known all this when I started - but next time I will.
Also just got in my TINY, ITY BITTY 1 oz. bottle of Hum-Bugger conductive paint to paint the guitar cavities with. Evidently you need this to shield electronics and reduce humm - it acts as sort of a faraday cage.
I decided to go with a Single Locking Floyd Rose "Licensed" black tremolo and parts. I figured the easier to string up, the better, plus I got it brand new from ebay for $24. May not last long, but it should look cool even if I have it locked in place.
Posted by: Sensible Jones Apr 18 2014, 12:50 AM
You're fine using one or more bags for the sand, just as long as the whole surface area is covered!
This guy shows how to Wet Sand really well:-
You could also use adhesive Copper Sheet for shielding as I didhttp://www.guitarmasterclass.net/wiki/index.php/Build_your_own_Guitar
Single Locking is fine but you may decide you need Locking Tuners after a while!!
Posted by: Spock Apr 18 2014, 02:12 AM
This guy shows how to Wet Sand really well:-
You could also use adhesive Copper Sheet for shielding as I didhttp://www.guitarmasterclass.net/wiki/index.php/Build_your_own_Guitar
Single Locking is fine but you may decide you need Locking Tuners after a while!!
GREAT VIDEO!!! And thanks for posting this here. Wish I had watched this one before I started. My guitar will not turn out anything near as immaculate as his, but learning all these tricks along with practice is the key.
So tomorrow, back to the store for 400 and 2000 grit paper!
Posted by: Spock Apr 18 2014, 11:00 AM
Just applied my last top coat. This stuff dries and hardens really fast, so I hope to take it to work with me today and dry sand it exactly as that video showed. All together I got 10 coats on it before I ran out. I did the back and sides last night and they were beautiful once it dried and I flipped it over to do the front.
This stuff is amazing. When it goes on it's milky and just sort stands on the top and drips down the sides, you can see brush strokes and everything. But as it hardens it binds together and creates a smooth even surface with no brush strokes of any kind. With the exception of the feel, it's hard to tell that anything has been put on it - which is a far cry from when you're laying it on thick like these last coats...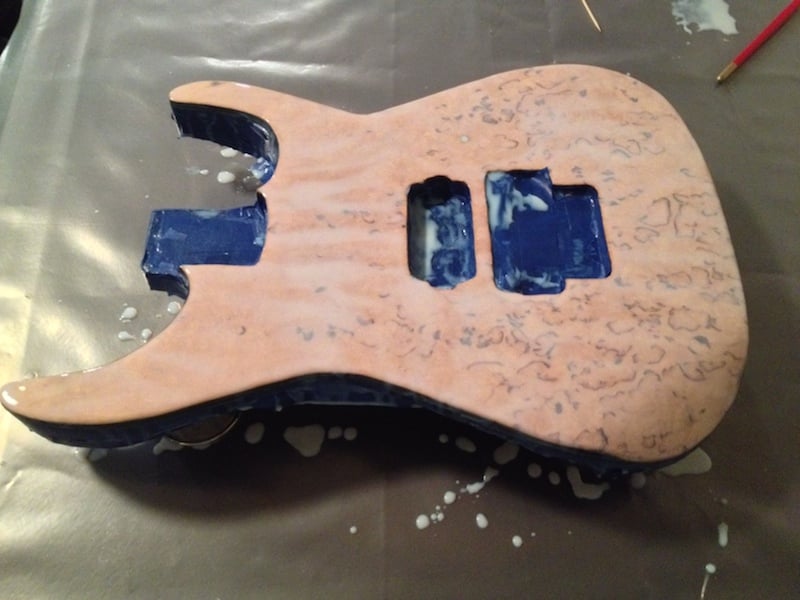
I've been saying lacquer this entire time, but I was wrong, it's actually a High Performance Polyurethane Water Based Top Coat which was suggested to me by a member of the local builders guild which builds cellos and violins - of course, he wouldn't put this much on a resonate instrument such as those, but he has watched this guitar transformation since I took it in charred to a crisp.
Posted by: Sensible Jones Apr 18 2014, 03:08 PM
So tomorrow, back to the store for 400 and 2000 grit paper!
I'm only sorry I was a bit late in posting it!
I'd also suggest an intermediate grit, like an 800 or a 1200 too. As is pointed out in the Vid, you don't want to 'burn' through the built up layers now!!
I have to say though, I love your choice on the veneer and your placement of it! I think if I'd have had it here I may have been tempted to stain it, I reckon that piece would take it really nicely!! Especially a Black stain to start with, just to accentuate those grain swirls before adding a colour!!
Posted by: Spock Apr 18 2014, 04:02 PM
I'd also suggest an intermediate grit, like an 800 or a 1200 too. As is pointed out in the Vid, you don't want to 'burn' through the built up layers now!!
I have to say though, I love your choice on the veneer and your placement of it! I think if I'd have had it here I may have been tempted to stain it, I reckon that piece would take it really nicely!! Especially a Black stain to start with, just to accentuate those grain swirls before adding a colour!!
I wanted to do that. My idea was to go with a light amber, then sand it off and go with a natural, that would have popped the quilt, but my fear was how thin the veneer was and how deep the stain would go. I played it safe by not doing it.
My fear now is that I am hoping the last clear coat i put on this morning was not too thick. It's almost dry, but it has never taken it this long, and it has been almost 6 hours since I put it on.
I guess I won't be sanding and buffing today as I eagerly hoped - I'll need to let this extra thick coat cure first.
Impatience gets the best out of me every time.
Posted by: Spock Apr 18 2014, 10:14 PM
WELL DAMN!!!
The front looks great now, but the top clear coat leaked through my tape and built up, and dried, in little puddles and bubbles on the back and sides - and the back and sides were PERFECT!!!! So I had to shave some of that off with a blade, then sand down other areas, and will have to put a light coat of poly on the back and sides again tonight. I'm glad I still have a little left.
This is monotonous. I have to somehow insure that the painters tape is secure enough not to allow the poly to leak through - which it did not last night, but did this morning.
This is what happens when you're an amateur.
Posted by: Blister Apr 19 2014, 04:37 AM
"It's not a problem to make a mistake. The problem lies in when you continue to make the same mistake rather than learn from it."
Not exactly how it was originally worded but I love that quote!
Keep up the good work, Spock, we're cheering you on!
Posted by: Spock Apr 19 2014, 05:34 AM
Thanks man!
All is good tonight. I fixed those areas and removed the painter's tape from the cavities to paint black tomorrow. Once it dries I'll do the wet sand and wax.
At that point it's just putting the parts on. The tremolo should be here sometimes this week - I think Wednesday, put I can go ahead and put in the pickup and volume knob <---- which will require more you-tube learning lessons.
Posted by: Spock Apr 19 2014, 06:45 PM
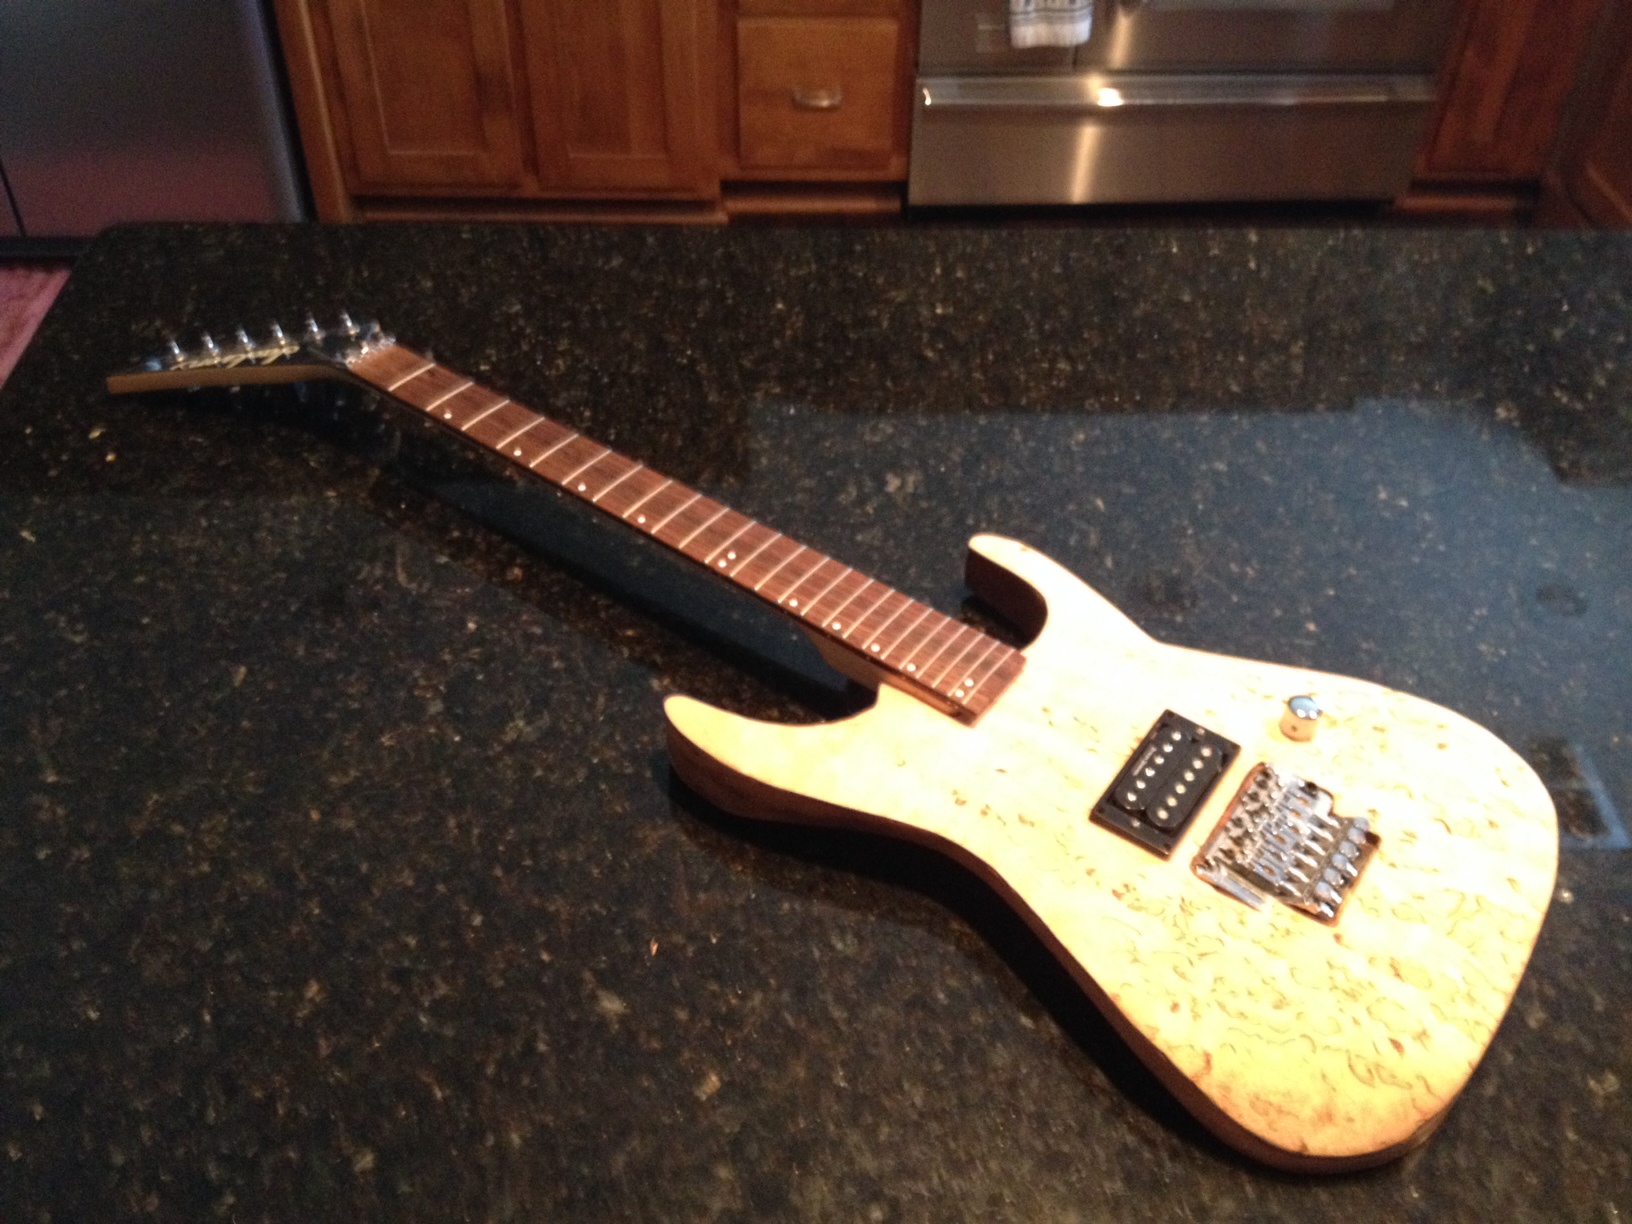
READY FOR HARDWARE!!!
It screams amateur in places - but from 2 feet away, it looks really, really good.
I won't use vinyl tape for faux binding next time I take on another of these projects. The tape does the trick, but when you stare at this from close range and pour your heart and soul into it, you know you want more - I guess it's like music or any other art form.
However, I am VERY, VERY pleased with the outcome.
After yesterday's catastrophe, I came home, cut, sanded, touch-up stained, recoated, re-sanded.
This morning I wet sanded with the 400-grit sandpaper and then the 2000 grit, then shined with Turtle-Wax auto wax. Still need to buff it better as I just used a dry cloth, but I'm okay with this to present as "Ready for Hardware".
These pictures are not wet, or after being wiped down with water - they are true to the finish and the auto-wax I used on it.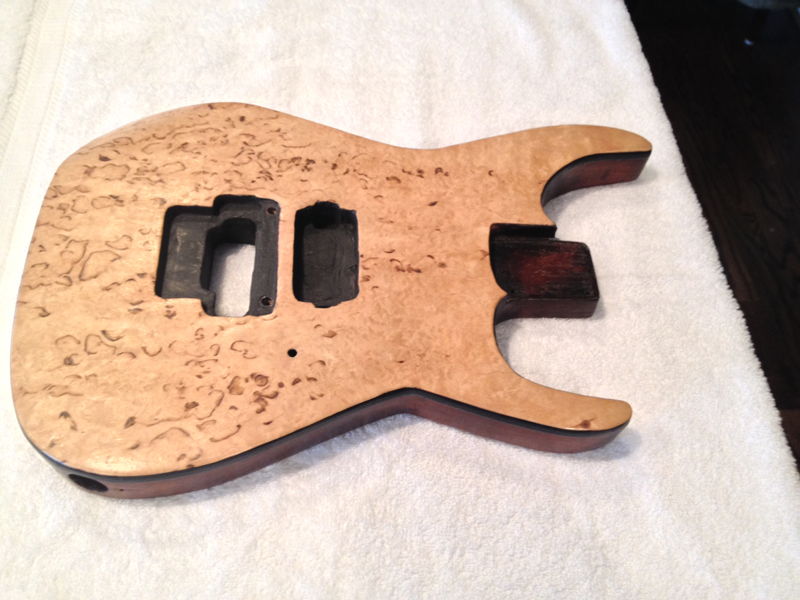
Posted by: Sensible Jones Apr 19 2014, 07:54 PM
Looking good!!
All these things are learning curves! You should see my first attempts at building, they were nowhere near as good as the results you've achieved here!!
The wiring shouldn't give you any problems, that's about as basic a set-up as you could have!!
Posted by: Spock Apr 19 2014, 08:07 PM
Thanx S.J.!
You are right, all this has been a wonderful learning experience. I am ready to spend all my obsessive time actually playing again. I think I've played a total of 4 hours in the last 2 weeks because of this.
Posted by: Sensible Jones Apr 20 2014, 06:17 PM
You are right, all this has been a wonderful learning experience. I am ready to spend all my obsessive time actually playing again. I think I've played a total of 4 hours in the last 2 weeks because of this.
Hehehehe!! I know that feeling only too well!!!
Posted by: Spock Apr 20 2014, 08:30 PM
The bridge was delivered yesterday and it didn't fit there recessed cavity, so I had to use my dremel tool as a router and make it bigger, then paint that area again - also had to make a thin gasket out of a piece of veneer to go between the body of the guitar and the neck plate on the back, this was to compensate for the lose of the veneer when it was stripped.
I don't have the wiring hooked up, and I'm not sure if the intonation is correct or not yet, but it is in tune, great action - just has a little buzz on the G string - so now going through You-Tube looking for videos on how to set intonation and fix fret buzz on a single locking tremolo.
I put my PRS HFS Treble pickup in it to replace the crap that came with it.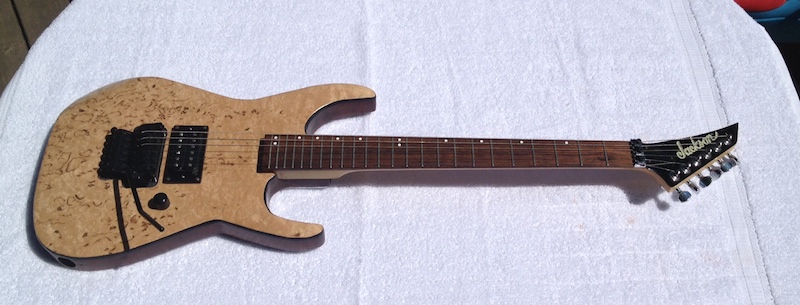
Posted by: Spock Apr 21 2014, 10:08 AM
Better pic. Volume knob not on cause still don't have electronics hooked up
Posted by: bleez Apr 21 2014, 10:12 AM
man, it looks so cool what an awesome job you've done on this. excellent choice on the veneer, its really eye catching.
Posted by: Spock Apr 21 2014, 11:43 AM
Thanks Bleeze.
Truth be known I've coveted Ben's single humbucker Jackson since the first day I saw it, so I drew inspiration from that, knowing I couldn't afford the real thing - but always loved the natural wood grains that aren't duplicated so often - like a quilted or flamed maple - though I still love those looks.
Posted by: klasaine Apr 21 2014, 04:16 PM
Nice job man! From the pictures it looks really good.
Posted by: Blister Apr 22 2014, 04:55 AM
Wow! She's looking great! I can see it in her, she's just begging to be played!
Posted by: Spock Apr 22 2014, 08:28 AM
Thanks I'm anxious to hear it too. I was able to work out the buzz on the G string. Just figured out how to set the floating bridge and lower and higher the action at the same time.
I'm having the guy that's working on my other Jackson to do the wiring and adjust intonation. I just got black Schaller strap locks for it and some black Jackson reverse head tuning keys too. I really like the black headstock so I think I'm going to leave it as it is - but that should finish out the hardware change.
Posted by: Caelumamittendum Apr 22 2014, 12:44 PM
Awesome project and it was fun following here! The guitar looks great!
Posted by: Sensible Jones Apr 22 2014, 02:31 PM
It's looking good all polished out!! Great job mate!!
Like I said all through this project, for a first attempt you've done a spectacular job!!
Congrats again and I look forward to hearing it! You may be surprised how different it sounds by having the Neck P/up cavity filled!!
Posted by: Spock Apr 22 2014, 03:38 PM
If it makes a sound at all I'll be thrilled!
Posted by: Sensible Jones Apr 22 2014, 05:54 PM
That shouldn't be a problem!!
Posted by: Mertay Apr 22 2014, 06:08 PM
I like it it also has a vibe as aging would really make it cooler in time, its a keeper
Posted by: Spock Apr 24 2014, 11:59 AM
Thank you guys for all the very gracious feedback. It was this thread and knowing people were watching which helped make this process be completed and more fun!
I put the new black nut and black tuning knobs on it last night. All that is left is the soldering of the wire to the volume and pickup jack - which I'll let someone else do. Also waiting on black Schaller strap locks in the mail.
I'll post a final picture once all that is done showing all black hardware and everything hooked up.
BTW - the back plate won't go on it, because the tremolo bracket that screws into the guitar stick out just a hair above the back of the guitar - this is from losing that veneer I'm sure. and the plate that goes over the volume knob cavity over hangs the edge by a hair too - I can use the dremel tool on that however.
My next project is going to be a Dean Edge bass that someone gave me a few years ago. I just want to make it natural and I'm hoping the wood is a light color. I'll know on this bass not to go after the current finish like a madman with the heat gun and take more care to preserve the wood underneath.
Posted by: jstcrsn Apr 24 2014, 01:33 PM
IMO , get a high grade paint stripper( you will need a respirator and good acid resistant gloves )this will produce less damage and strip it ia about half an hour,There is a learning curve to using stripper well ( no pun intended),but not much,especially if you ever want to use the natural wood of the guitar
Posted by: Spock Apr 24 2014, 01:41 PM
Good idea, I have used stripper before while refinishing a dining room table - that was a loooooong time ago. What I remember most about it is how bad it burned when it got on my bare skin.
I inspected the bass this morning and you can see the wood grain under the poly. It is a red stain - covered with poly but the top is quilted maple and the back is beautiful.
Just like this - but this is not my bass...
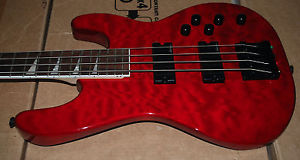
I'll start researching a little because I have heard that striper won't work on some poly coatings on guitars now days - but if I can go that route I will most definitely.
Posted by: Spock Apr 25 2014, 11:19 PM
CATASTROPHIC FAILURE ALERT!!!
I would say "utter humiliation" but I would rather chalk it up to excruciating amateur hard lesson learned.
And, I had fun in the process.
On the way home from work I got a call from the luthier I took the guitar to for wiring.
Well..
Remember this picture...
If you notice just to the right of the neck pocket on the body, located on the neck you will see a finish line, and I'm not sure if I mentioned it on this thread, but I know I did at home, that I did not remember taking that much wood off the guitar to leave that sort of impression on the finish on the neck.
So - that neck is not the original neck for that guitar - which explains everything.
Oh, but wait!!! It gets worse!
When I first got the guitar, the B and E strings were tight against the fretboard and would not play - I figured it was just the tremolo and needed to be set up.
Turns out - the neck is bowed back, and the truss rod is all the way out already - there is no fixing it.
Now, I did get this guitar just to practice quietly on - so that is what it's for now. Not going to bother with a new Warmoth neck for it or wiring. As of now it is in tune, but not intonated - so, any hopes of really getting the best out of this guitar are gone.
I could say I was screwed over by Guitar Center - but I was the fool that took the guitar apart before having it checked out - used - and I had 30 days to make up my mind about it.
So - we win some, we lose some.
I wondered if I would have rather spent that $350 at a strip club, which would have beaten throwing it out the car window, but no, I have exactly what I purchased that guitar for - the frets - and the experience of refinishing and learning.
I'm okay with that.
Posted by: jstcrsn Apr 25 2014, 11:55 PM
And, I had fun in the process.
On the way home from work I got a call from the luthier I took the guitar to for wiring.
Warmoth might have a neck for it
Posted by: bleez Apr 26 2014, 11:27 AM
so when you originally bought the guitar it had a replacement neck on it, do you think guitar centre knew?
man, what a downer. I wouldn't say humiliation at all though, you done a great job on it.
Posted by: Blister Apr 26 2014, 11:19 PM
I'm very sorry to hear this news. 
I know nothing about rebuilding guitars, but if it is just the neck that is the problem & the body is good, why can't the neck just be replaced? 
It has been interesting following your progress.
Posted by: Spock Apr 26 2014, 11:53 PM
Thanks guys for the feedback!
I'm not sure if Guitar Center knew or not - regardless, I had 30 days to test it out to see if it was for me or not, and I just dug into it - so that is all on me. I could have taken it back if I had known, or realized, but at this point it's too late. Guitar Center is more than generous with their 30-day money back guarantee and I have utilized that guarantee many times in the past.
As far as getting a new neck from Warmoth - that is a possibility, but I have 2 brand new guitars (one has not been delivered yet) and I am so in love with this $500 Jackson that I just upgraded to an $900 Jackson that I wonder if the new PRS is going to seduce me. This Jackson is smoking and so much fun, very different from what I am use to.
However, I love PRS - so, I sort of have it figured that the Jackson is going to be used for Standard tuning, the Silver PRS Standard and SE Custom for Drop D, the PRS Custom 22 for Drop C, and the one I just refinished for practicing patterns at the office - so it doesn't really need a pickup, and the finish will look great on a stand in there. I could get a new neck and spend $250 for it, but I would want to send the body in to Warmoth so they could give me exactly what I need, but I really feel that it's not worth the money for what I would use that guitar for.
But I might - just to say I did! - Then I would want a Warmoth body too
Check out the new Jackson though!!! Armed with Zakk Wylde EMGs...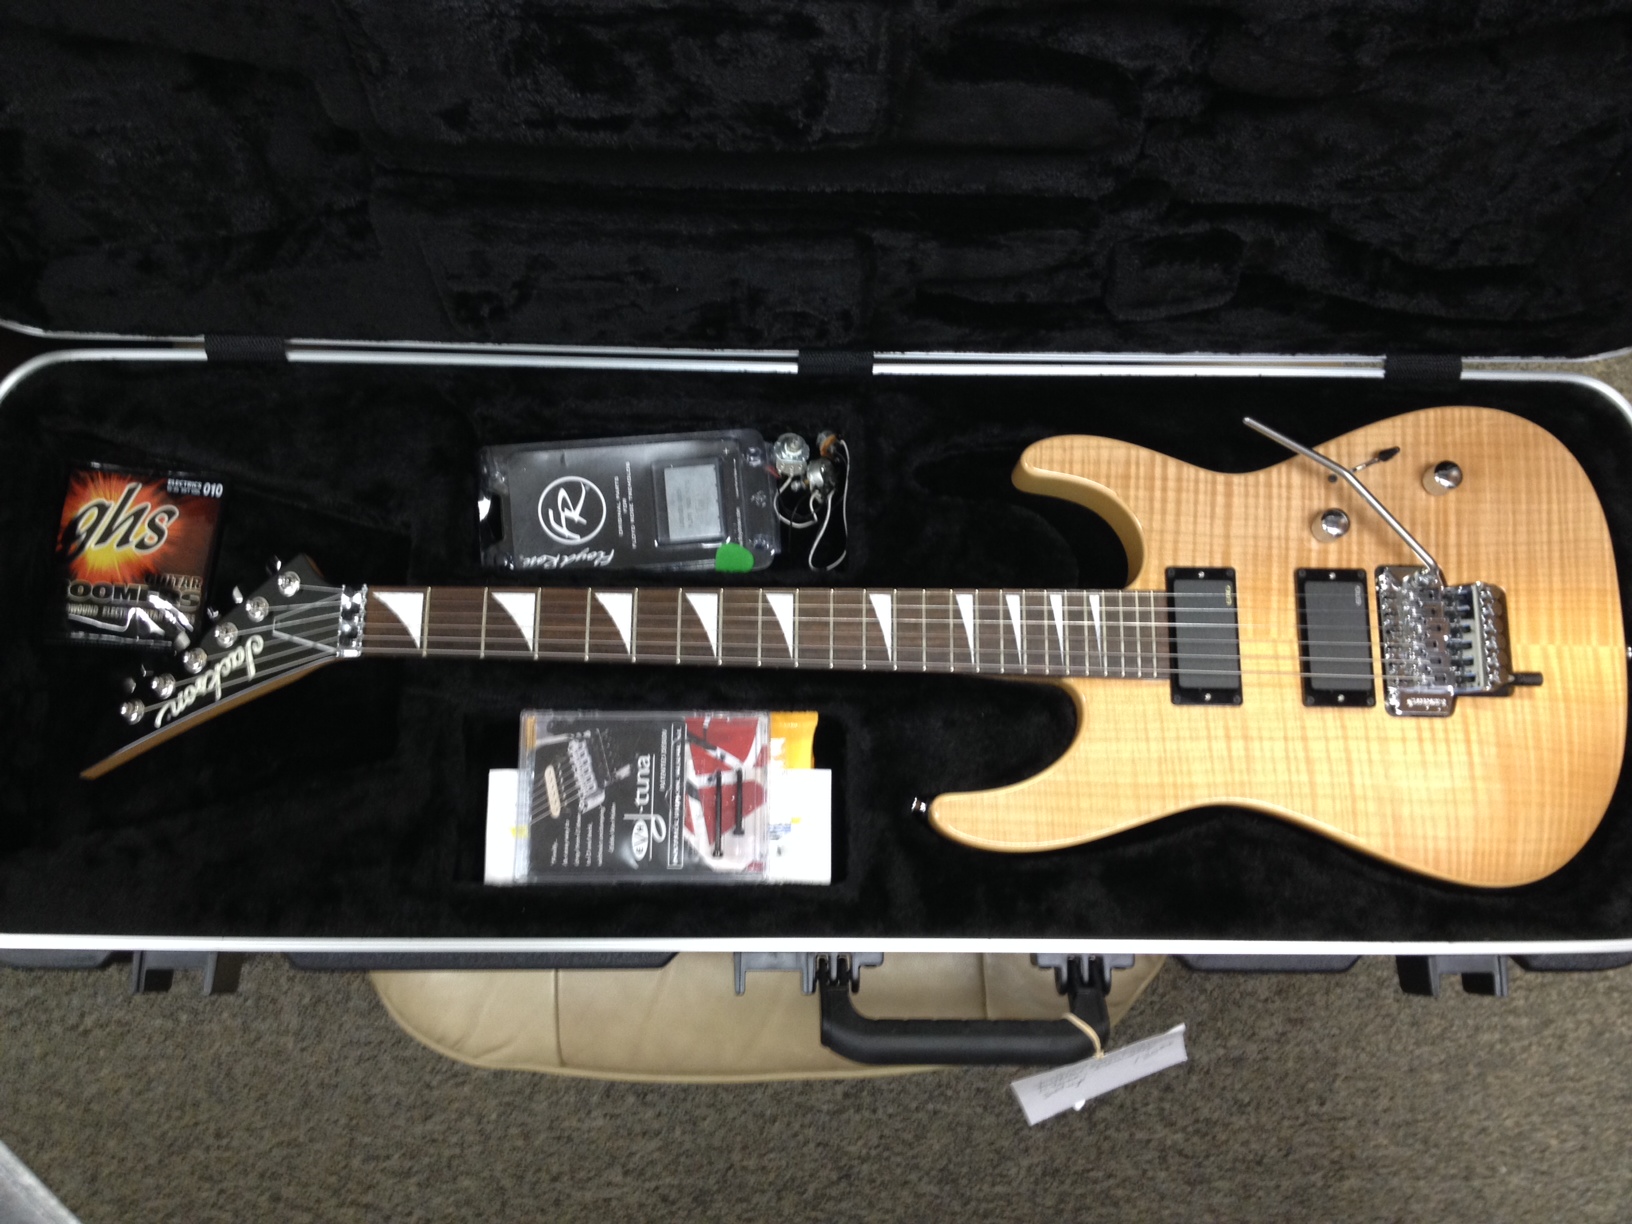
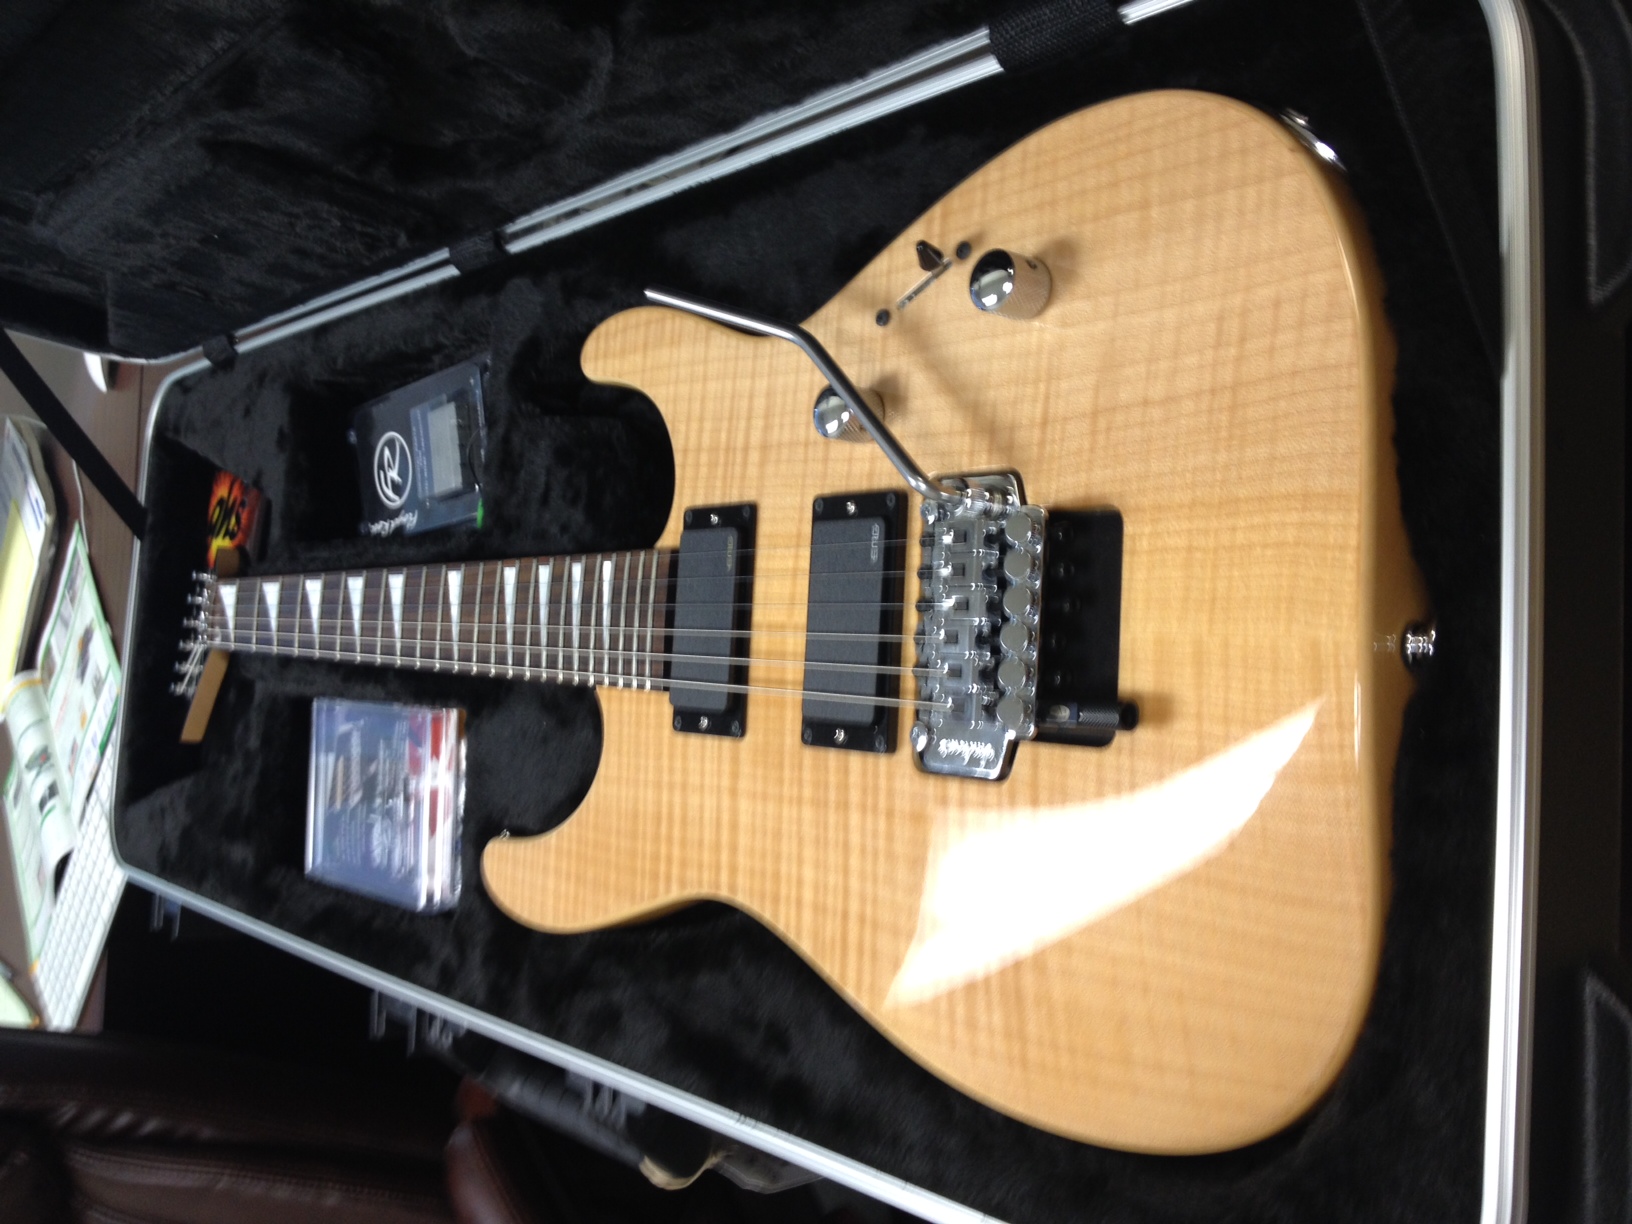
Posted by: Azzaboi Apr 26 2014, 11:56 PM
Prutty!
I would like to know how she plays wit them Zakk Wyldes, she's a beaut!
Posted by: Spock Apr 27 2014, 12:12 AM
I would like to know how she plays wit them Zakk Wyldes, she's a beaut!
Yea man - working on a new song right now that happened today - so, I hope to be able to have at least a chorus/verse idea recorded tomorrow so I don't forget it - on the Jackson, very sort of AC/DC sounding-ish because my musical compadre wrote the chorus and threw it my way and I came up with a quick verse.
Posted by: Mudbone Apr 27 2014, 12:15 AM
Jackson necks are a dime a dozen on eBay, I'm sure you could find a suitable one there.
Posted by: Spock Apr 27 2014, 12:17 AM
BTW - if you just want to hear the EMGs, here are the same brand pickups I put in one of my PRS's on another song I'm working on...
https://soundcloud.com/lllspocklll/song3-in-progress
Posted by: Todd Simpson Apr 27 2014, 06:59 PM
All of this is very good on every level for not only learning about buying/working on guitars but for sharing this with everyone @ GMC. Thanks much for posting your continuing adventures!!
BTW: Per previous posts, you can get a decent neck cheeeaaaaap on ebay, but again, your best off to research the vendor quite a bit as folks are quick to sell necks that are simply crap/broke/etc.
https://soundcloud.com/lllspocklll/song3-in-progress
Posted by: Spock Apr 28 2014, 11:56 AM
It has been an adventure. I guess a new neck would be a way to start on a Warmoth, just do it little by little and not be obsessed about it. Start with a Warmoth neck that is right for this guitar, then down the road add a new body onto it with a maple cap - sort of ease myself into a custom built guitar that way.
My next goal is learning how to play the ones I have though. 
Posted by: Todd Simpson Apr 29 2014, 03:10 AM
If it's your first neck, a warmoth may be a bit much. You could buy a decent used guitar for a the price of a nice neck. Cheap new guitars are usually just that, cheap. Used guitars are often a better deal
My next goal is learning how to play the ones I have though.
Posted by: Kerbs Apr 30 2014, 03:53 PM
Spock, thank you for the journey. I love these types of threads with the informative pictures you put it, with all the ups and downs and the things you learned.
You end up helping a lot of people with this information. I would never know what to look for in a replaced neck. I think what $$$ you lost on the neck of the guitar, you have definitely gained in knowledge. High quality thread.
Powered by Invision Power Board (http://www.invisionboard.com)
© Invision Power Services (http://www.invisionpower.com)