Printable Version of Topic
Click here to view this topic in its original format
GMC Forum _ GEAR & PRODUCTION _ Recording Stuff-soundproofing-remodel/reconstruction
Posted by: bobg Jun 23 2013, 11:40 PM
A number of years ago, my wife and I decided to have our basement remodeled which essentially meant taking things down to the studs and insulation. Fortunately, this allowed me to do SOME level of soundproofing but on a fairly tight budget. Unfortunately, that budget did not allow for the use of Limp Mass Vinyl and some other soundproofing processes that I hope I can do in any future room.
This remodel also gave me the opportunity to expand the size of my home studio room from a square 11ft X11ft to a rectangular room of 11ft X14ft and as you may already know, generally, it is better to have a rectangular room where your Studio Monitors are "shooting" sound down the LONGEST length of your room.
Below is a photo of my studio Before Construction (BC) and the walls were only covered with very cheap paneling that was installed when the house was built by the first owner in the 1980’s.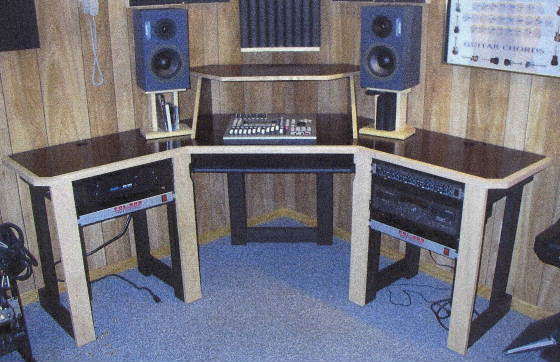
Below is a photo of the room after tear down and as you can see, it was down to the studs and wall insulation and no insulation around the ceiling heating/cooling ductwork.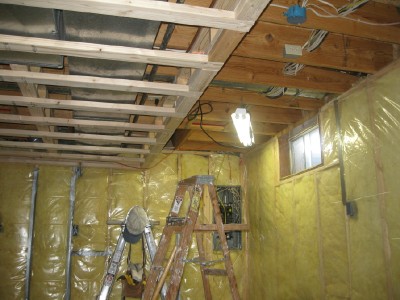
My north wall and east walls, shown above, faced the outside (concrete foundation and Illinois soil) so no soundproofing was required (per se). However, as the West and South Walls had contact with other rooms in the basement, we did some easy to do low-cost soundproofing that you will see below.
In this photo below you can see that the space around the heating/cooling ductwork were reframed, filled with insulation THEN enclosed with 2 layers of drywall instead of just one.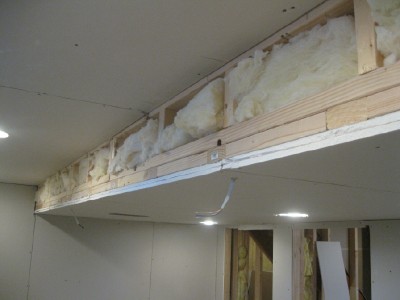
As far as the west and south walls and soundproofing, we made them each Double Wide Walls that measured 9 ¾ inches wide where half of the width was filled with insulation and the other half had nothing in it creating a Dead-Air Space once the layers of Double Drywall were installed as you can see in the photo below. 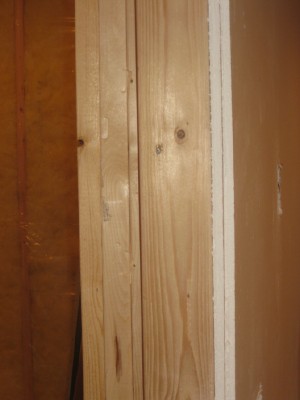
What we also did to help with soundproofing was to use SOLID WOOD DOORS that are known to reduce transmission of sound. In the photo below, you can see one of the 2 doors installed AND the nice finished storage closet I ended up with due to the room expansion.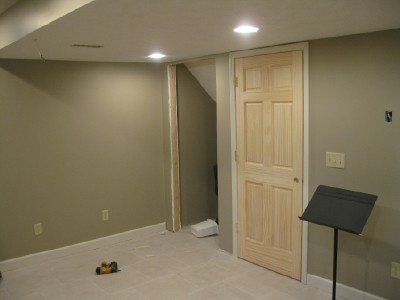
In this photo below you can see the empty completed room and photo below that one shows the room as it is today after construction (AC). The room is not completely soundproof as one would like but there is such an amazing difference between BC and AC that the changes made on the budget allowed made the room much better.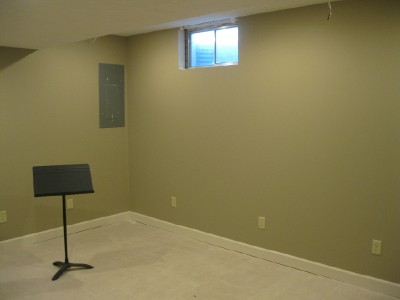

Posted by: liveOASISforever Jun 24 2013, 06:37 AM
Really love all your work mate it is very interesting to read
Posted by: Darius Wave Jun 24 2013, 11:27 AM
Find some free time and please...do the same with my recording room  Very nice work!
Posted by: bobg Jun 24 2013, 04:31 PM

Thank you very much.
Like they say, It's only money!
 Very nice work!
Thank you Darius.
Fly me over, bring your checkbook and we will do it!!

Posted by: Cosmin Lupu Jun 25 2013, 09:18 AM
Oh wow  This is very inspiring man! Thank you! I have built the sound proof cabin in my future home studio in the same manner - double dry wall and mineral yellow sound proofing material on the inside of the frame.
Still have to build the panels which I intend to cover the walls in on the outside though - I have to rip some time off to actually do it already !
Posted by: bobg Jun 26 2013, 04:07 PM
If there is some way I can be given access to my original/initial post above, I can reinsert the photos that have vanished (due to changes on my website). BG
Posted by: Cosmin Lupu Jun 27 2013, 07:11 AM
The Edit button should be of help in this case - use it on your initial post in order to edit it. It is found at the bottom of the original post! Thank you man!
Powered by Invision Power Board (http://www.invisionboard.com)
© Invision Power Services (http://www.invisionpower.com)