Printable Version of Topic
Click here to view this topic in its original format
GMC Forum _ GEAR & PRODUCTION _ Building A Usa Strat On A Budget Pt.5
Posted by: Mudbone Dec 8 2010, 06:20 PM
Finished... Well almost. The only thing left to change is the nut, but thats not going to happen for a while (got other projects that now have priority). Other than that, every single piece of hardware has been upgraded.
In this post I tackle the problem of the binding tremolo and install the tuners.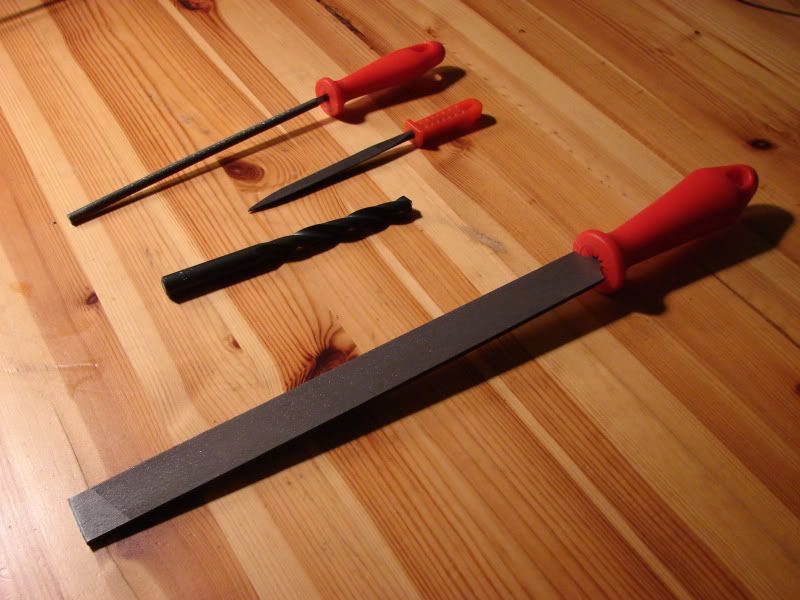
The tools I used to bore out the tremolo hole and tuners holes in the headstock. The drill bit is 10mm.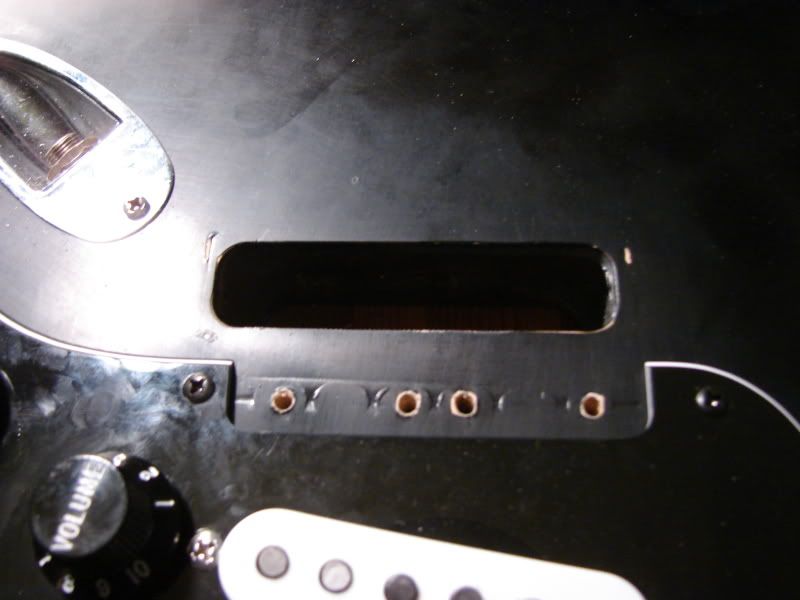
Before being bored out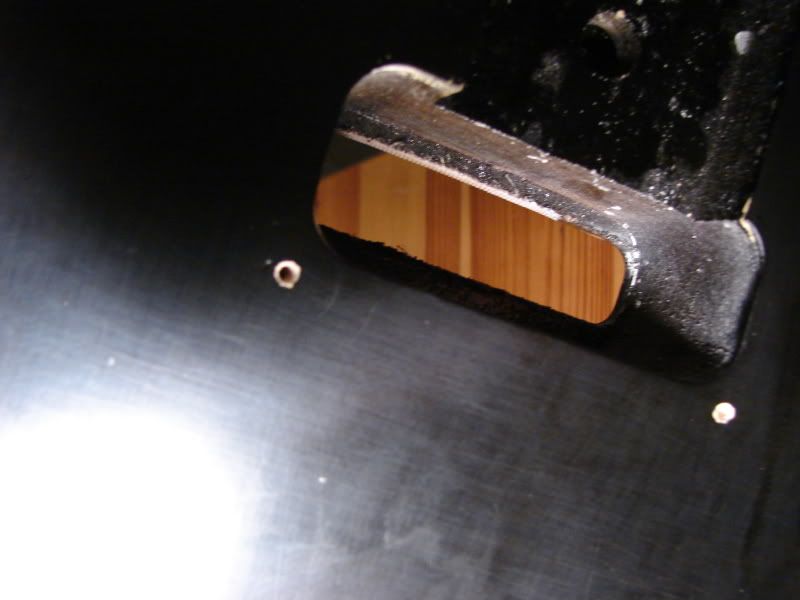
A view from the bottom. If you look closely you'll notice theres a little lip that goes around the hole, I'll explain what it is in just a moment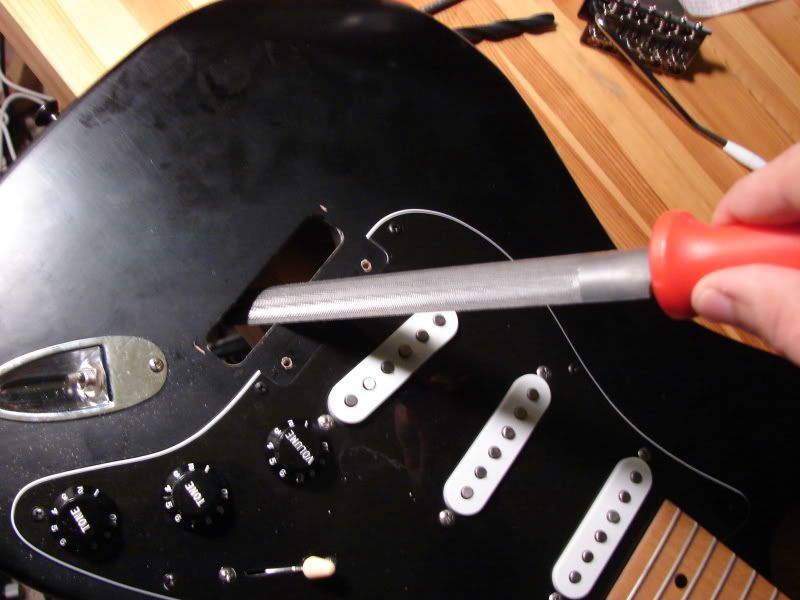
The grit on this file wasn't very aggressive, so progress was very slow. I got impatient and went for a very aggressive file. This decision turned out to be a big mistake.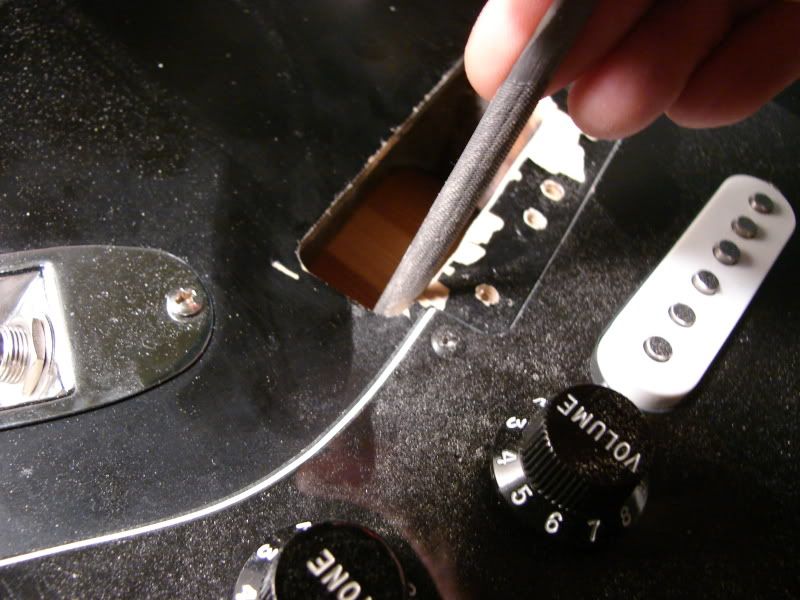
Check out the damage done by the coarse file. Ouch... more pictures in just a moment. In this picture I'm using the round file to bore out the corners so they'll be rounded like the other ones.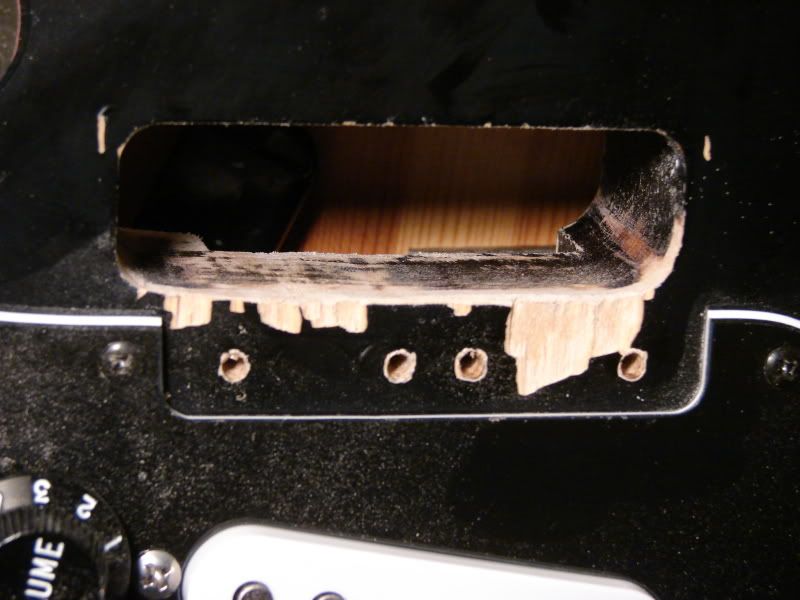
And this here is the damage done. This is what happens when you're impatient. The course file got the job done quicker but also splintered the wood around the hole. I'm fortunate none of the wood that makes contact with the bridge got splintered. If you plan on doing a similar job, use a finer grit file, and be patient.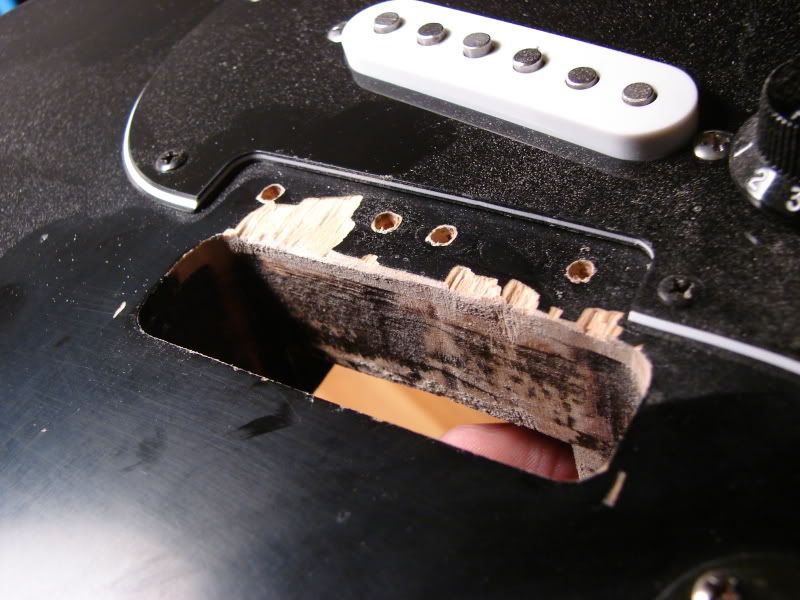
Notice how there are two pieces of wood. It turns out some people on the Peavey forums were correct - there is an alder cap on a poplar body.
I wasn't going to waste my time with wood filler and sand paper fixing this, so I decided to do it the ghetto way and cover it up with a marker. Once the bridge is installed, you really can't see it, except through the two empty holes in the tremolo (the Peavey came equipped with four post screws instead of the usual six). The tremolo now works fine and I can't see the damage, so it doesn't bother me one bit. 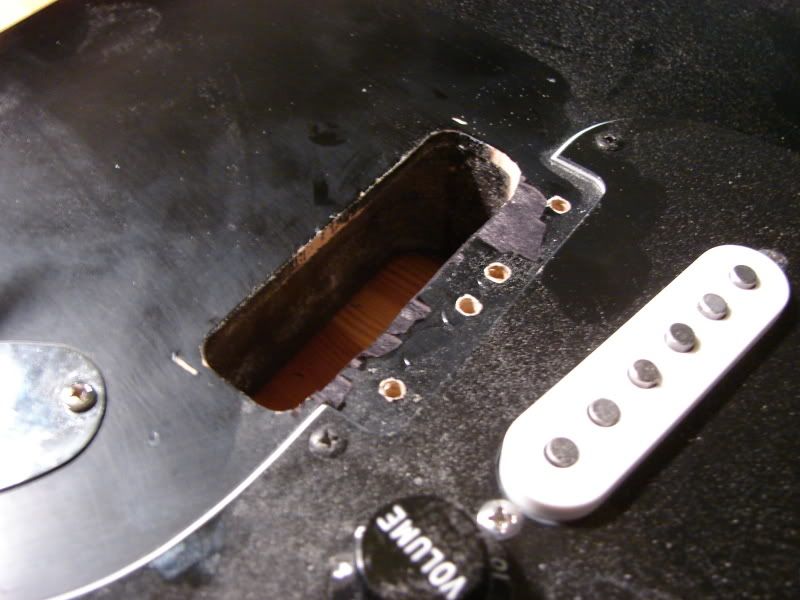
Once the tremolo was installed it really wasn't noticeable.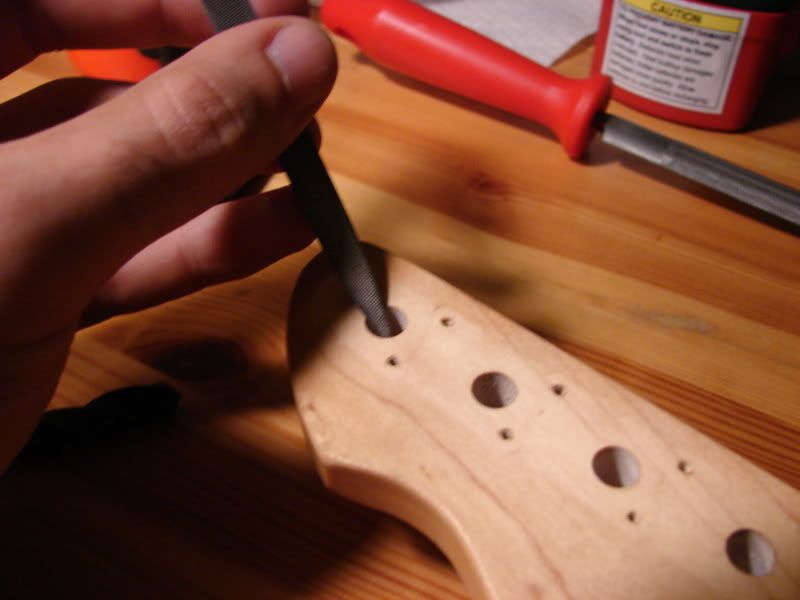
Now on to the tuners. I filed the edges of the holes on the exit side to help minimize splintering.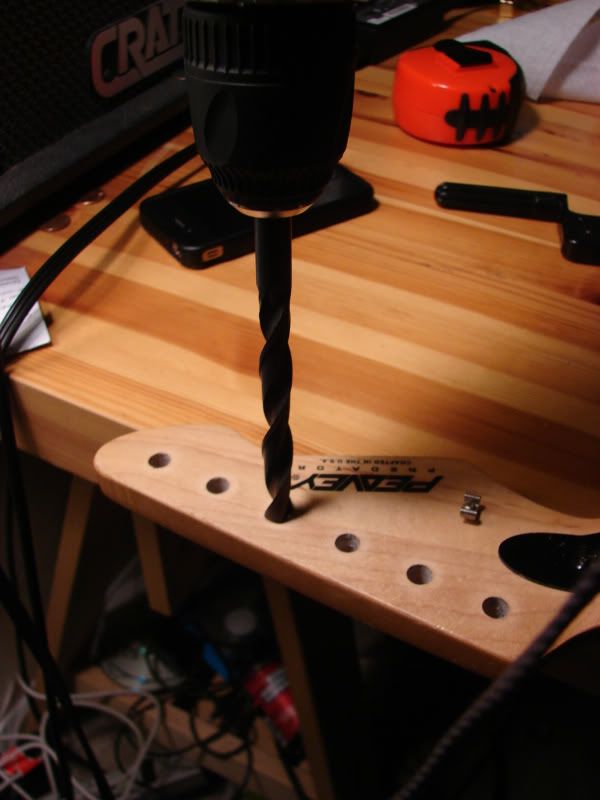
Do or die moment, I was actually really nervous about doing this. When doing this, make sure you're battery is fully charged so you can get a high drill speed. Don't use to much pressure, but gradually work your way through it. When I did this the battery wasn't fully charged, so I had to go through it with a slow drill speed, which did cause some slight splintering. When maple splinters, it makes a really loud snapping sound, so every time I went through one of the holes it sounded like I was splitting the neck in half. I nearly soiled myself six times doing this. However the only thing that happened was some slight splintering, which wasn't much of an issue, because it was covered up by the tuners.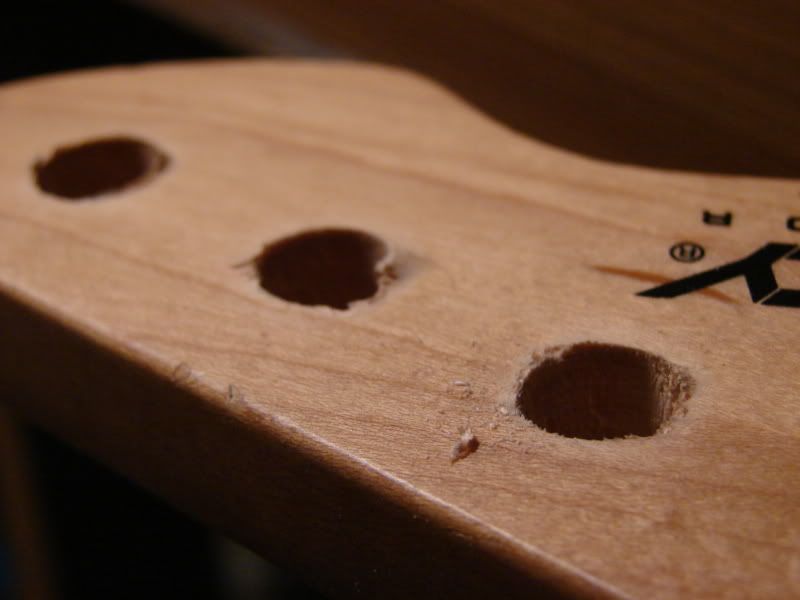
As you can see, some slight splintering did happen on the entry side. This could have been prevented if a used a higher drill speed and less pressure. 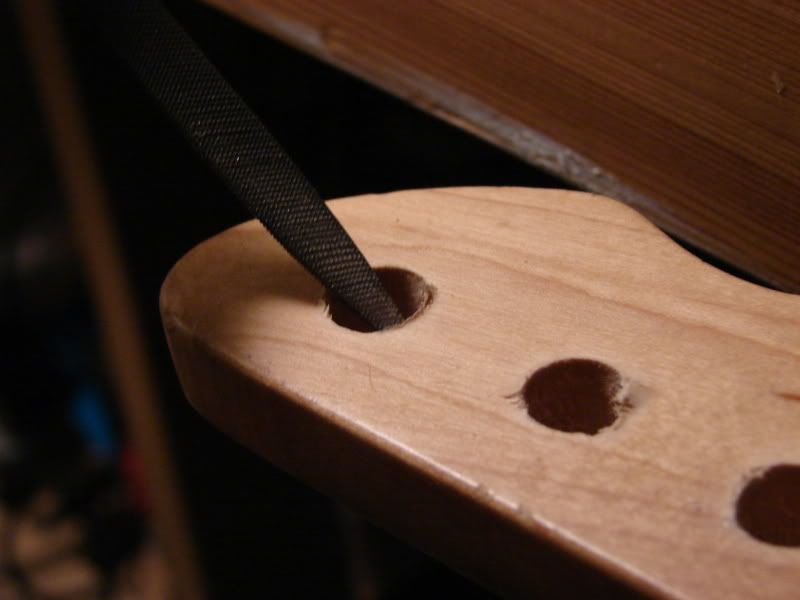
Filing off some of the splinters.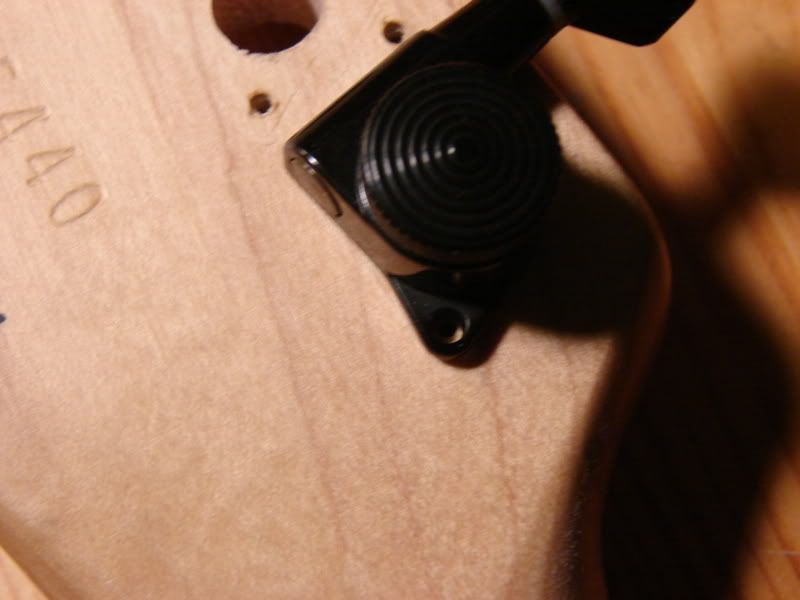
One of the holes actually matched up, but the other one is left exposed. It doesn't really bother me because it doesn't affect playability and I can't really see it, so I'm not going to bother filling it with wood filler. This guitar is going to be my beater guitar, one I can leave lying around and not worry about scratching it. Eventually it will relic naturally - I'm not really into the idea of artificially relicing a guitar. 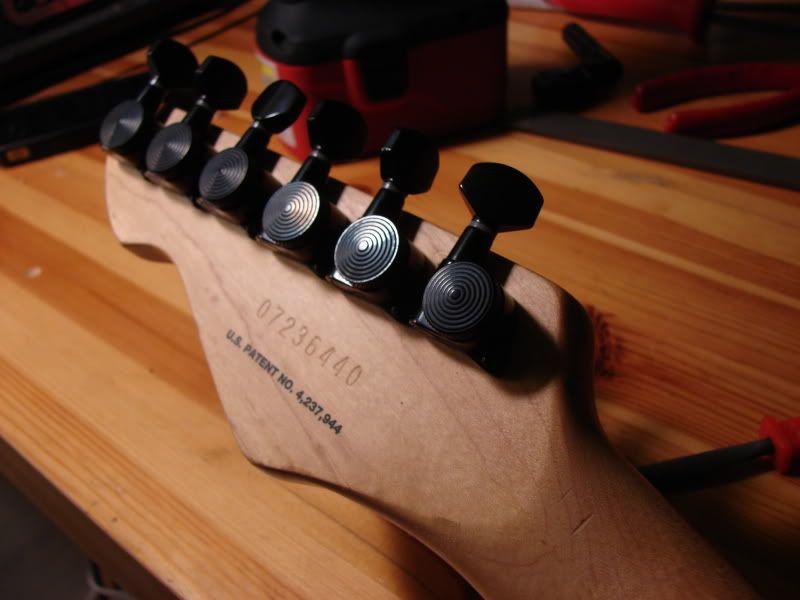
These tuners do add some mass to the headstock, the old ones were cheap flimsy pieces of junk. I actually did notice the open strings ring a little more clearly now, so I guess installing these also had a positive effect on tone.
Look real close at the lengths of the tuning posts, you'll notice that they are staggered. The low E string is the tallest and the high E is the shortest, this eliminates the need for a string tree. When installing these, make sure you pay attention and install them in this order so you don't have to take them out and reinstall them again.
The finished product. This looks like a promo for Peavey gear, doesn't it? For the money, you can't get better gear than Peavey. I'm not partial to Peavey, just every time I'm looking for something at a certain price point, the Peavey always comes out the clear winner.Peavey aught to send me a fruit basket for all the promo work I've been doing for them... or a 6534+ amp would be nice.
Posted by: Vaidya Dec 8 2010, 07:11 PM
Congrats man! Looks awesome! 

Posted by: Fran Dec 9 2010, 06:03 PM
You certainly deserve that 6534 
Great job and thanks for all this info and pics, whch are now one of the very best entries in our knowledge base 
http://www.guitarmasterclass.net/wiki/index.php/Building_A_Usa_Strat_On_A_Budget
Posted by: Mudbone Dec 10 2010, 02:46 AM

Thanks Vaidya
Great job and thanks for all this info and pics, whch are now one of the very best entries in our knowledge base
http://www.guitarmasterclass.net/wiki/index.php/Building_A_Usa_Strat_On_A_Budget
Thanks fran
I just checked out the entry, looks great. I hope this can help somebody out thats looking to do the same thing.
Posted by: N4085B Dec 10 2010, 08:02 AM
Looks cool! Did the staggered tuning posts help with keeping it in tune when using the tremolo? This guy has some youtube videos on keeping a std strat tremolo in tune really well, and that's one of the tricks he uses;
http://www.youtube.com/watch?v=O0Oyc6slYRc
I saw a Dan Erlewine video where he enlarged some existing holes out on a guitar, and he started by running the drill in reverse initially so it wouldn't gouge them out. I think he also mentioned using dull drill bits as well. maybe that'll help with the chipping on the edges of the holes?
Good job man! I so want to build a guitar too.
Posted by: maharzan Dec 10 2010, 09:01 AM
Great one Mudbone! Is there a YouTube preview too? would love to hear how it sounds...
Posted by: Ivan Milenkovic Dec 11 2010, 10:23 PM
O-oh, bummer about the wood :  but a good recovery as well
The strat looks aweeesomeeee! Excellent job man!
Posted by: Mudbone Dec 11 2010, 10:57 PM
http://www.youtube.com/watch?v=O0Oyc6slYRc
I saw a Dan Erlewine video where he enlarged some existing holes out on a guitar, and he started by running the drill in reverse initially so it wouldn't gouge them out. I think he also mentioned using dull drill bits as well. maybe that'll help with the chipping on the edges of the holes?
Good job man! I so want to build a guitar too.
Thanks dude
The guitar does stay in tune very well. There is no more string binding at the tuners and I don't use the string tree anymore, so that definitely helped with the tuning stability. It doesn't have as much range as say a Floyd Rose, so I really can't go totally ape s**t on it Thanks maharzan
I'll post a demo of it once I can find a good way to record it played through an actual amp. but a good recovery as well The strat looks aweeesomeeee! Excellent job man!
Thanks Ivan
This really taught me a lesson in the virtue of patience, something I wish I had more of 
Powered by Invision Power Board (http://www.invisionboard.com)
© Invision Power Services (http://www.invisionpower.com)