


Make Your Own Pedalboard, Would you dare?? :) |

|
|
|
|
Nov 23 2007, 09:09 PM

|
|
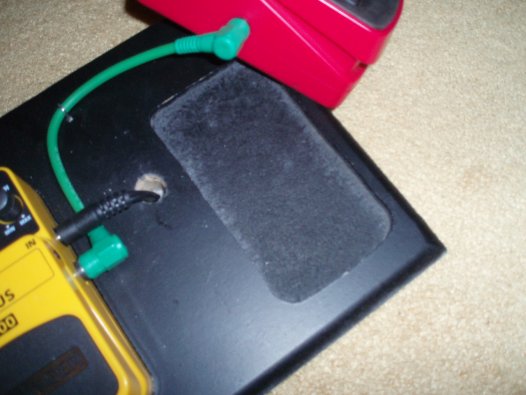
Hi guys, a thought it would be usefull to post some pictures of my old custom made pedalborad. If you don`t have anything smarter to do in the next couple of days and have some ~50$ on the side, you can make some interesting thing for your babies
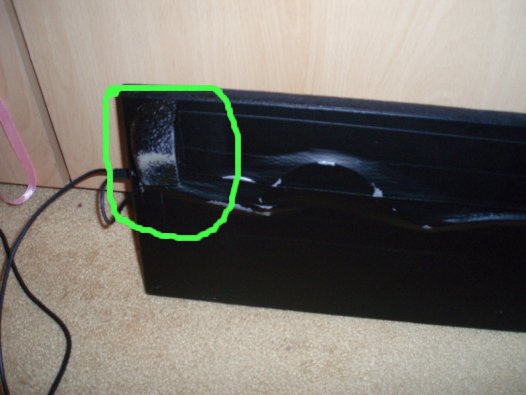
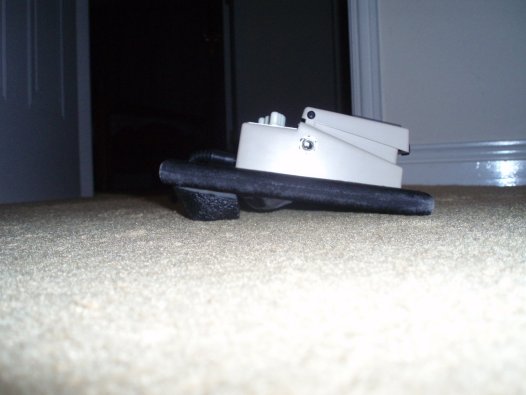
 . I AM aware that there are a lot of mistakes made on this PB, but since it was my first project.. Hvae fun! . I AM aware that there are a lot of mistakes made on this PB, but since it was my first project.. Hvae fun!I will post everything that I used, so you can get some inspiration. You don`t have to follow my instructions step to step, this is why i called custom. In the beginning always plan ahead room for your pedals, taking in consideration pots, patch cables, distances, and leave some extra room for future pedals. Try out the pdals in the future position because they must feel comfortable when using on the pedaboad. Also do all the cabling in advance. THere are two types of cabling, power and signal. First do the power. See what will be your source of power (somekind of adapter - something lightweighted will be usefull). If you wanna carry your pedaboard around FIRST buy some casing (i boguht a 15$ cheap tool case and it has never failed me, see pictures at the bottom). WHEN you buy the case (taking in the consideration the layout of the pedals and dimensions) then build your pedalboad so it fits inside properly.This ih how my old pedalboard looked from above:  Tools that I used: 1. Jigsaw (small teeth for thin wood, big teeth for fat board) 2. Drill 3. Hammer 4. Scaplel 5. Screwdrivers 6. Black Marker 7. Meter and ruler 8. Marking wood pen 9. Soldering Iron (for power cables) 10. Maybe some other things.. Material that I used: 1. Wooden board (the best is to use a light type of wooden, not a full wood, but some sintetic boards, i don` really know the translation for them). If yu dont wanna cut it yourself lot of companies sell precut pieces that you can order. 2. Wooden blocks (full wood because you need to drill some holes in them). This blocks are needed maybe if you are making a two-level pedalboard). 3. Carpeting material (you don`t need to put anything underneath the pedals but it look much nicer and neater when somekind of carpeting looking material is put there) 4. Screws and nails 5. Rubber "legs" for the pedalboard (you can screw them under the pedalboard to prevetn sliding and damaging the floor,stage or wood) 6. Patch and power cables (in found very cheap PROEL cables and some angle mono jacks, and for power i used some old power adaptor cables. Almost any cheap cabel with isolation will do for power as it is very low voltage - 9V) 7. GLue 8. Black paint - to look cool 9. Metal handles( to put on the sides so you can lift your pedalboard up and down from a case easily) This is it. Here how the finished produst looks in front with the pedals stilll on. On the left hand side yu can see an I\O box, although this is not nececcary (as the matter of fact it will only weaken your signal as i established later when i made it and glue it down hehe  ) Also in that box is the female power jack for power adapter). I made inside a network of cables for all my pedals and left spare if i buy some more) ) Also in that box is the female power jack for power adapter). I made inside a network of cables for all my pedals and left spare if i buy some more) Here we see the pedalboard on the right. Notice that the patches are going under the board. I tride to keep it neatly as i could but on expence of pedal changes. On the picture you can see a black plastic one-way connection string. I used this to tie the pedals to the board firmly in place. Mind that this pedals can only be cut off when changing the pedal  THey are cheap though.. THey are cheap though.. From the left you can see the handle and the part of upper level of PB. You can also see a power jack for the neon light (i just had to do that  ) ) Front view, bellow the upper board I installed the 6W bluelight (what was i thinking ) Separete cable for that one. Insteda of these stupid light you can make something much more practical, a shite light that lighten up the pedals on dark stages. I needed that countless times! You can see here those rubber legs and plastic brackets that go around the pedals.  http://img19.imageshack.us/img19/4188/1 An here is that tool case ( i feel almoust bad because i sold it, it has really served me well, many guy ask me if i carry some one milion dollars in there or what  ) )http://img19.imageshack.us/img19/4188/1 For my pedals i used filtered current (mandatory) 1000mA power adapter. THey can be vey cheap but if you wanna go on gigging with it buy something with a light weight and reasonable quality). That`s it i hope it help and give you some insights and ideas how to make your own Pedaboards. Any suggestions are very welcome. Cheers This post has been edited by Milenkovic Ivan: Nov 23 2007, 09:10 PM -------------------- - Ivan's Video Chat Lesson Notes HERE
- Check out my GMC Profile and Lessons - (Please subscribe to my) YouTube Official Channel - Let's be connected through ! Facebook! :) |
 |
 
|
|


|
|
|
|
Nov 30 2007, 10:59 AM

|
|
looks really good.
I'm not really good working wood. If I were I would be interested in building one myself. |
|
|
|
|


|
|
|
|
Nov 30 2007, 01:41 PM

|
|
Really cool post Ivan - I like it a lot!
-------------------- Check out my Instructor profile
Live long and prosper ... My Stuff: Electric Guitars : Ibanez Jem7v, Line6 Variax 700, Fender Plus Strat with 57/62 Pickups, Line6 Variax 705 Bass Acoustic Guitars : Taylor 816ce, Martin D-15, Line6 Variax Acoustic 300 Nylon Effects : Line6 Helix, Keeley Modded Boss DS1, Keeley Modded Boss BD2, Keeley 4 knob compressor, Keeley OxBlood Amps : Epiphone Valve Jnr & Head, Cockburn A.C.1, Cockburn A.C.2, Blackstar Club 50 Head & 4x12 Cab |
|
|
|
|


|
|
|
|
|
Dec 1 2007, 01:27 AM
|
|
Hey nice job there man. looks nice and tight
I hope that we can encourage someother members to upload pics of their custom-made pedalboards. That would be really cool!
-------------------- - Ivan's Video Chat Lesson Notes HERE
- Check out my GMC Profile and Lessons - (Please subscribe to my) YouTube Official Channel - Let's be connected through ! Facebook! :) |
|
|
|
|

 
|
1 User(s) are reading this topic (1 Guests and 0 Anonymous Users)
0 Members:


