Drum Sound Processing
Drum Sound Processing
An article by Socky42
Contents |
Introduction
Some of you asked for a quick run through of my drum sound in my Doom remix so I thought I’d make this guide on how I process my drums. I use Superior Drummer with the Metal Foundry add-on but it really doesn’t matter what you use as long as they’re good sounds. E.g. EZDrummer 1/2, Steven Slate Drums, the default Avatar Superior Drummer etc.
The most important parts of my drum sound that make the biggest difference are the overheads, room mic and the reverbs that I talk about near the end.
I can do a guide using just the Avatar kit if enough people want it, since that's what most people here use anyway.
Sound sample:
- Before and After
Kick Drum
First up we have the shaping EQ, this is pretty extreme but I couldn’t really find a particular sample that fit my needs so I just found one that was close enough and did some broad EQ boosts.
Then I use Fabfilter Pro-Q 2 for some surgical EQ, cutting out some undesirable frequencies. Obviously you can use any EQ plugin, I just like Pro-Q because you can solo the individual bands. This stage really depends on your arrangement/mix, e.g. do you want a clicky kick or not?
Then I use Waves RBass to fatten up the sound a bit and add some tight low-end, this isn’t a necessary step since not everyone will own it but it’s on sale now for $39.
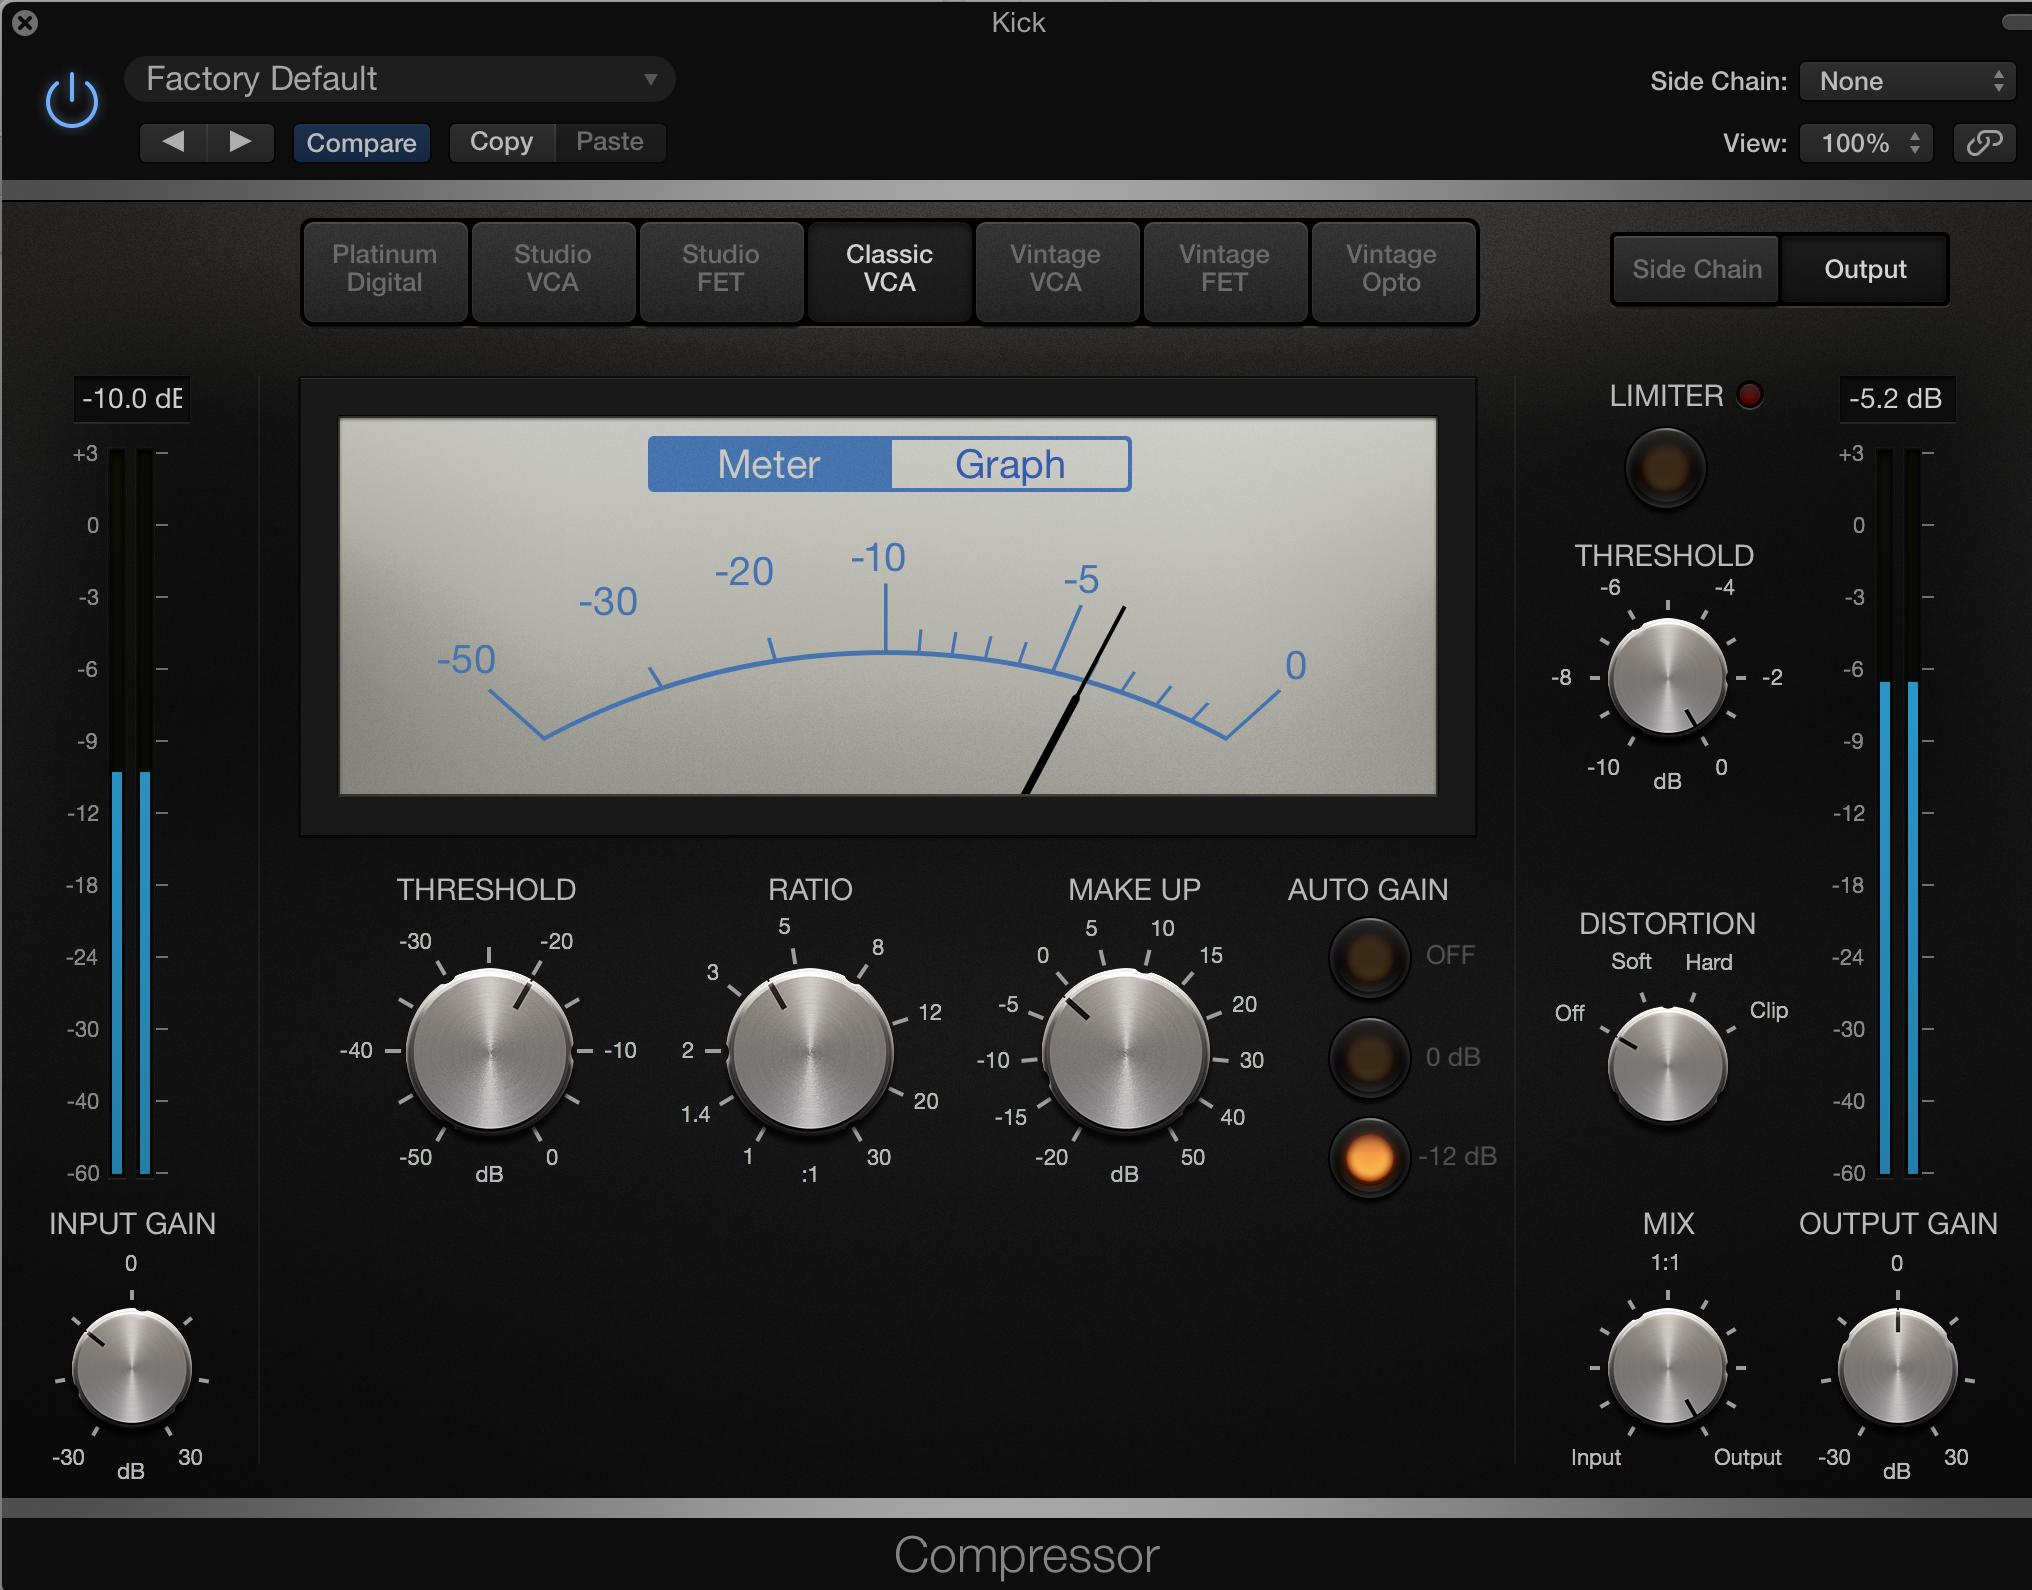
Finally the compressor - in Logic Pro, the default compressor comes with some analog emulation and in this case I’m using the ‘Classic VCA’ setting; but any compressor should be fine. Ratio is at 4 with around 5db of compression.
Snare
Starts off with some EQ to clean up unwanted frequencies.
Another extreme EQ to shape the sound of the snare, in this case I wanted more ring and body to the snare.
An enveloper to make the attack of the snare pop, every DAW should have a similar plugin.
Hi-Hats
I prefer the sound of overhead hi-hats, so here I cut out some of the high end so it doesn’t clash with those two tracks but left in the dry low-to-mid range.
Removed some low and mid-range frequencies to tighten up the sound and a wide boost over the high end.
Then I had another RBass on there for some boominess, but another EQ boost from 50-100hz would give roughly the same effect I guess.
Overheads
As with most tracks, an EQ to cut out the low end and mid-range; this is to ensure it doesn’t muddy up the rest of the drums and make the kick hard to hear.
Second EQ is for sound shaping, here I was focusing on getting the snare to come through the way I wanted and cutting out a few more undesirable frequencies.
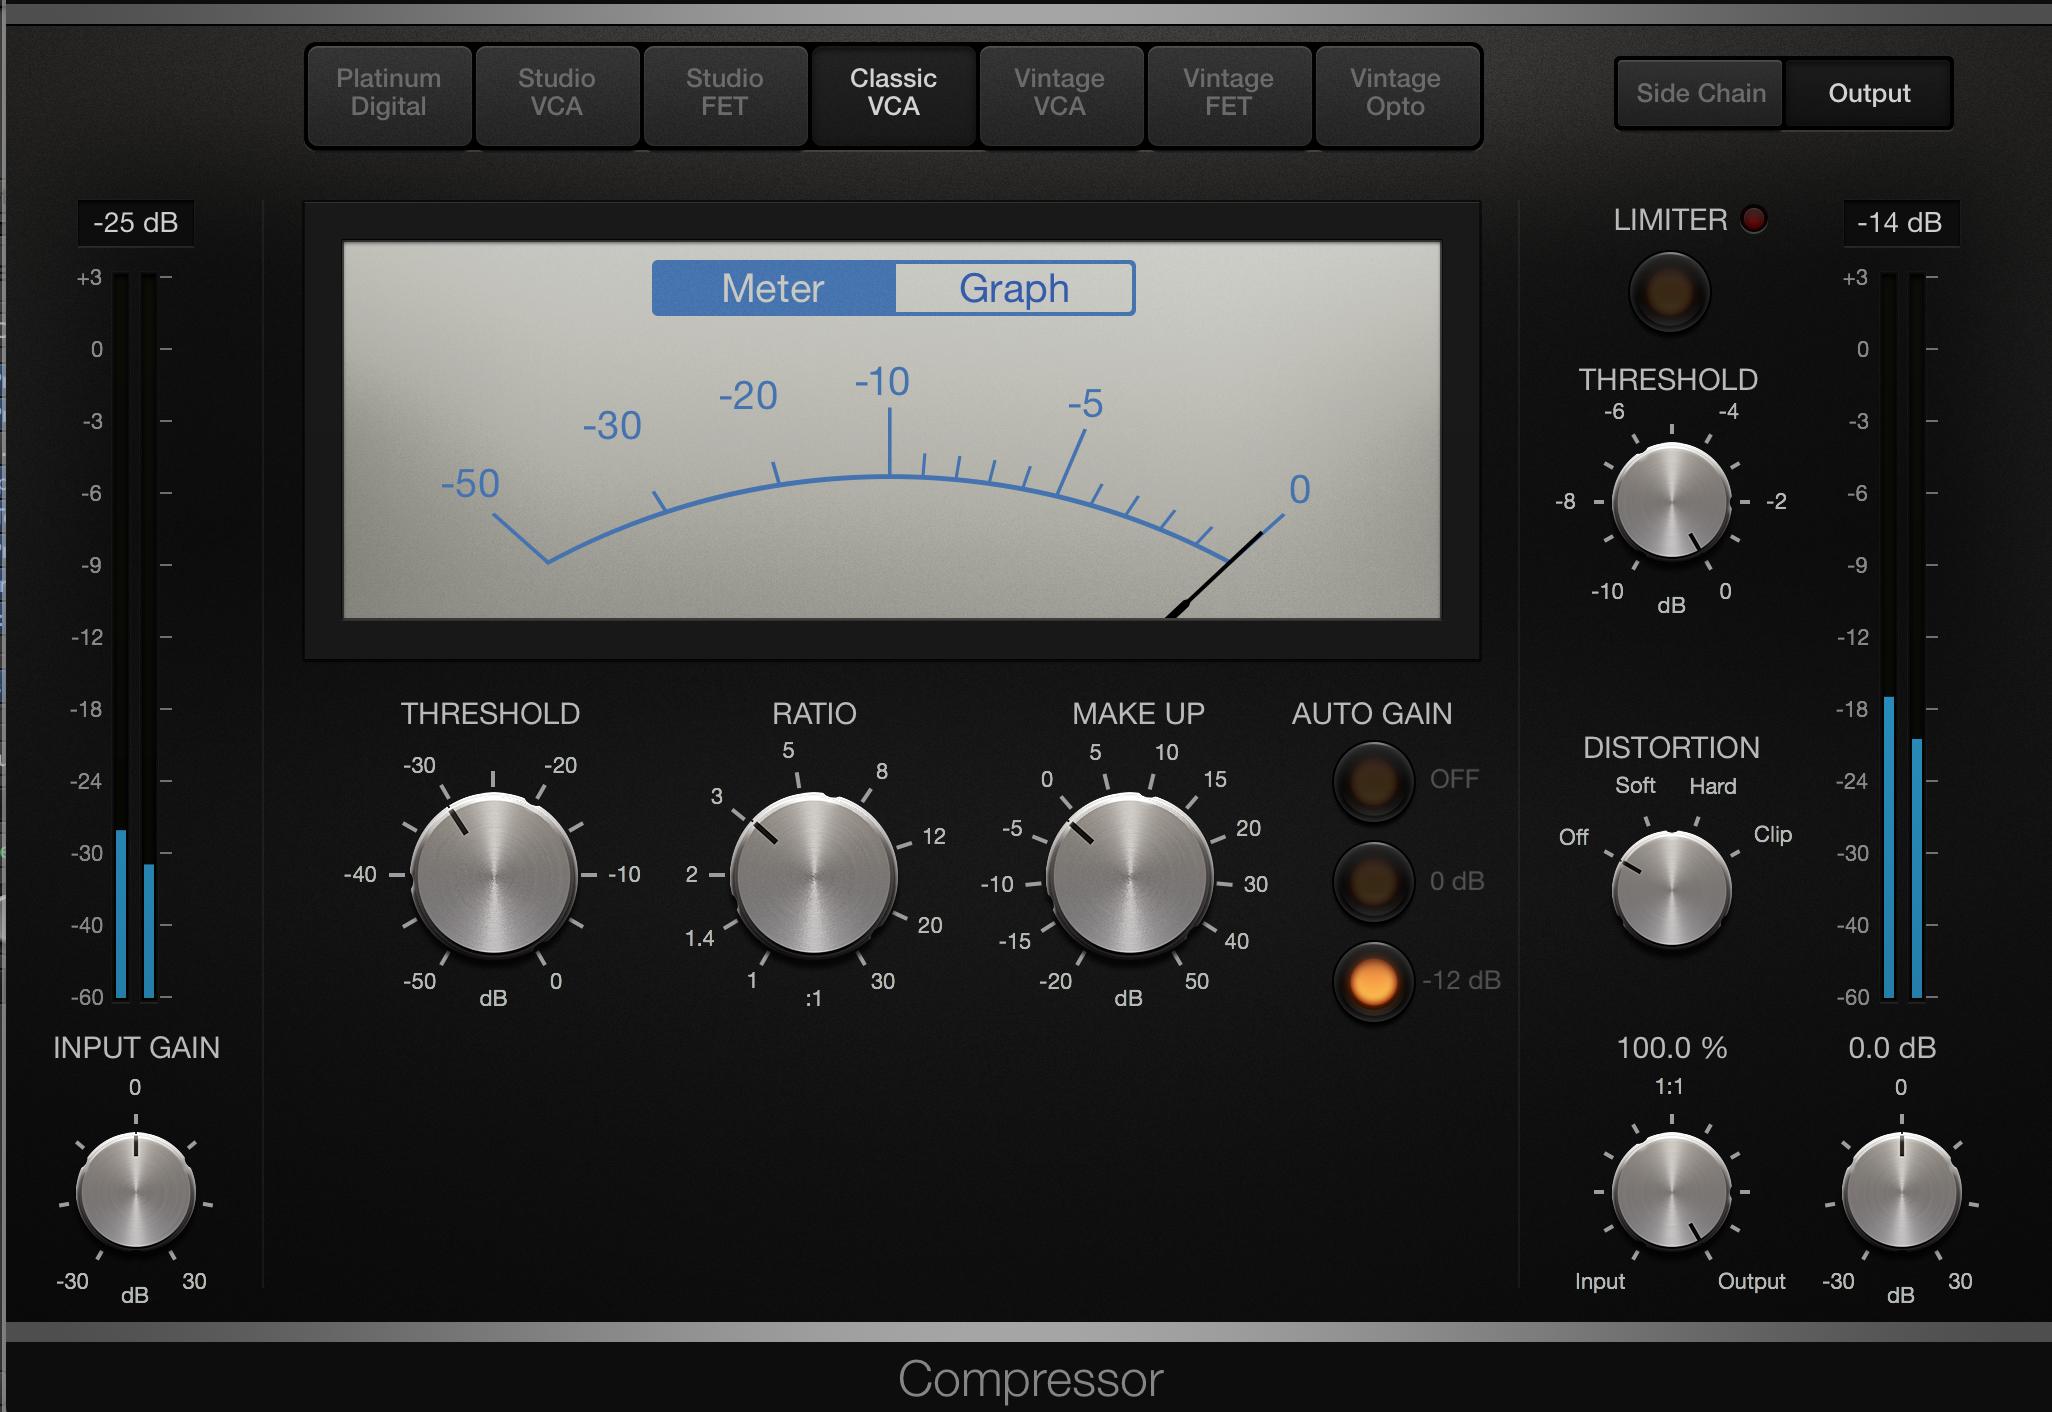
Some even out the levels a bit and glue the overheads together. Ratio of 3, around 5-6db of reduction.
Finally some more clearing up of undesirable frequencies, just left the track playing on some heavy hi-hat cymbal part and cut away till it wasn’t too harsh on the ear.
Room
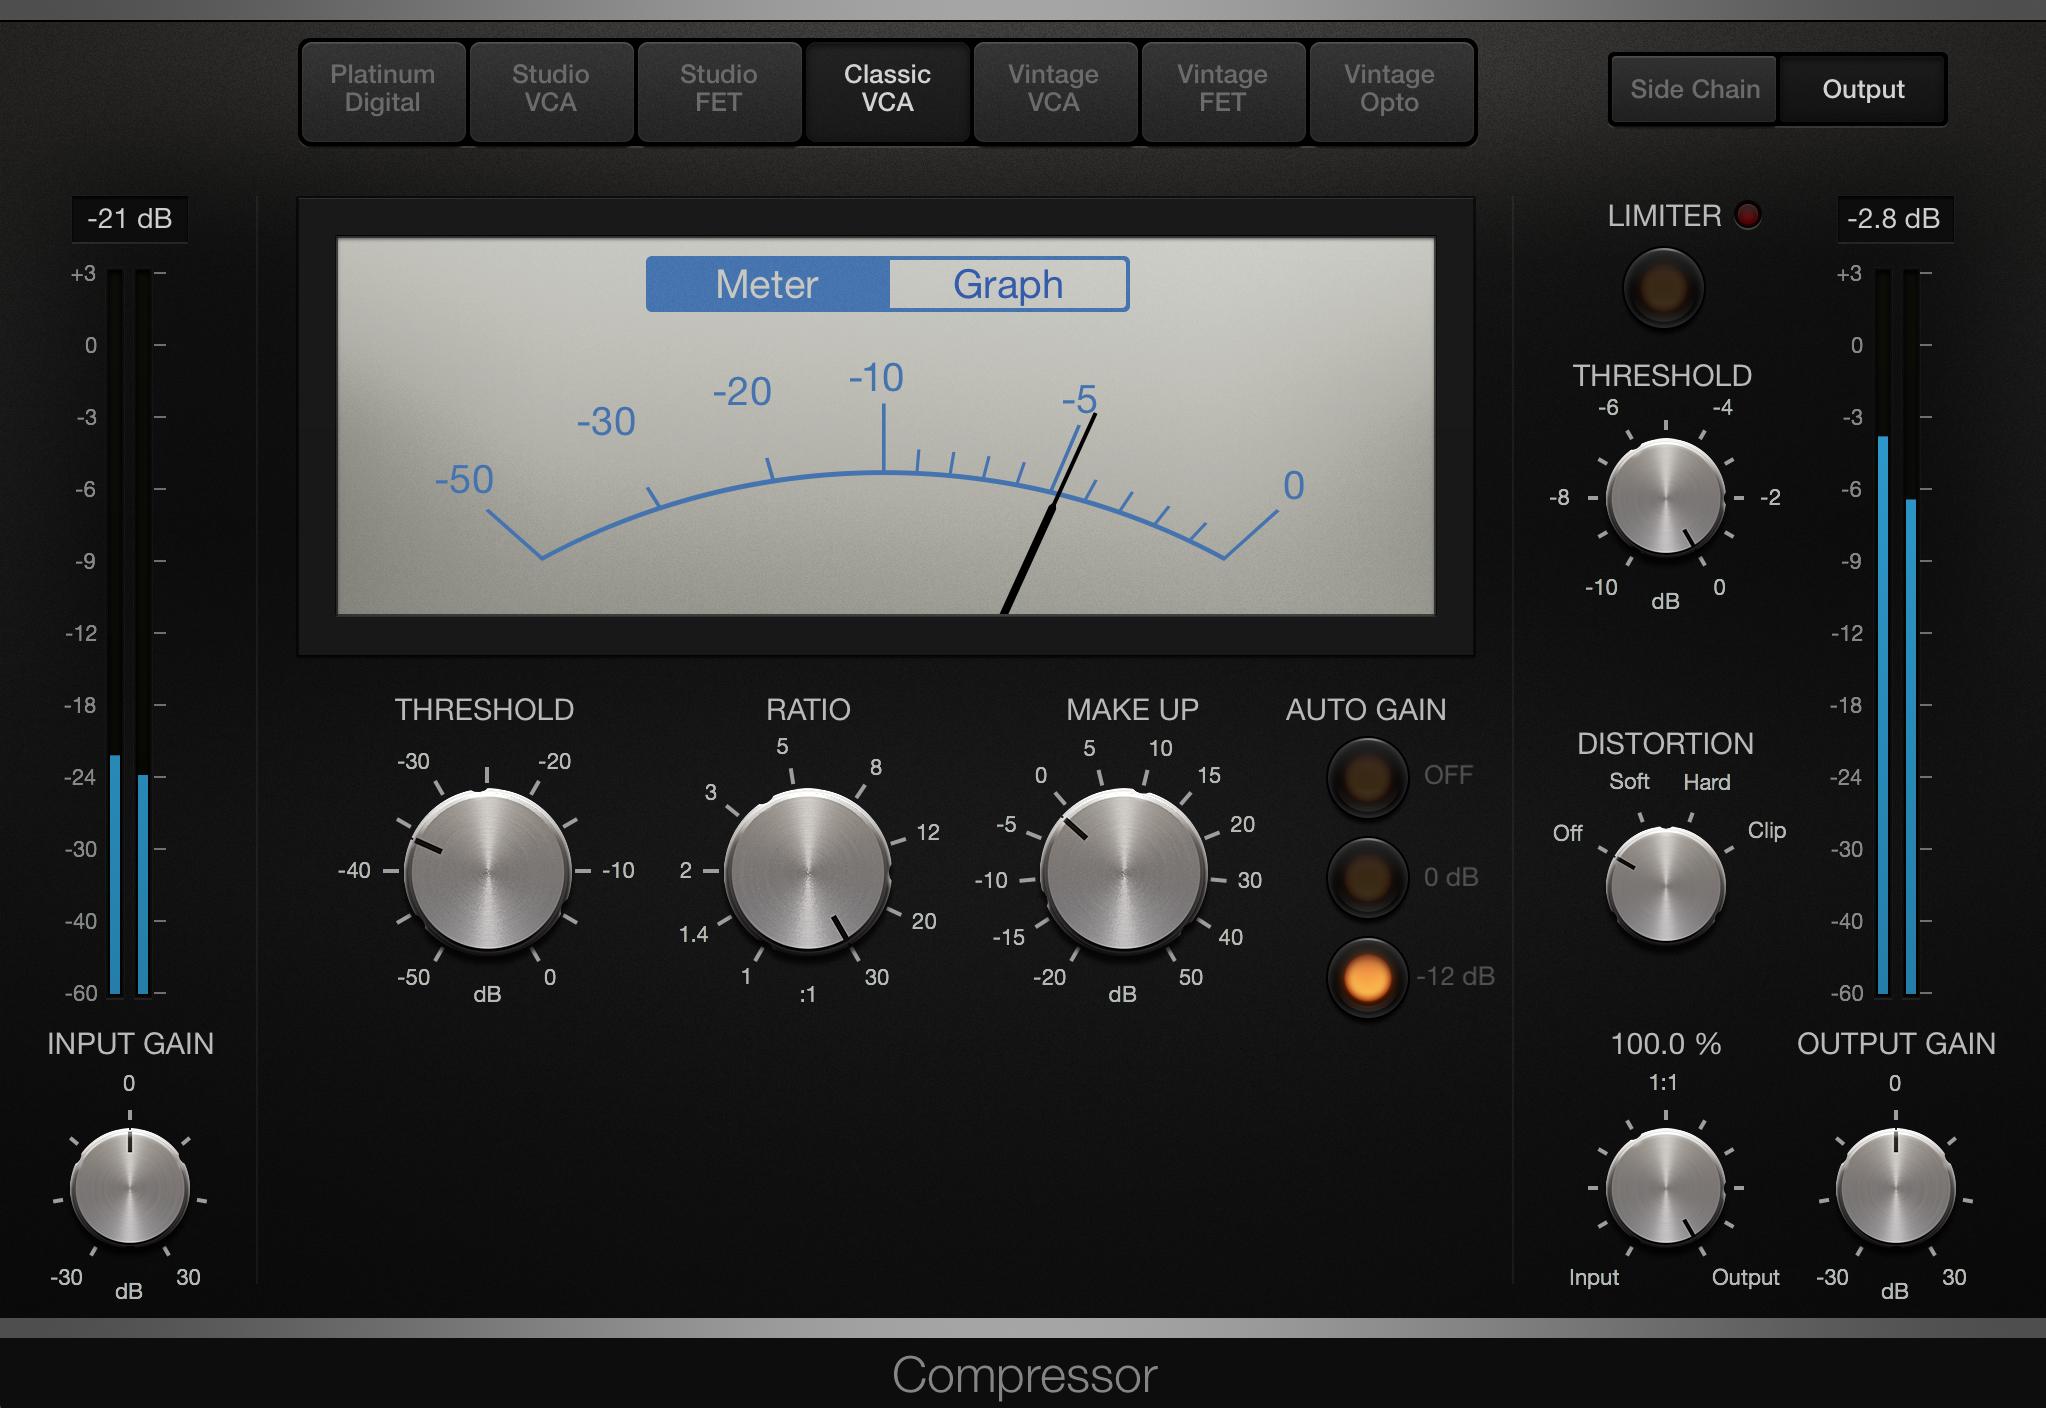
I slam the room mic with a high ratio compressor to the point of it clipping the sound, this gives a lot of life to the snare drum and glues the entire sound together.
And of course some EQ to clean up low frequencies and annoying fizz at the top.
Then I make 4 auxiliary tracks - Parallel Compression, a ‘Large Room’, a ‘Snare Hall’ and a ‘Drum Hall’.


