Staffaycaster
Contents |
The birth of the Staffaycaster
Clumsy as I am, Im stepping right into our masterbuilder Sensible Jones territory and sending some info on how to fix a bad axe.
Background:
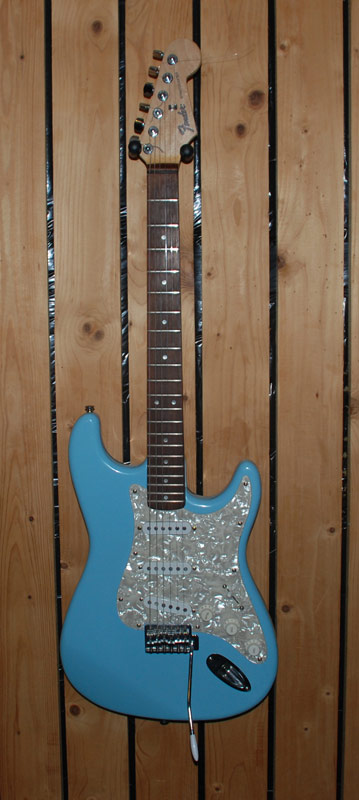
Since Im totally upset over Fender's ridiculous prices on their NOS vintage masterbuilt signature custom guitar's pieces of crap, I will try to prove that You can get the same sound (or nearly) from a total piece'o'junk. Fender did not built quality instruments in the 50's/60's so who say's that they are now? So what I did was to pick up a "no name" guitar for 150€ at my local dealer and started to mess with it. (this is actually a good idea to get a good instrument at a very low price, they use to have "home-built" guitars laying around that they could not sell so easily and therefore is cheap) The headstock on the guitar said "Fender", but even Fender can't glue a name that bad on a headstock, so we had some theories that it could have been a Squire or as I am bound to believe - a kit that someone built.
First steps:
Since the guitar was reasonable good to play, I first changed the strings and checked the intonation and tuning with the existant hardware. This is a pretty easy task, but You shall have new strings attached. First take the string unfretted and then pick the harmonic on the 12'th fret - is it in tune? If not, the bridge needs some adjustments. This is easy on a Fender type instrument, You just need an Hex-key (Allen Key)to move the metal to adjust the length of the string. Anyway, this piece'o'crap seemed to be good in intonation so far so I left it unchanged.
Next, I checked the sound of this dustbuster. It really sounded terrible, it was just the far treble and far bass modes on the 5-way switch that sounded reasonable. The other three modes sounded like someone falling of an airplane in a box, and tries to play even AFTER it has landed.... eg. I was horrified! I draw the conclusion that someone must have been connecting the microphones to the switch in a wrong way, which also was the case when I opened up the guitar.
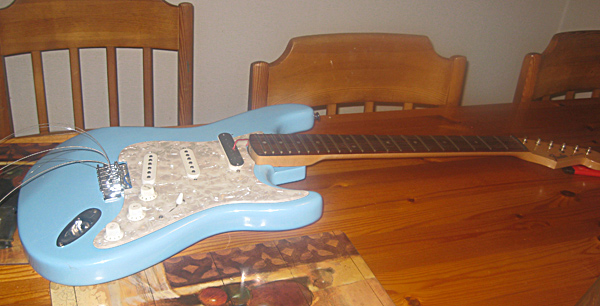
The guitar on the operation table - eg. the kitchen table.
First I took all the parts apart. It's easy on a Fender guitar, since You just need a screwdriver and some violence. (Why bother to glue something together when there is plenty of poor workers that is eager to do the screwing?) Nothing was of a surprise here, no names or stamps and the soldering was really an amateur job. Also, the mics and pots wasn't even in chinese style, rather Russian late 40's. (with excuses to the russians and chinese people out there) So I decided to mount some of the pickups from my Mexican strat instead, which are really good ones. Since one of them was broken I also bought an used one from my local dealer for 20€. (they use to have parts laying all around as well) Next thing I realized was that the machine heads was also a totally disaster, and I searched the Internet to find some used without succeeding. (I may have succeeded, if I waited for some time, though) Instead I bought some Schaller lockable tuners, which is on par with Sperzel tuners - but a lot cheaper.
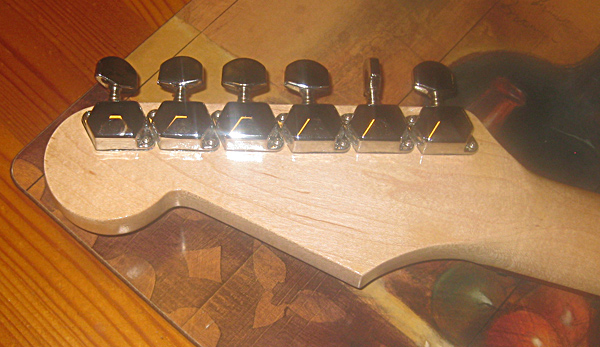
Old tuners
Due to my lack of reading skills, I ordered the wrong tuners of course - the one's I finally got was with a bigger radius than the old ones.... but at least they were heading in the right direction. smile.gif (don't do these mistakes)
It was easy to fix with some swearing and a machine drill though, I made the holes in the headstock bigger and then mounted them in place.
Isolation/Shielding.
In order to get rid of some hum and noise from the guitar I isolated the whole pickguard and the inside of the guitar with plain aluminium foil, the same as You use for the oven. Copper foil may be a better choice, but since I'm not that picker-nickety I used what I have.... I just glued in place and let it dry.
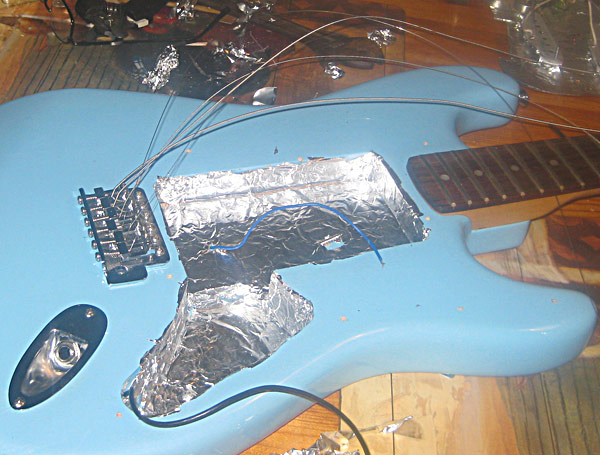
Isolation/Shielding inside.
Soldering.
To solder a Fender pickguard is not a hard task since You can unmount the whole pickguard - do the soldering - and then just connect the hot cable and the ground from the body. What is really important here is to use a soldering iron that is strong enough, (eg. in terms of watt, at least 100 w is recommended) otherwise it will be hard to warm the backplates of the pots, where some cables should be soldered. The soldering will be easier if the cables are "pre-soldered" before the actual soldering, which means that You just melt some iron on the tips of the cables. The wiring itself can be made with some tricks, but I decided to go for the standard strat-wiring instead of reversing the phase of some mics etc.
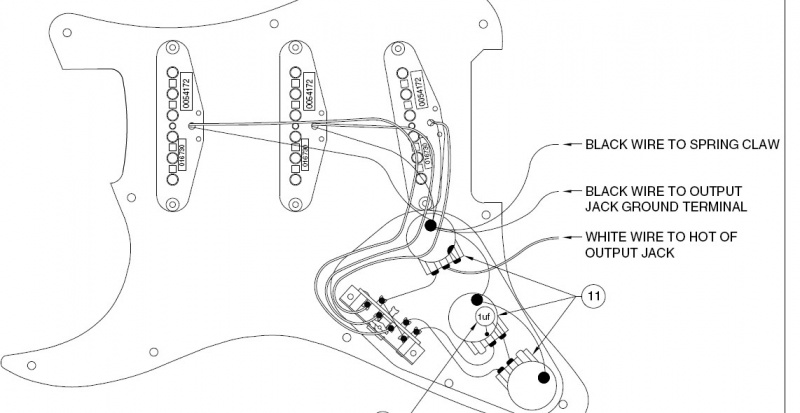
Standard Strat wiring.
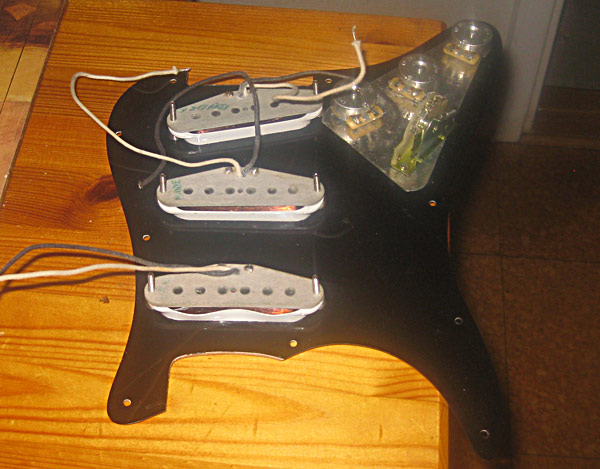
Pickguard with the mics in place before soldering and isolation.
A good idea when the soldering is completed, is to connect the guitar BEFORE you finally screw all the screws on the pickguard back - otherwise You may have to unscrew them again.... To test if the mics/toggle-switch are are working, just take a piece of metal and knock lightly on the poles of the mics when switching the toggle-switch in it's different positions....
My installation so far seems to be good, so I mounted all the parts back. A trick that can be made here is to use glue between the body and the neck at the same time that You screw the neck VERY hard.... This is important since the better contact the body & neck have = the better sustain will the axe have. I decided not to glue it, since I will probably unmount it again in the near future.
After assembling the guitar again, I checked the mics one more time before putting the strings on. Since Im using pretty heavy strings, the trm had to be set up again. There are really two approaches You can go for here: Either You have the trem "hanging" freely in the air, which will allow You to raise the pitch as well, but You will most likely have more problems with the tuning - or You can adjust it so that the trem is "locked" to the body in it's initial position. This goes for for the Fender 5-screw trems, other units can might as well stay in tune even that they are "hanging" in the air.... Anyway, I like my guitars in tune so I used 3 springs, one in the middle, and the other 2 in the outer position on the trem routed back to the holder in the three middle positions. This is a very common setting that makes the trem fairly easy to press without being too sensitive. There was no need to adjust the saddles after this - which is made by a small Hex-key (Allen Key) to adjust the height of each string. If necessary this should be made according to the necks radius, which You can see if You look at the neck from the bridge point of view. Then I trimmed the screws that goes into the body while at the same time bringing the guitar in tune - this step must be made several times to find the ultimate position of the trem-holder in the body.
Finally I connected the assembled guitar to my fender amp and TWANG !!!! It sounds like a Fender, it plays like a Fender and it even looks as a Fender - for about 250$ !!! (oki,oki maybe not of the best ones though......)
//Staffay
